Street Address
City, State, Zip
Phone Number
Your Custom Text Here

Your Custom Text Here
At Amazon Robotics, I am a Hardware Development Engineer II (Level 5). I am responsible for the Robot-on-Pallet (ROP) assembly within the Sparrow Piece-Picking program.
As a level 5 HDE, I have total ownership over this assembly, and lead the design and strategy moving forward from late Alpha phase, through Beta 1, 2, and 3, and currently pursuing a general availability release in September of 2025.
My engineers and I have solidified the ROP design to a production-ready state. Currently, 115 units exist in a fielded environment, spread across Houston and Shreveport active fulfillment centers. By EOY 2026, this number will increase to 600-1000 units, and continue at 1000+ units per year until EOY 2029.
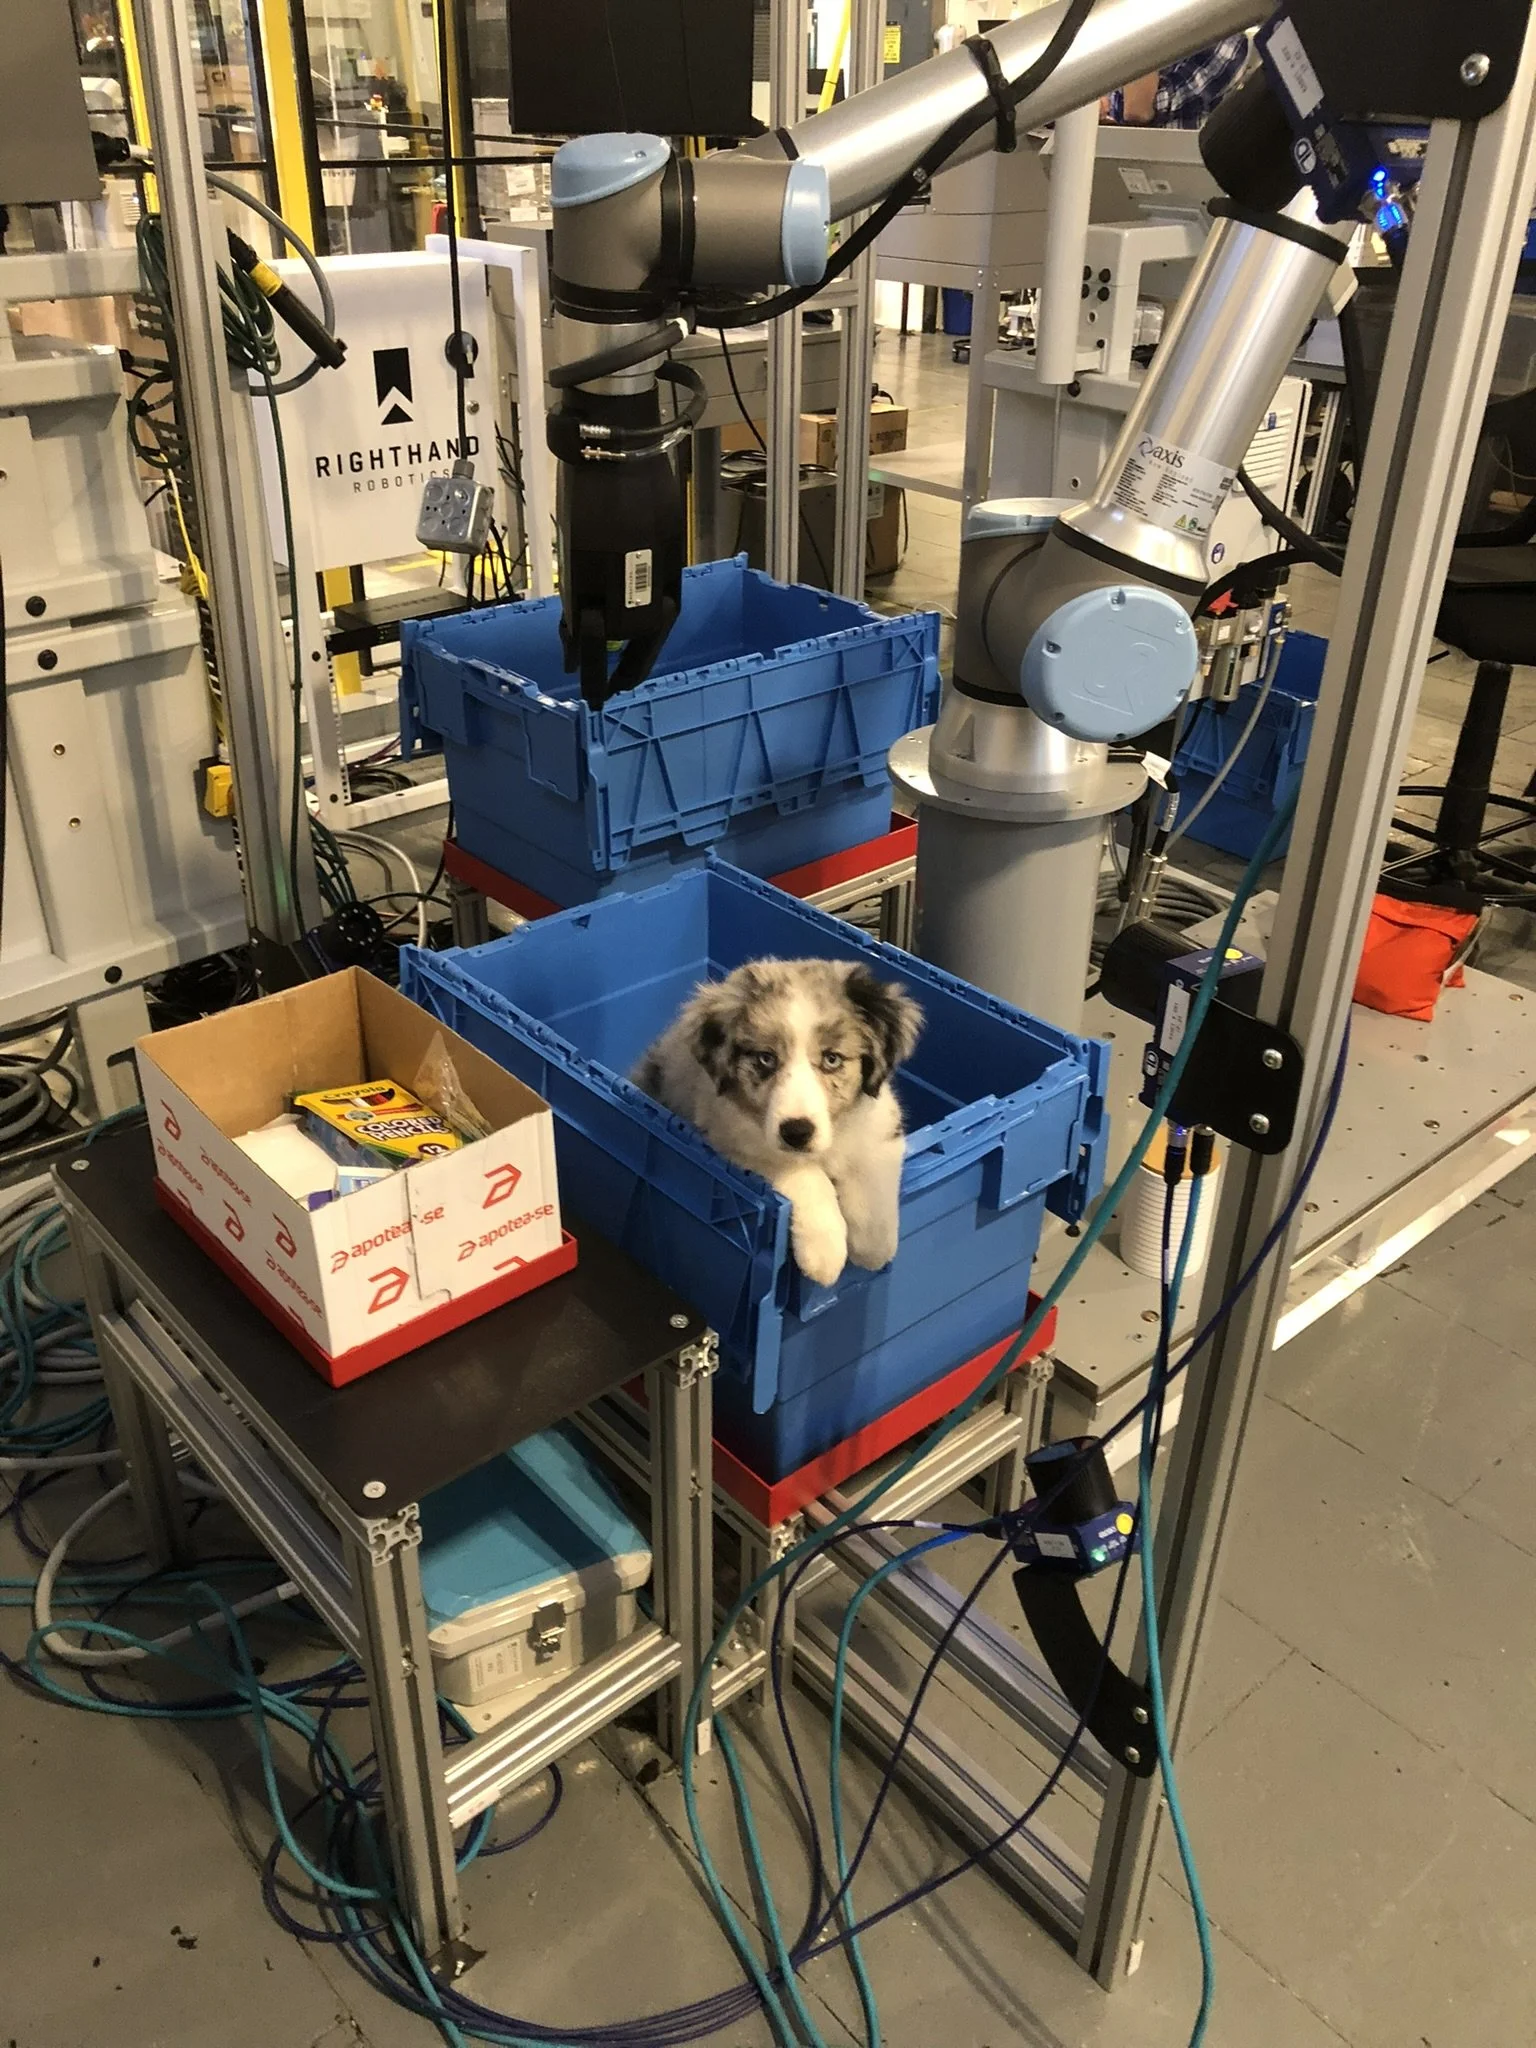
At RightHand Robotics, I am a mechanical integration engineer. Our piece-picking robot is capable of fulfilling online orders when factories want to automate this historically human-driven application.
Warehouses are designed around humans, and our robot has to fit in to that world. I am responsible for designing all auxiliary equipment that allows the robot to effectively integrate into any warehouse. This work is project-based, and I own the process start to finish. I start with a layout of the factory, design all supporting equipment, create technical drawings, source quotes from vendors, test the build in-house on a “faux cell” and then prepare the parts for shipment.
Creating accurate and detailed assembly drawings using SolidWorks is a critical part of my responsibilities, as we have a world-wide deployment team that goes on-site and installs the equipment I design. I always design with them in mind, creating easy-to-install, durable, and creatively simple designs.
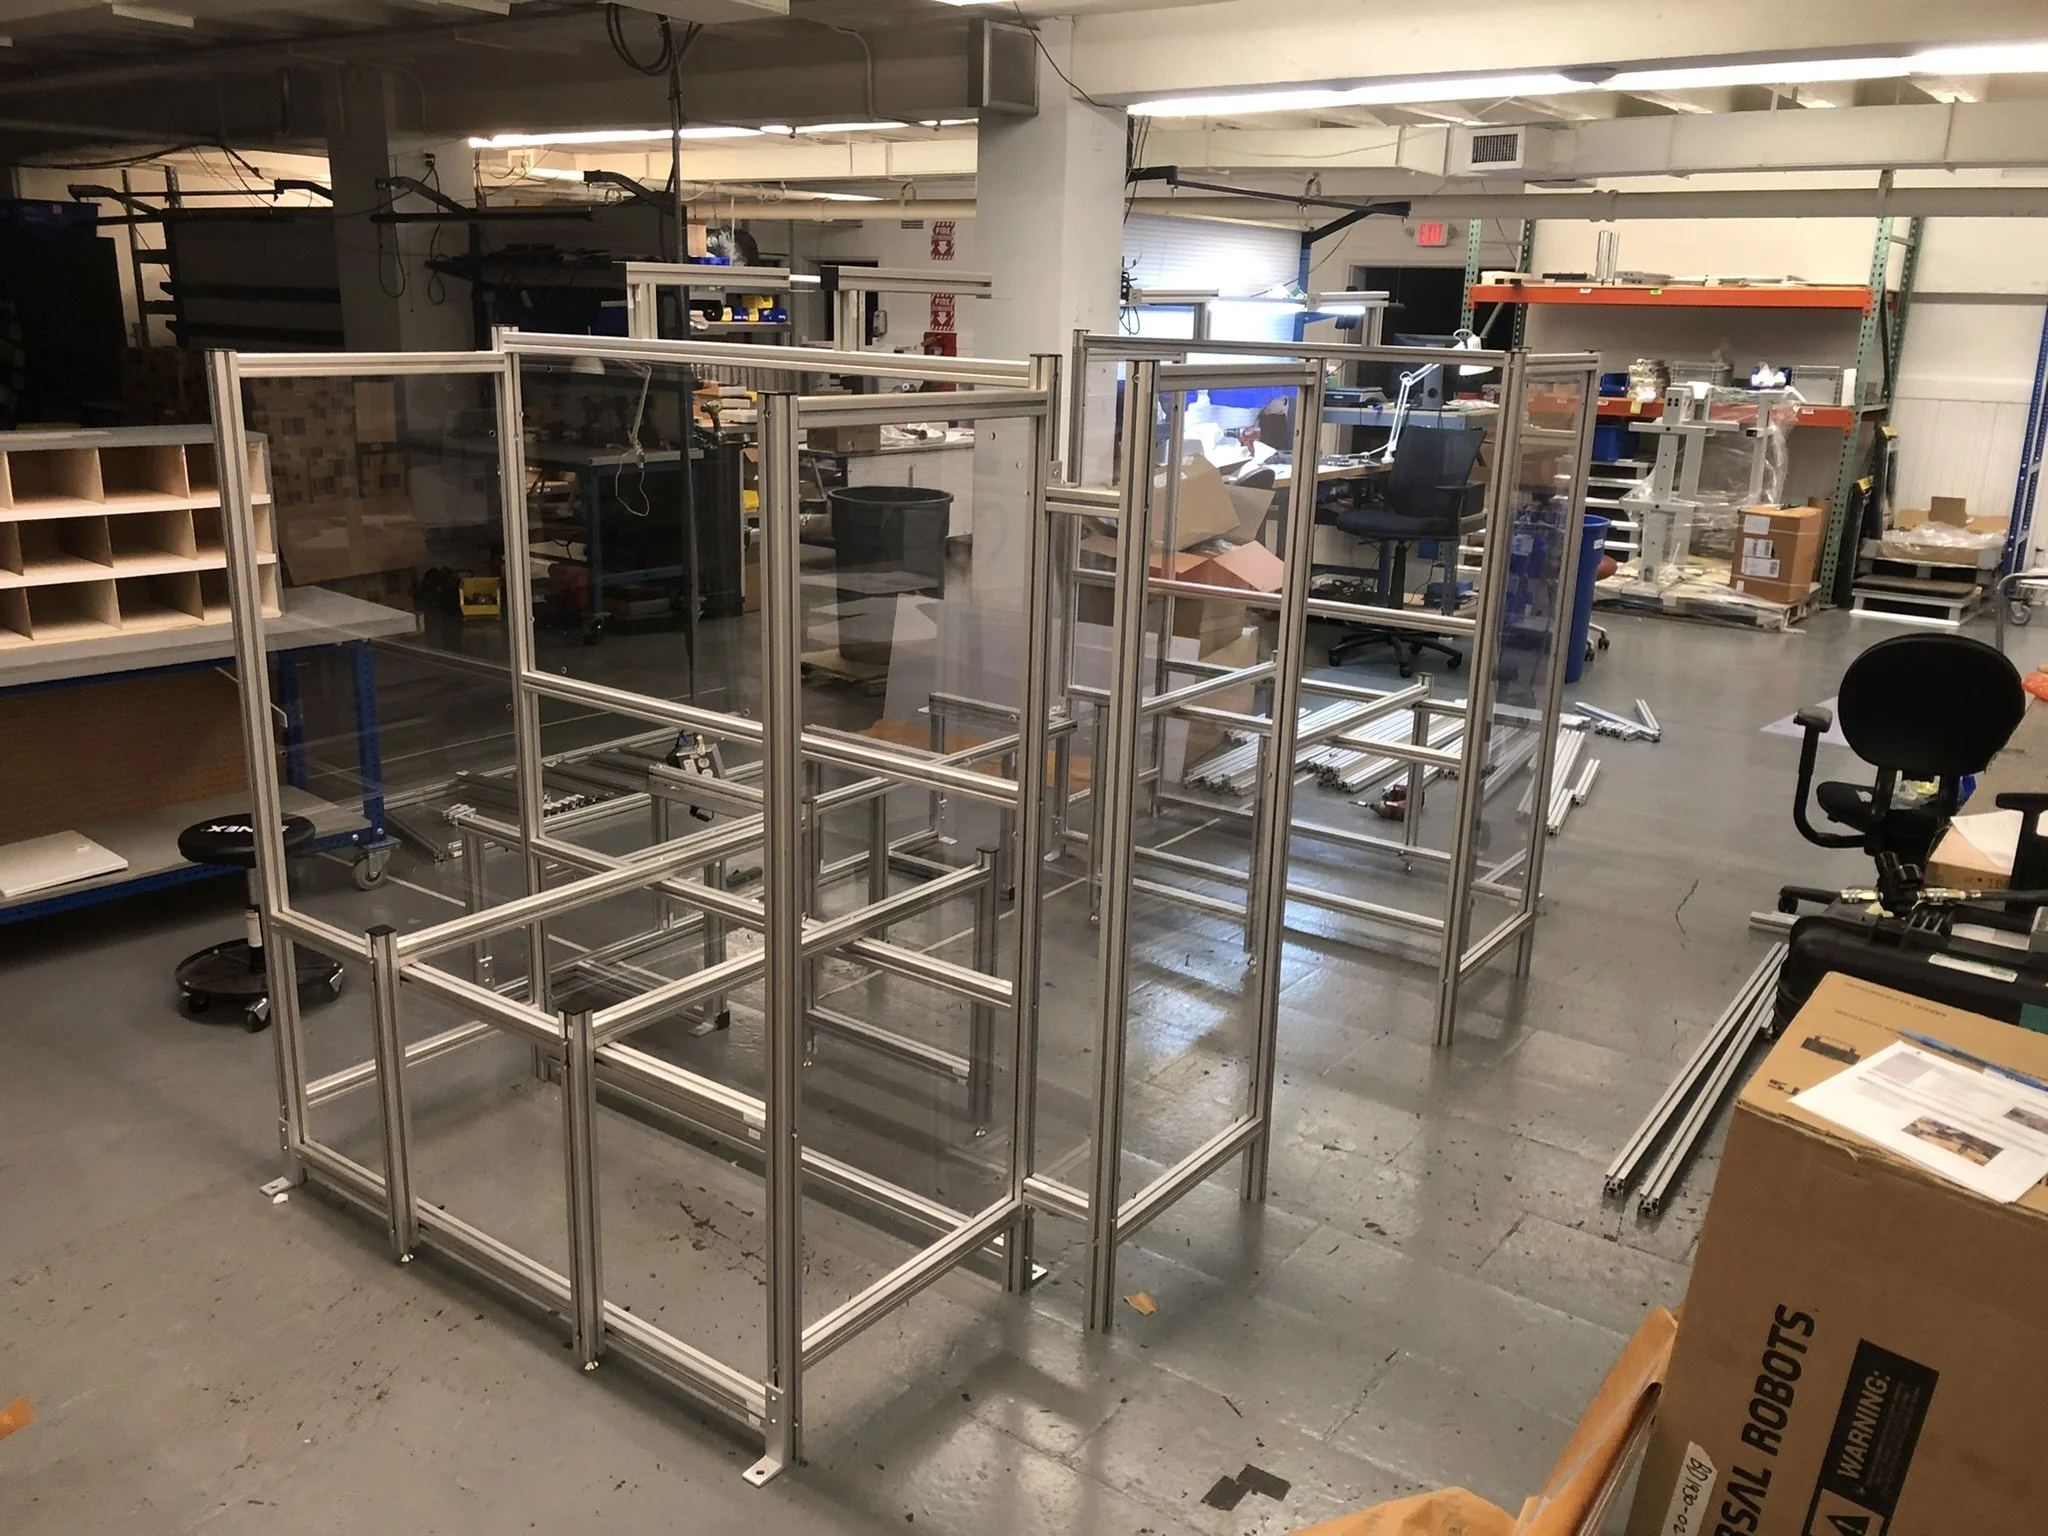
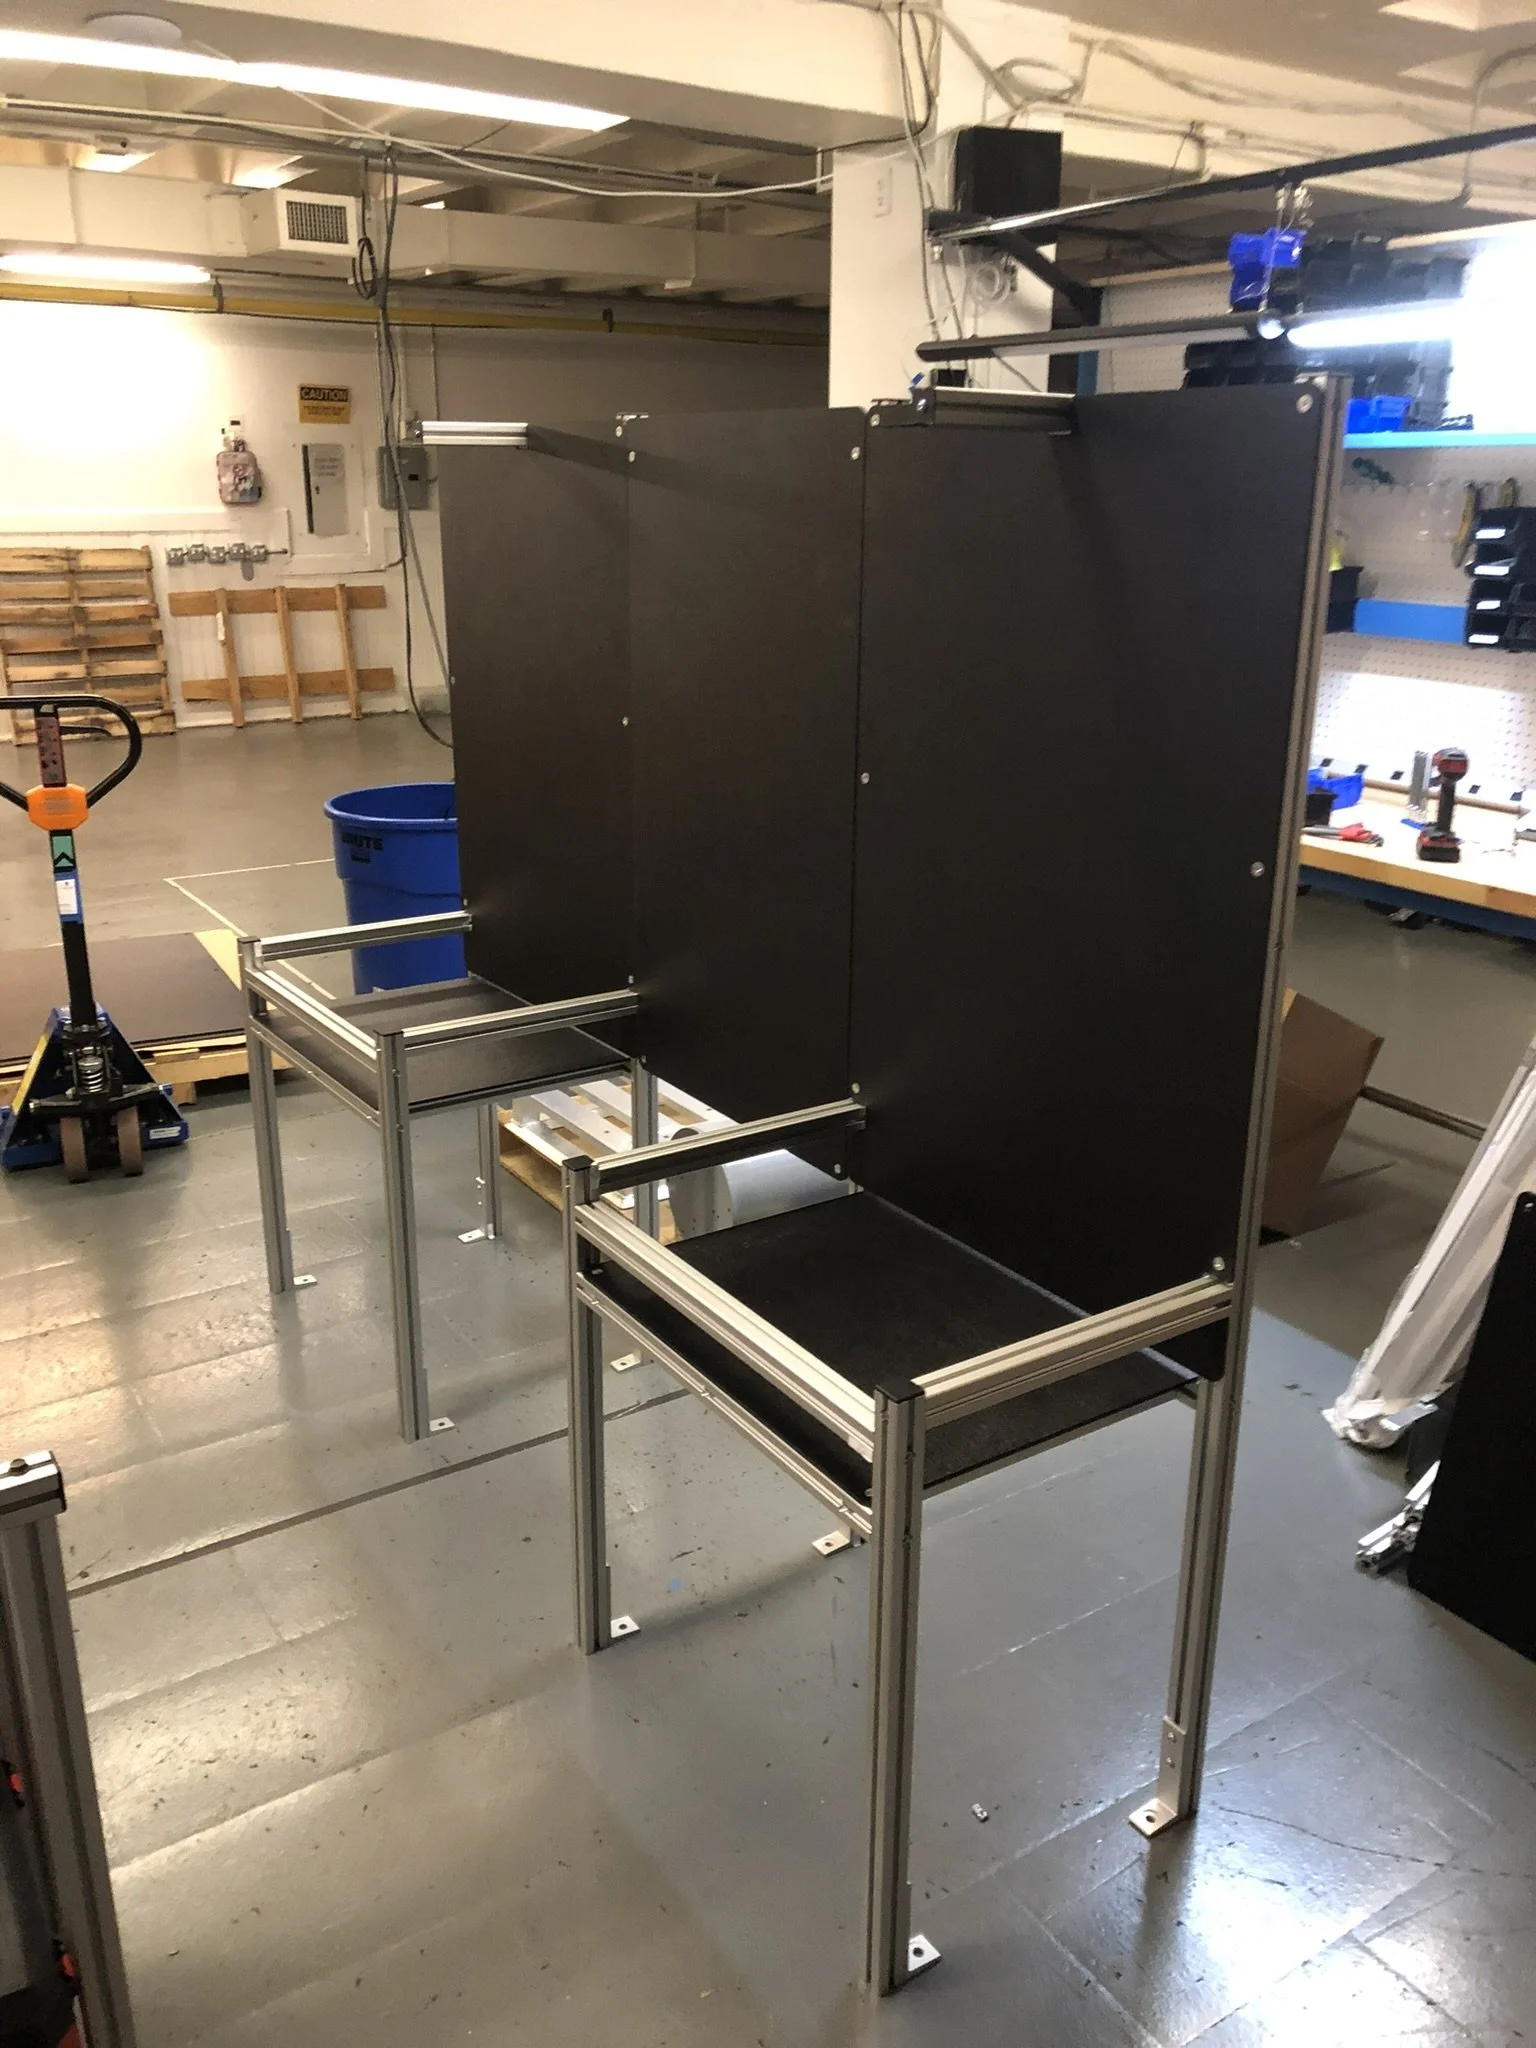
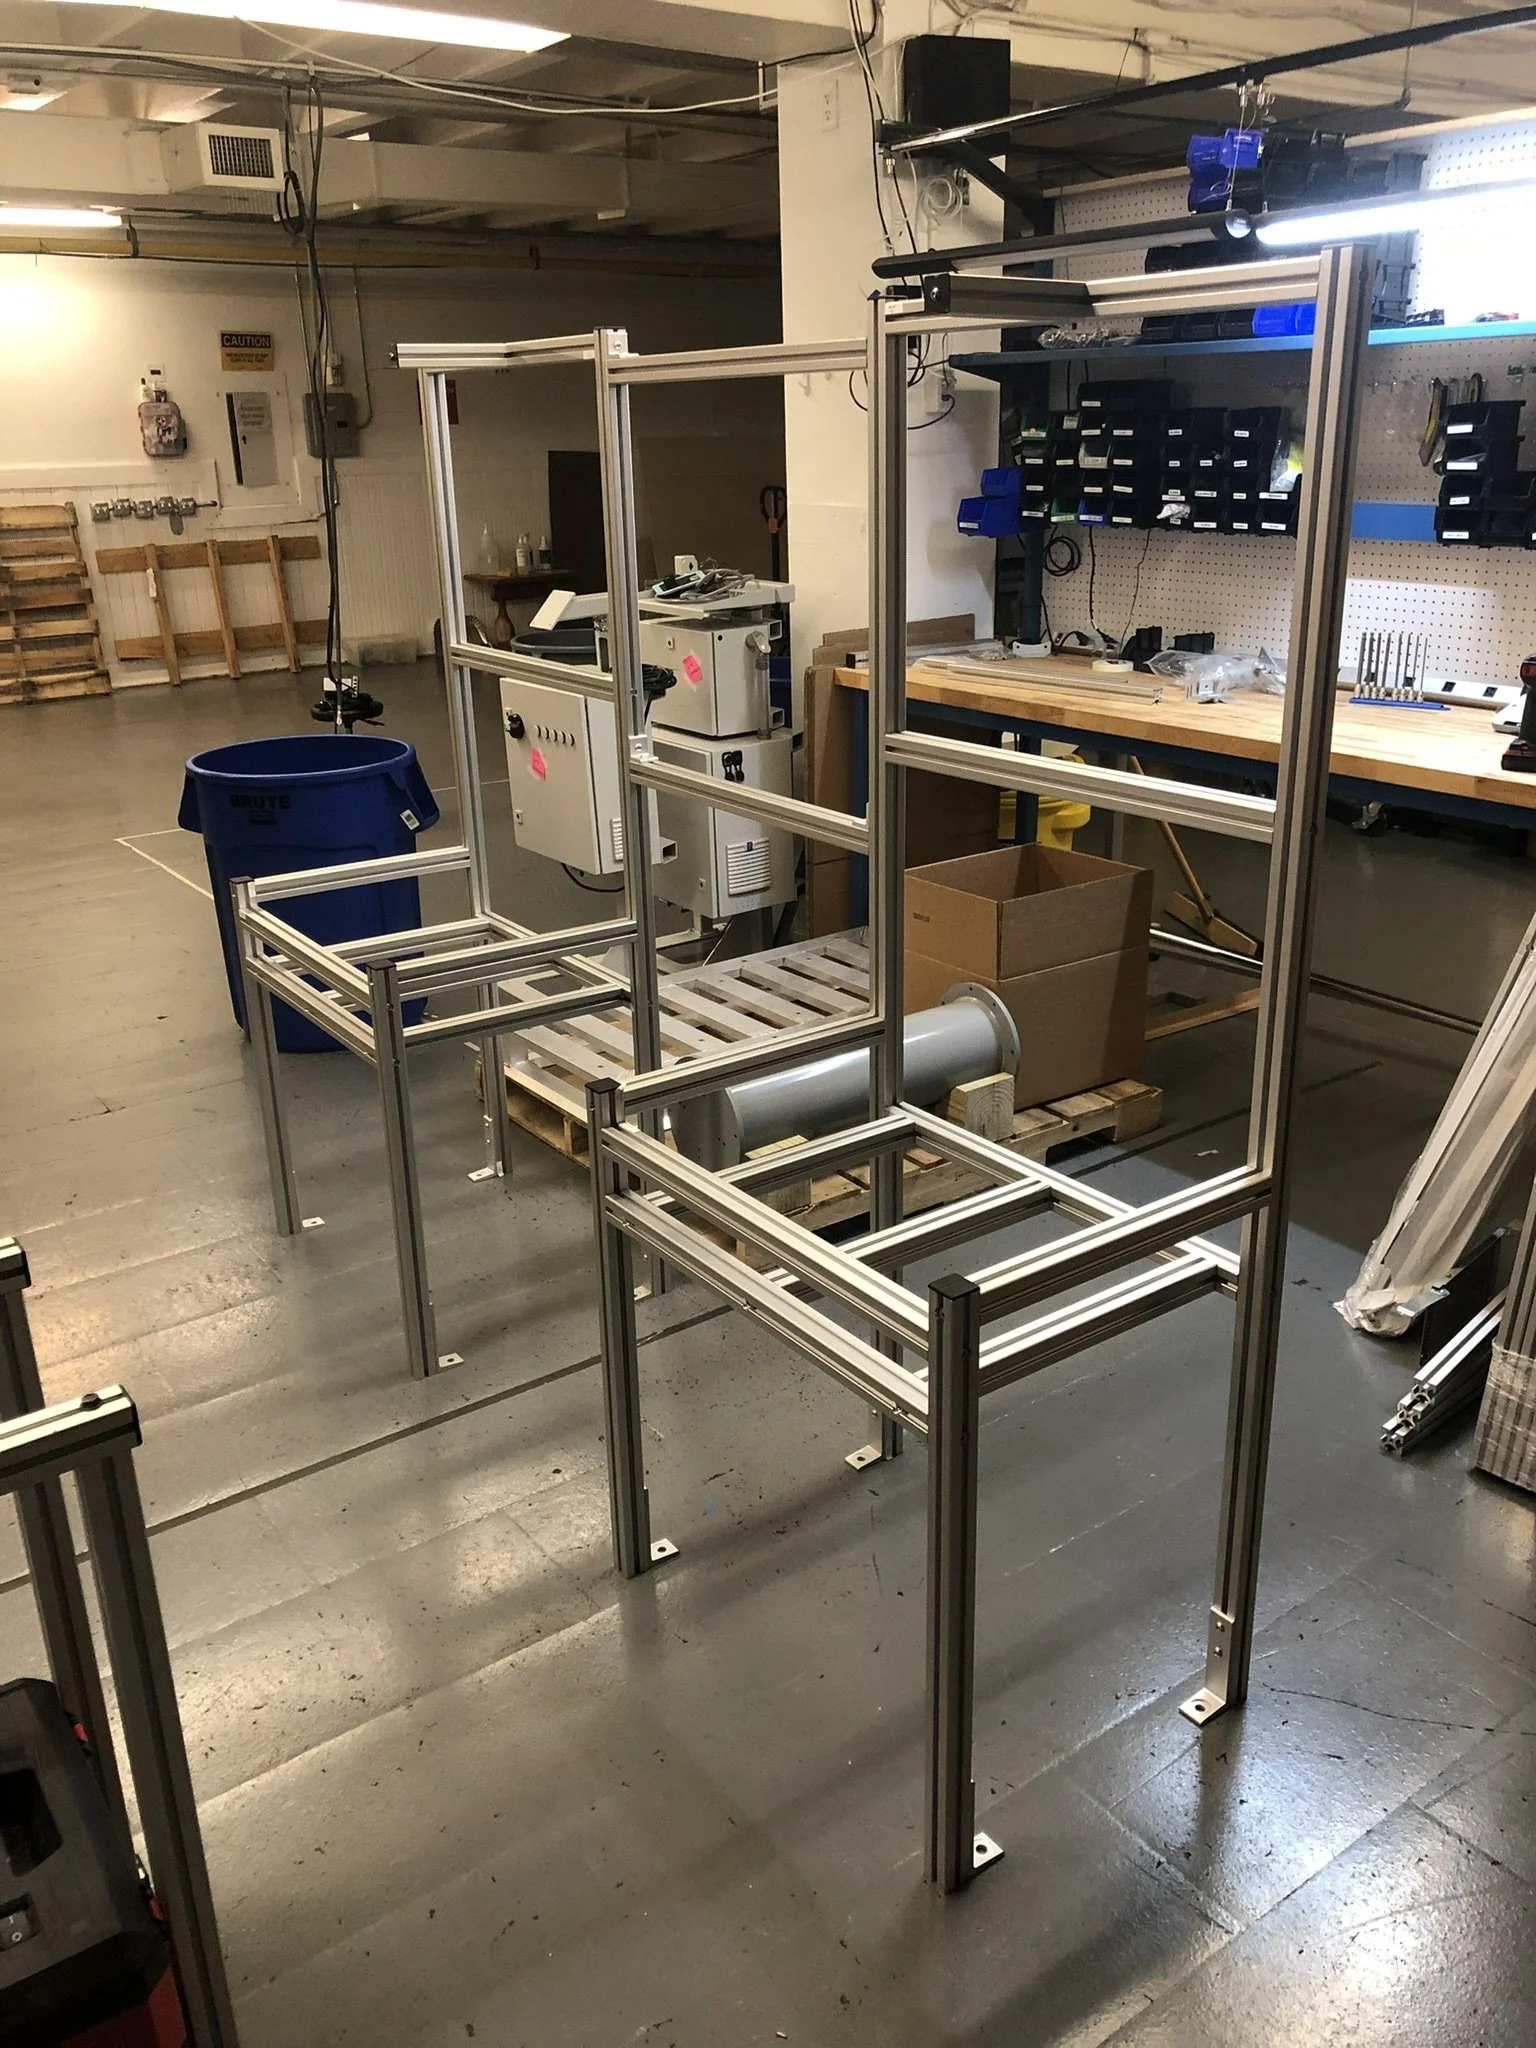
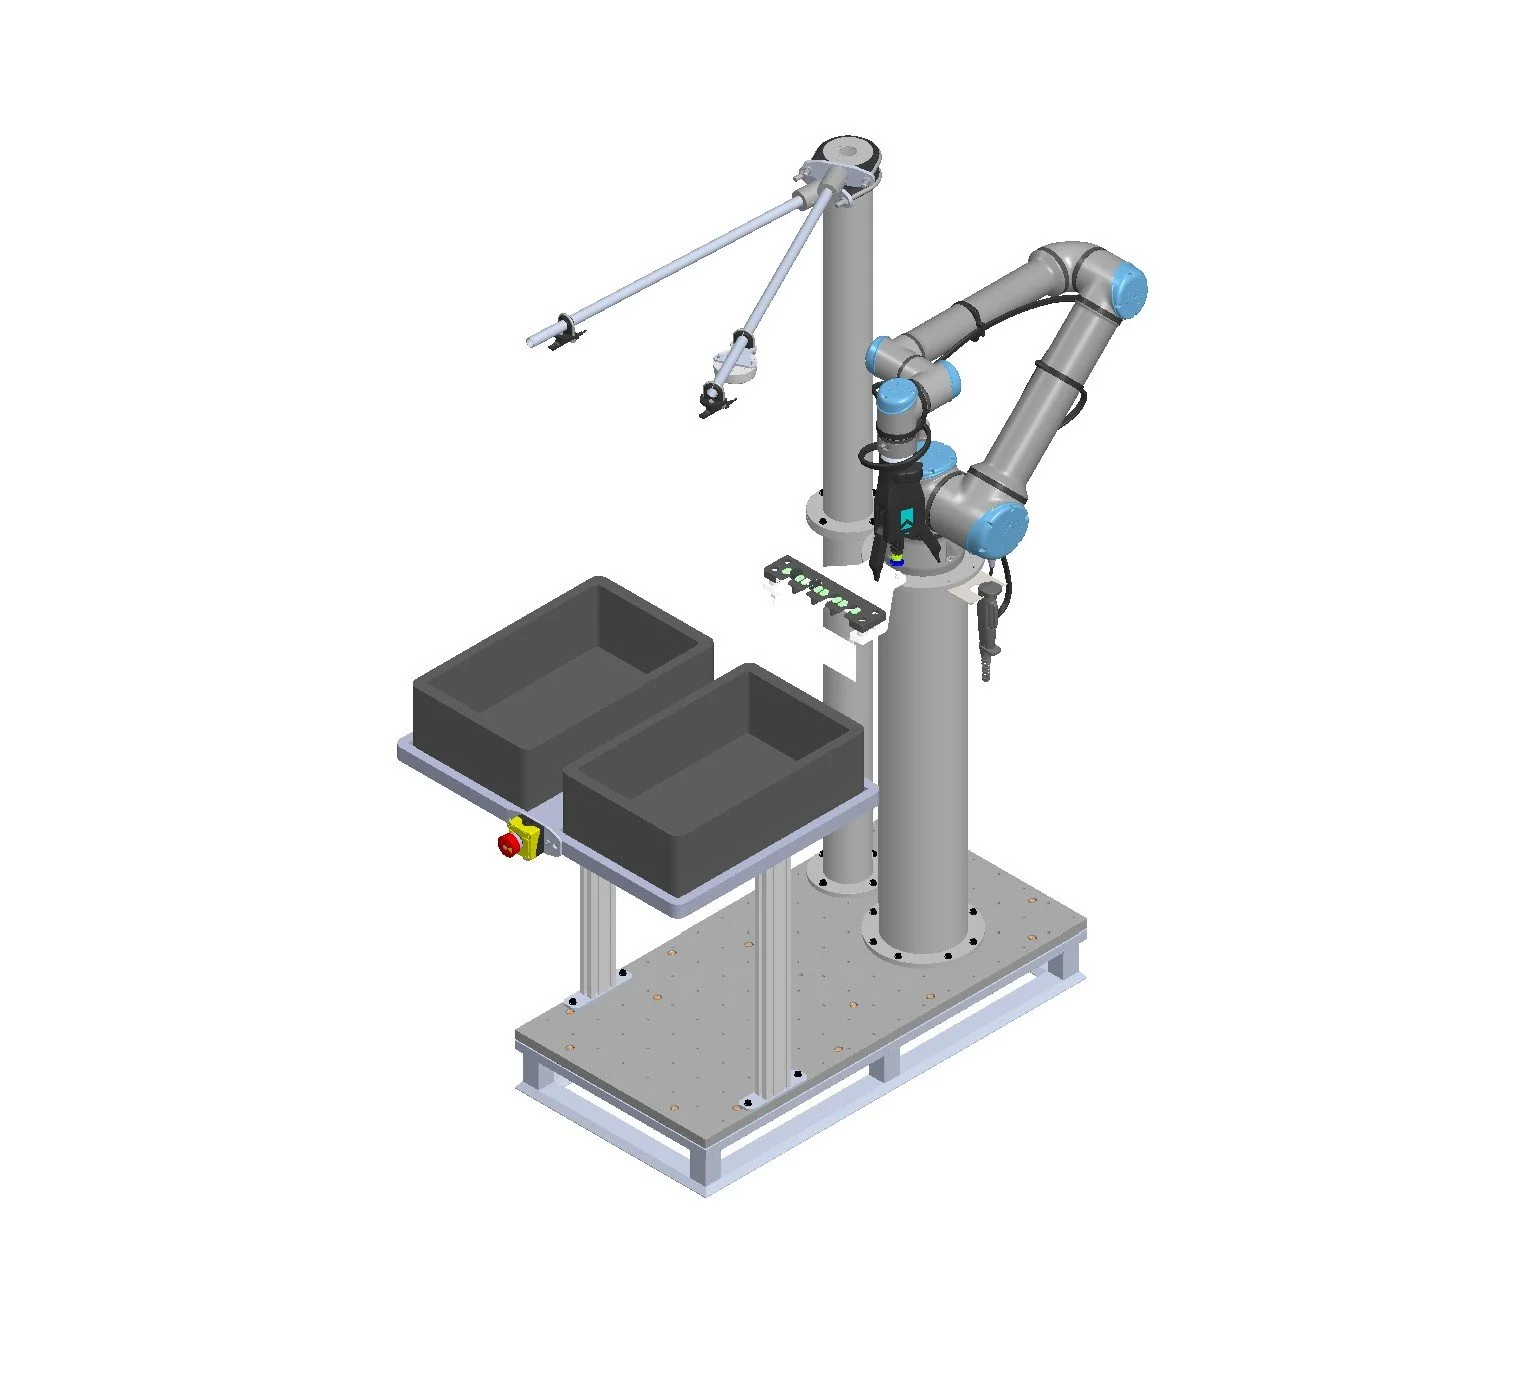
This workcell was for a customer to bridge the gap between humans and AGVs. Humans fill bins atop the gray drawers, then our robot picks and places to bins atop the silver flanges facing the camera. A lot of tricky engineering went into this, prioritizing human safety, usability, and robot speed for a larger design.
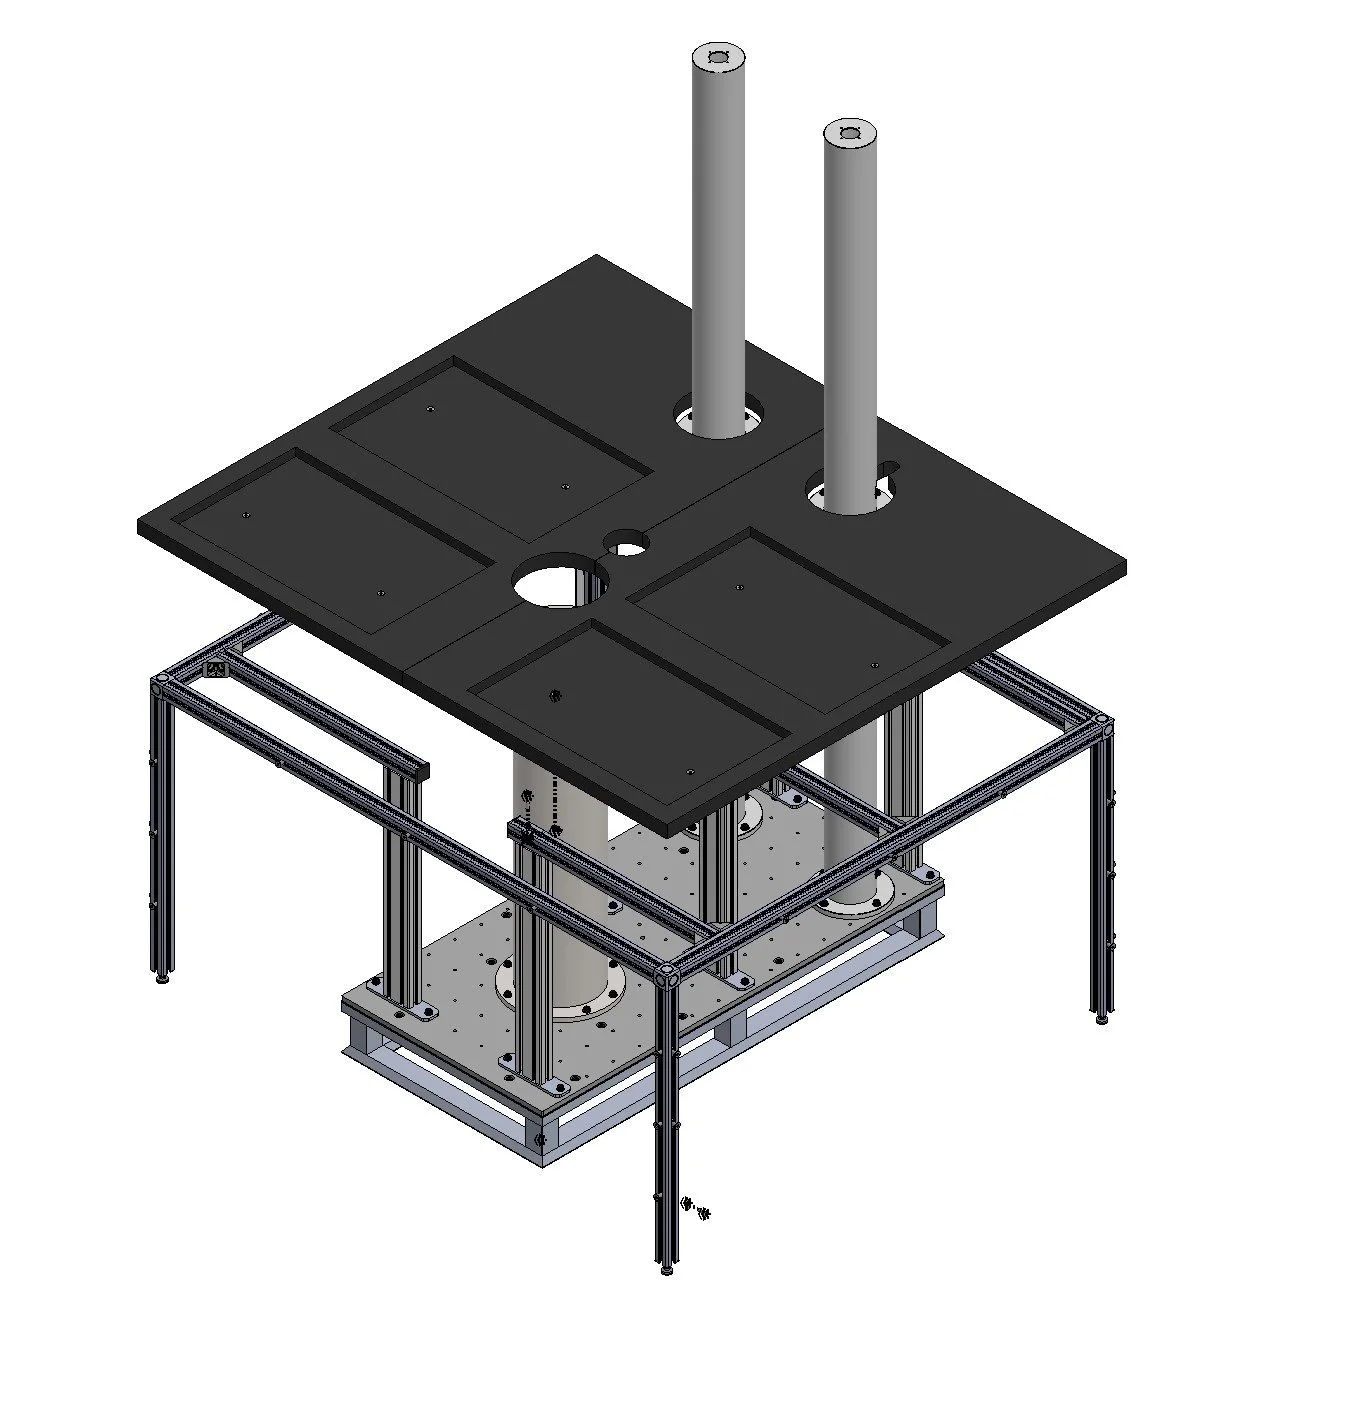
All of our workcells undergo a test fit before they are shipped. Part of my responsibilities at this stage is to assess DFMA and redesign parts as required to make on-site assembly go smoothly.
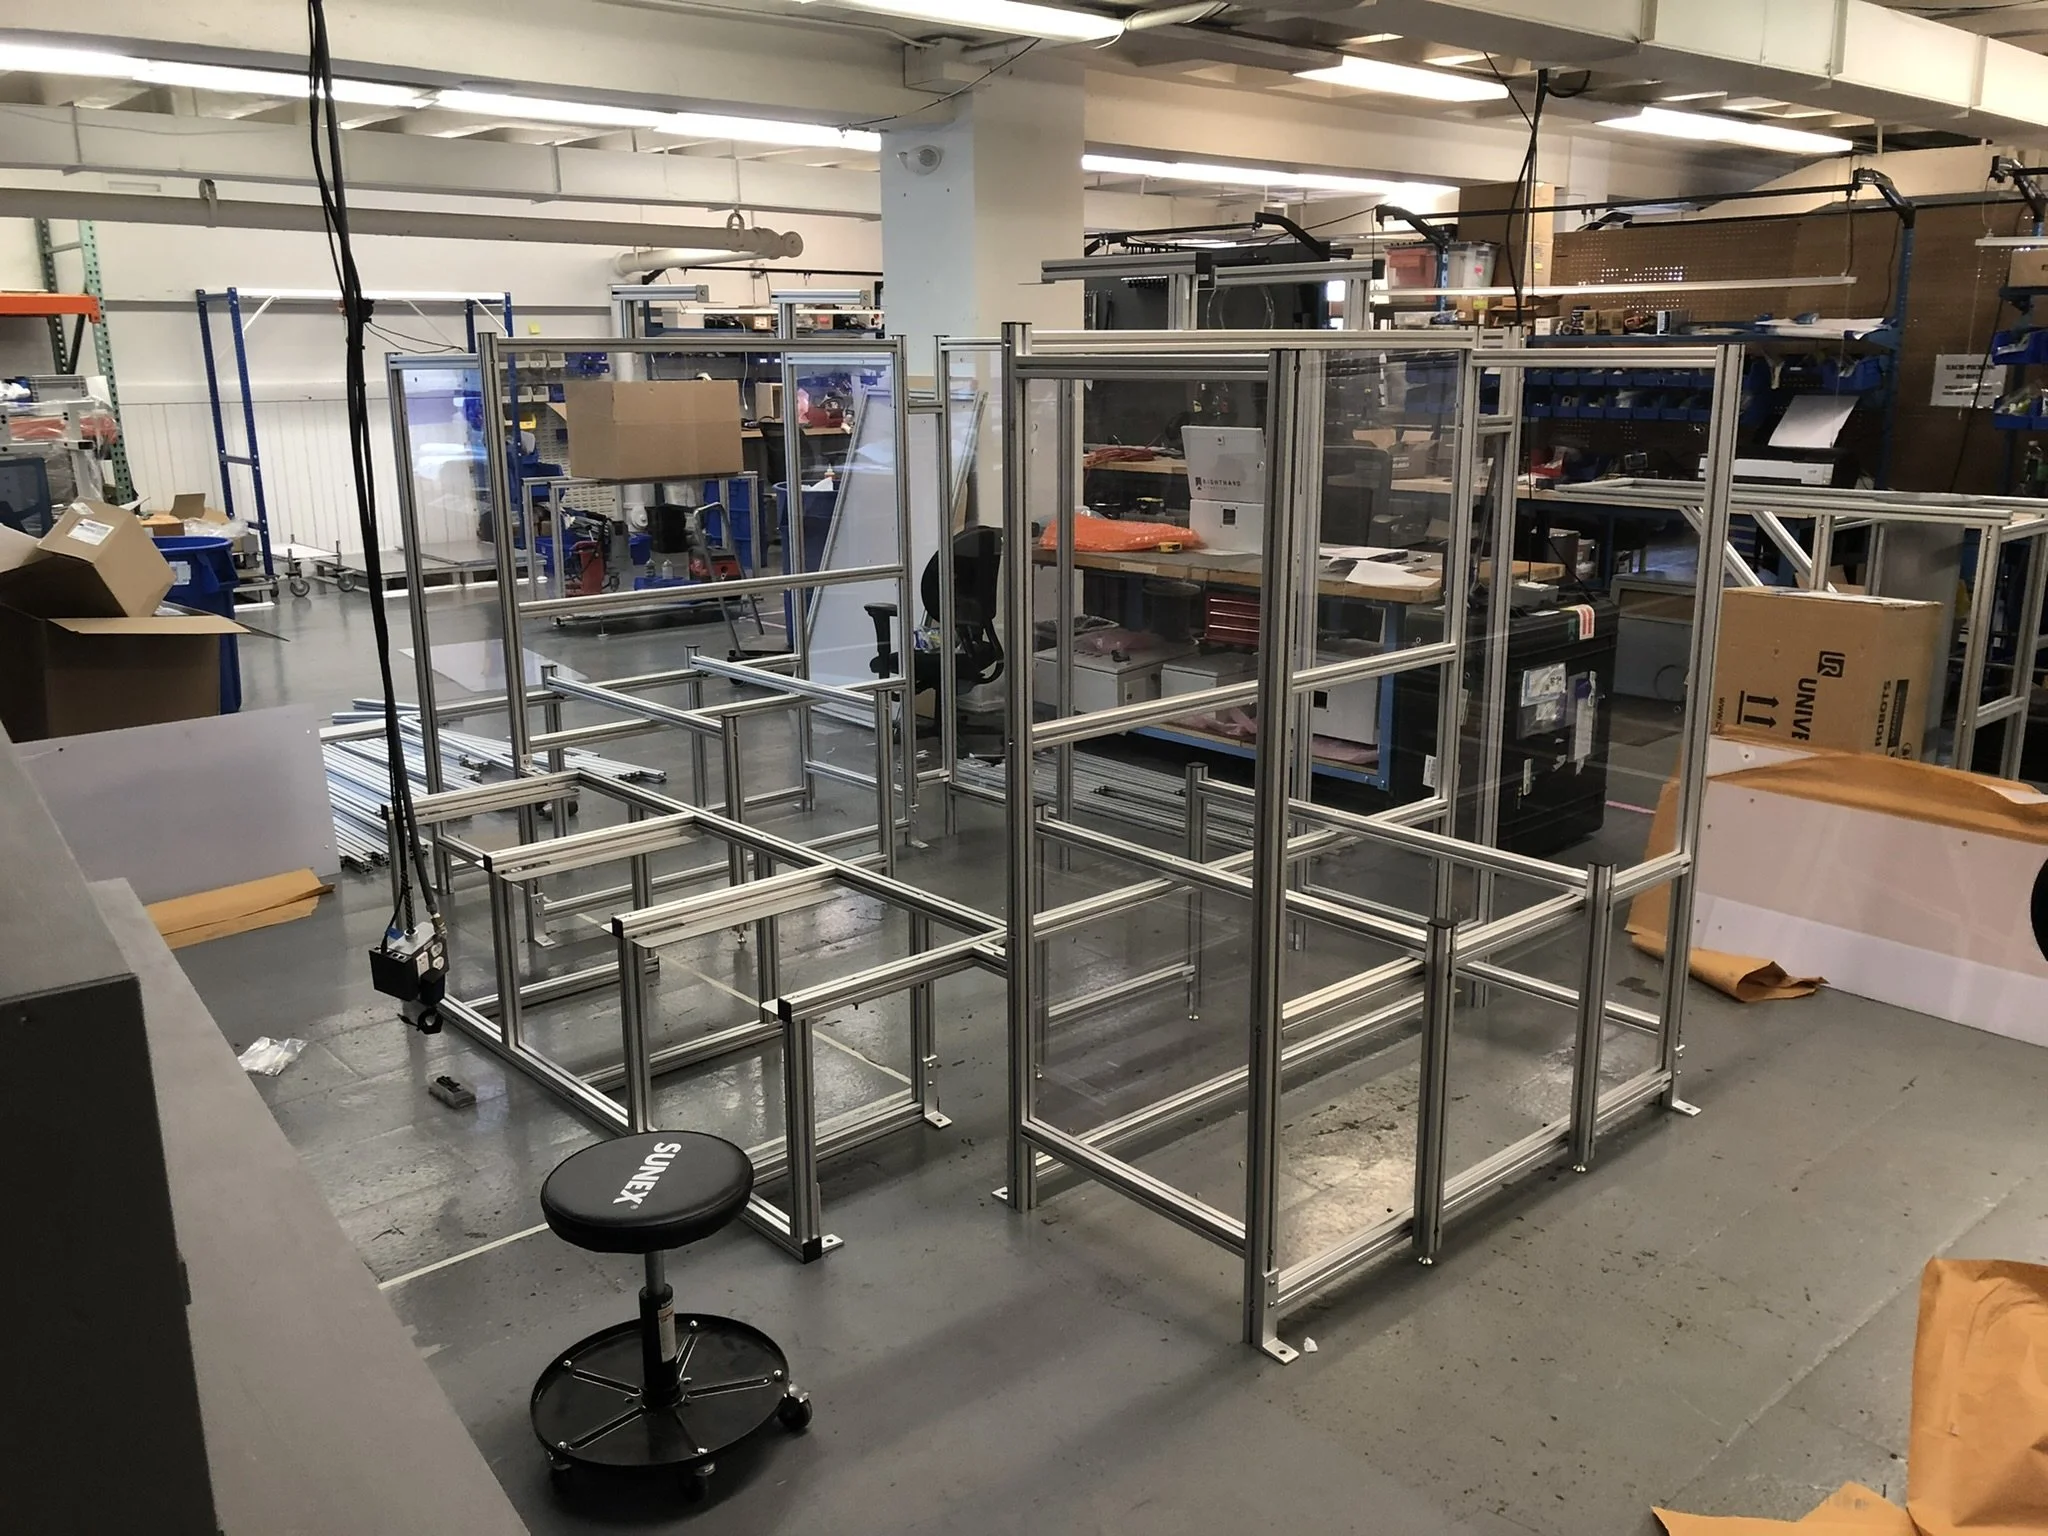
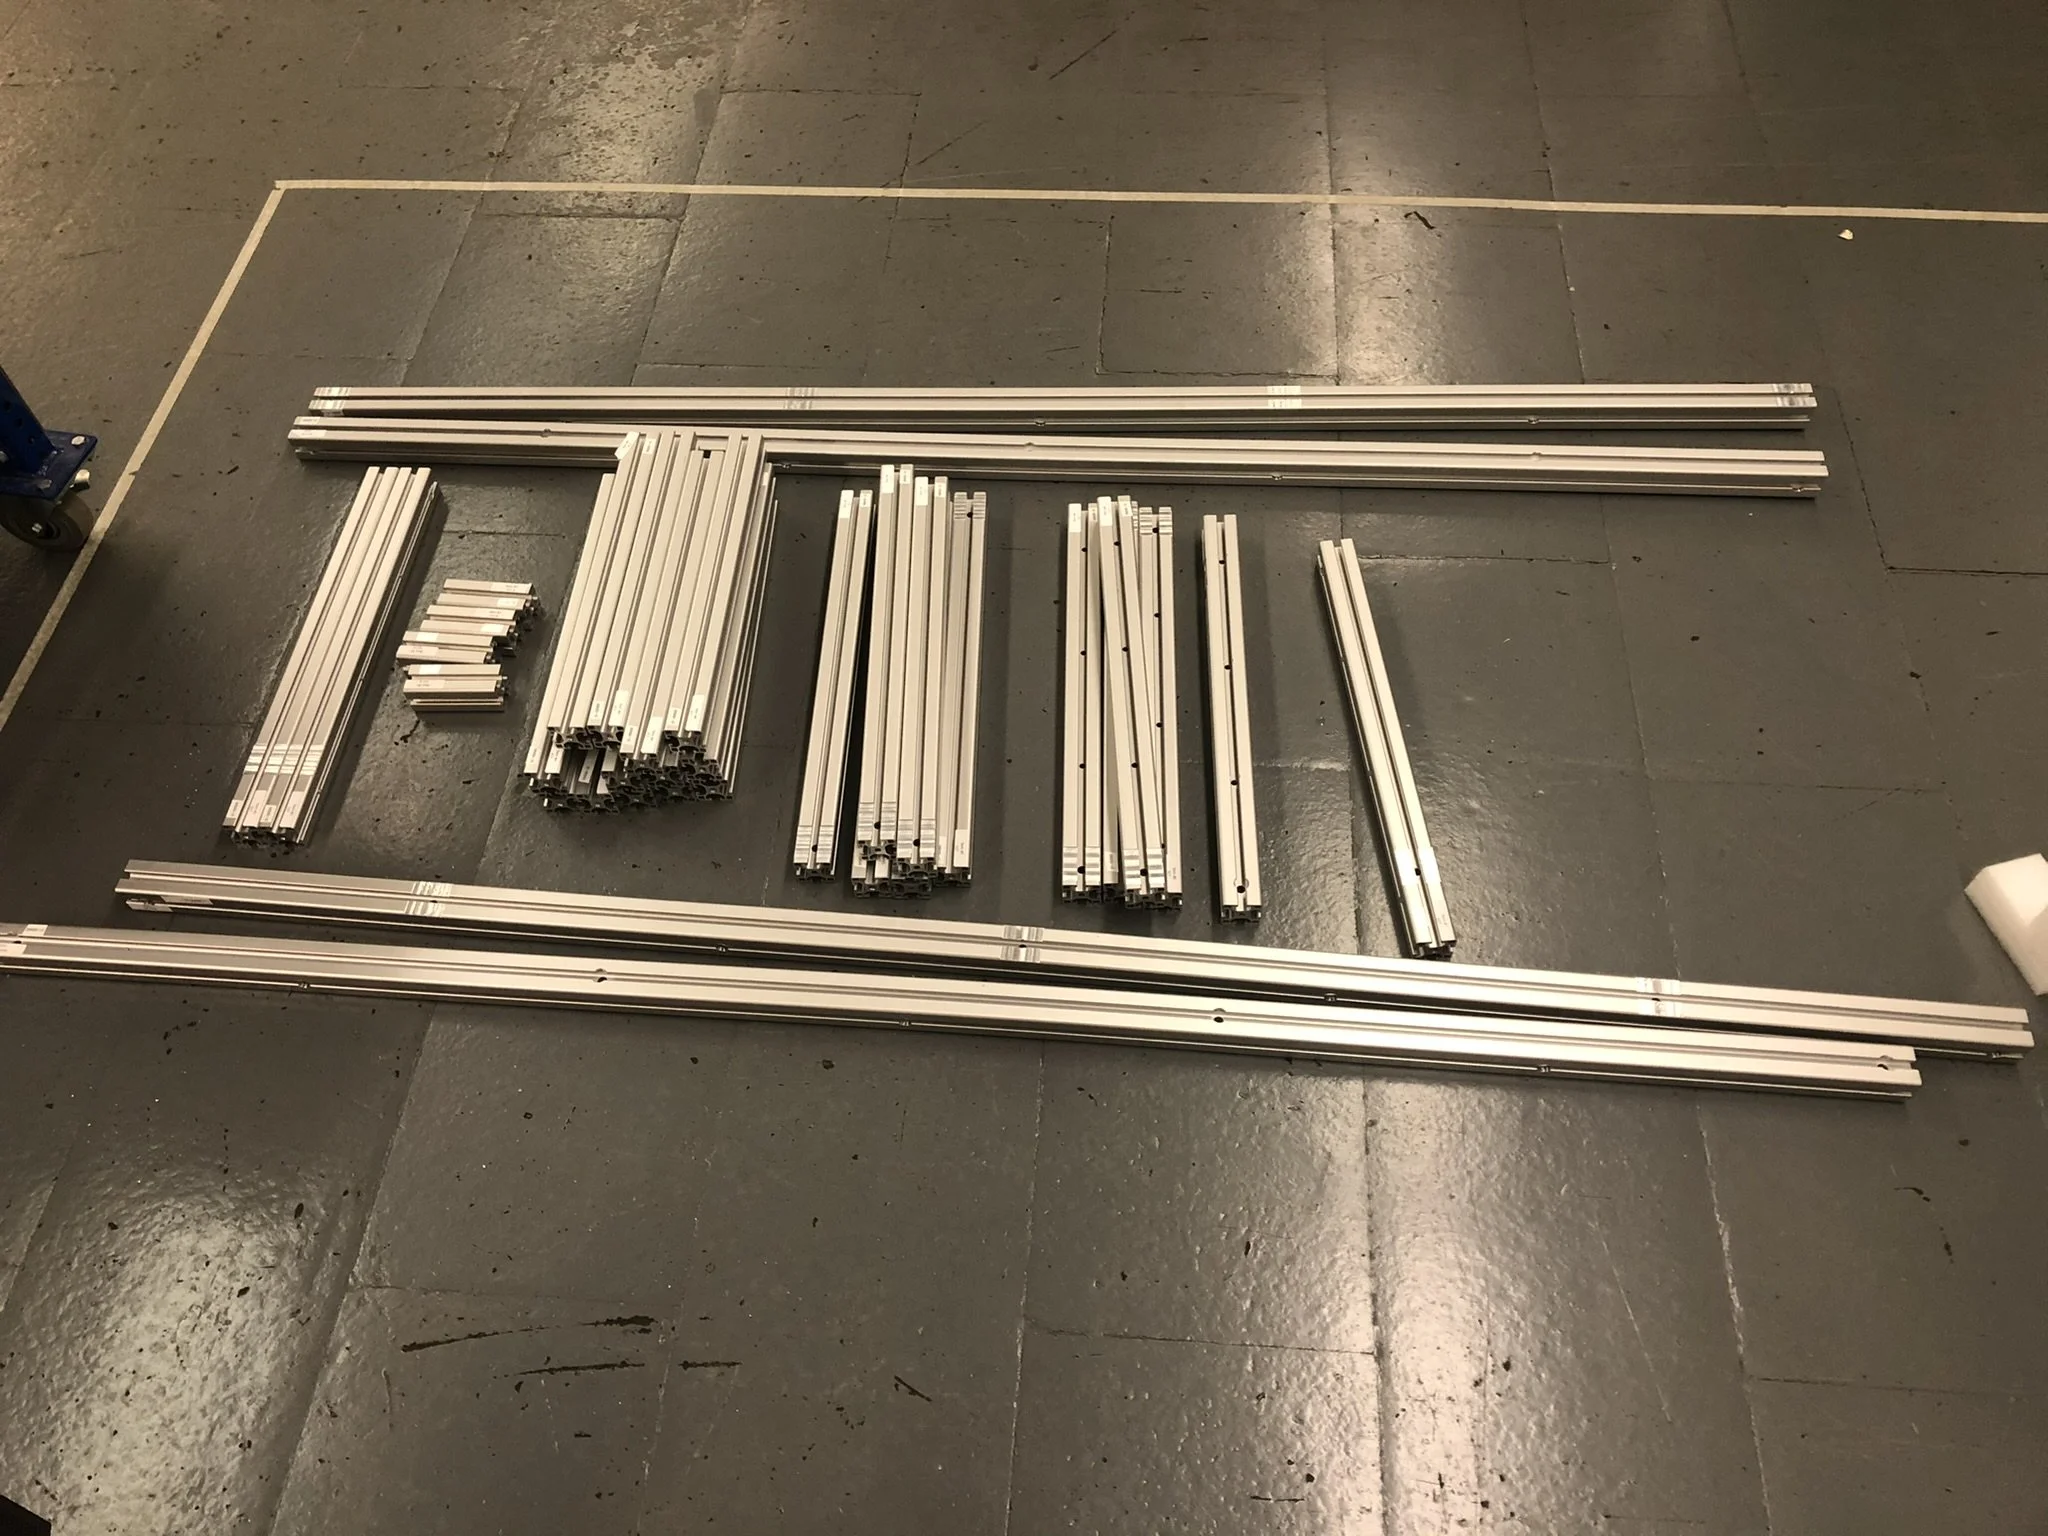
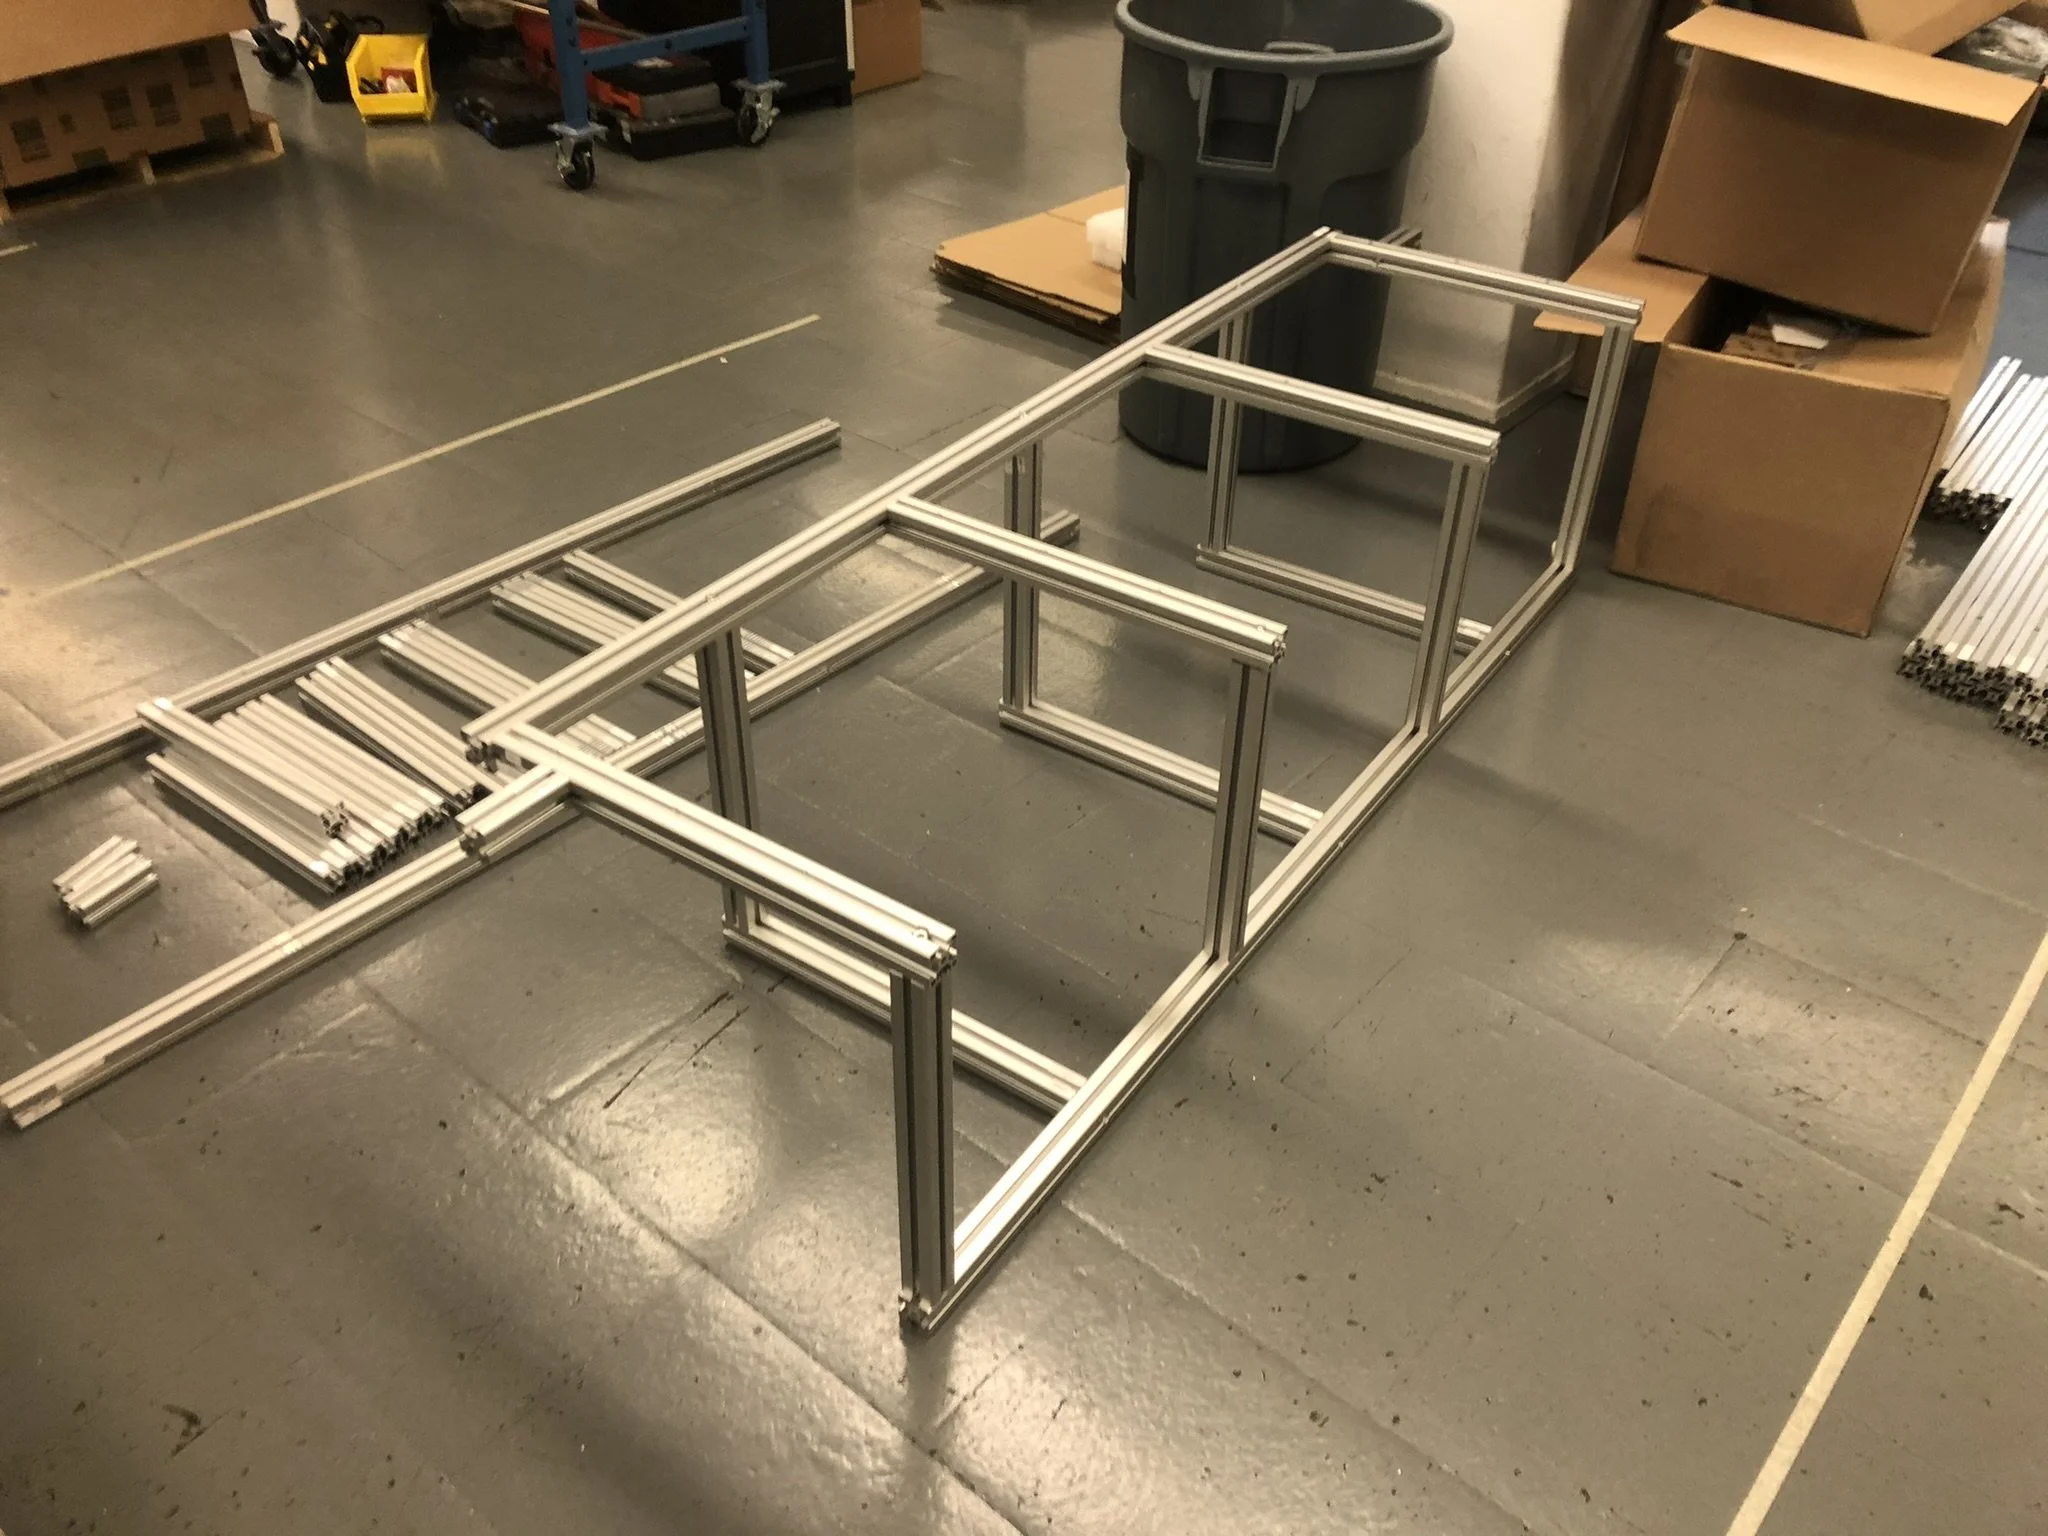
This workcell was designed with the intention of representing an AutoStore Port that was already installed on-site for a customer. A simple design in the scheme of things, but using aluminum extrustion to our advantage led to a very easy on-site install, requiring only 4 screws to connect the left and right half of the assembly together. Time is precious for our deployment staff on-site, and being able to install the hardware completely in less than one hour allowed them to focus on software initialization rather than tinkering with Allen keys for three days
Notice the two cross beams in the center, which were the only parts installed on-site. All other assembly was done in-house in Somerville, then palletized and shipped.
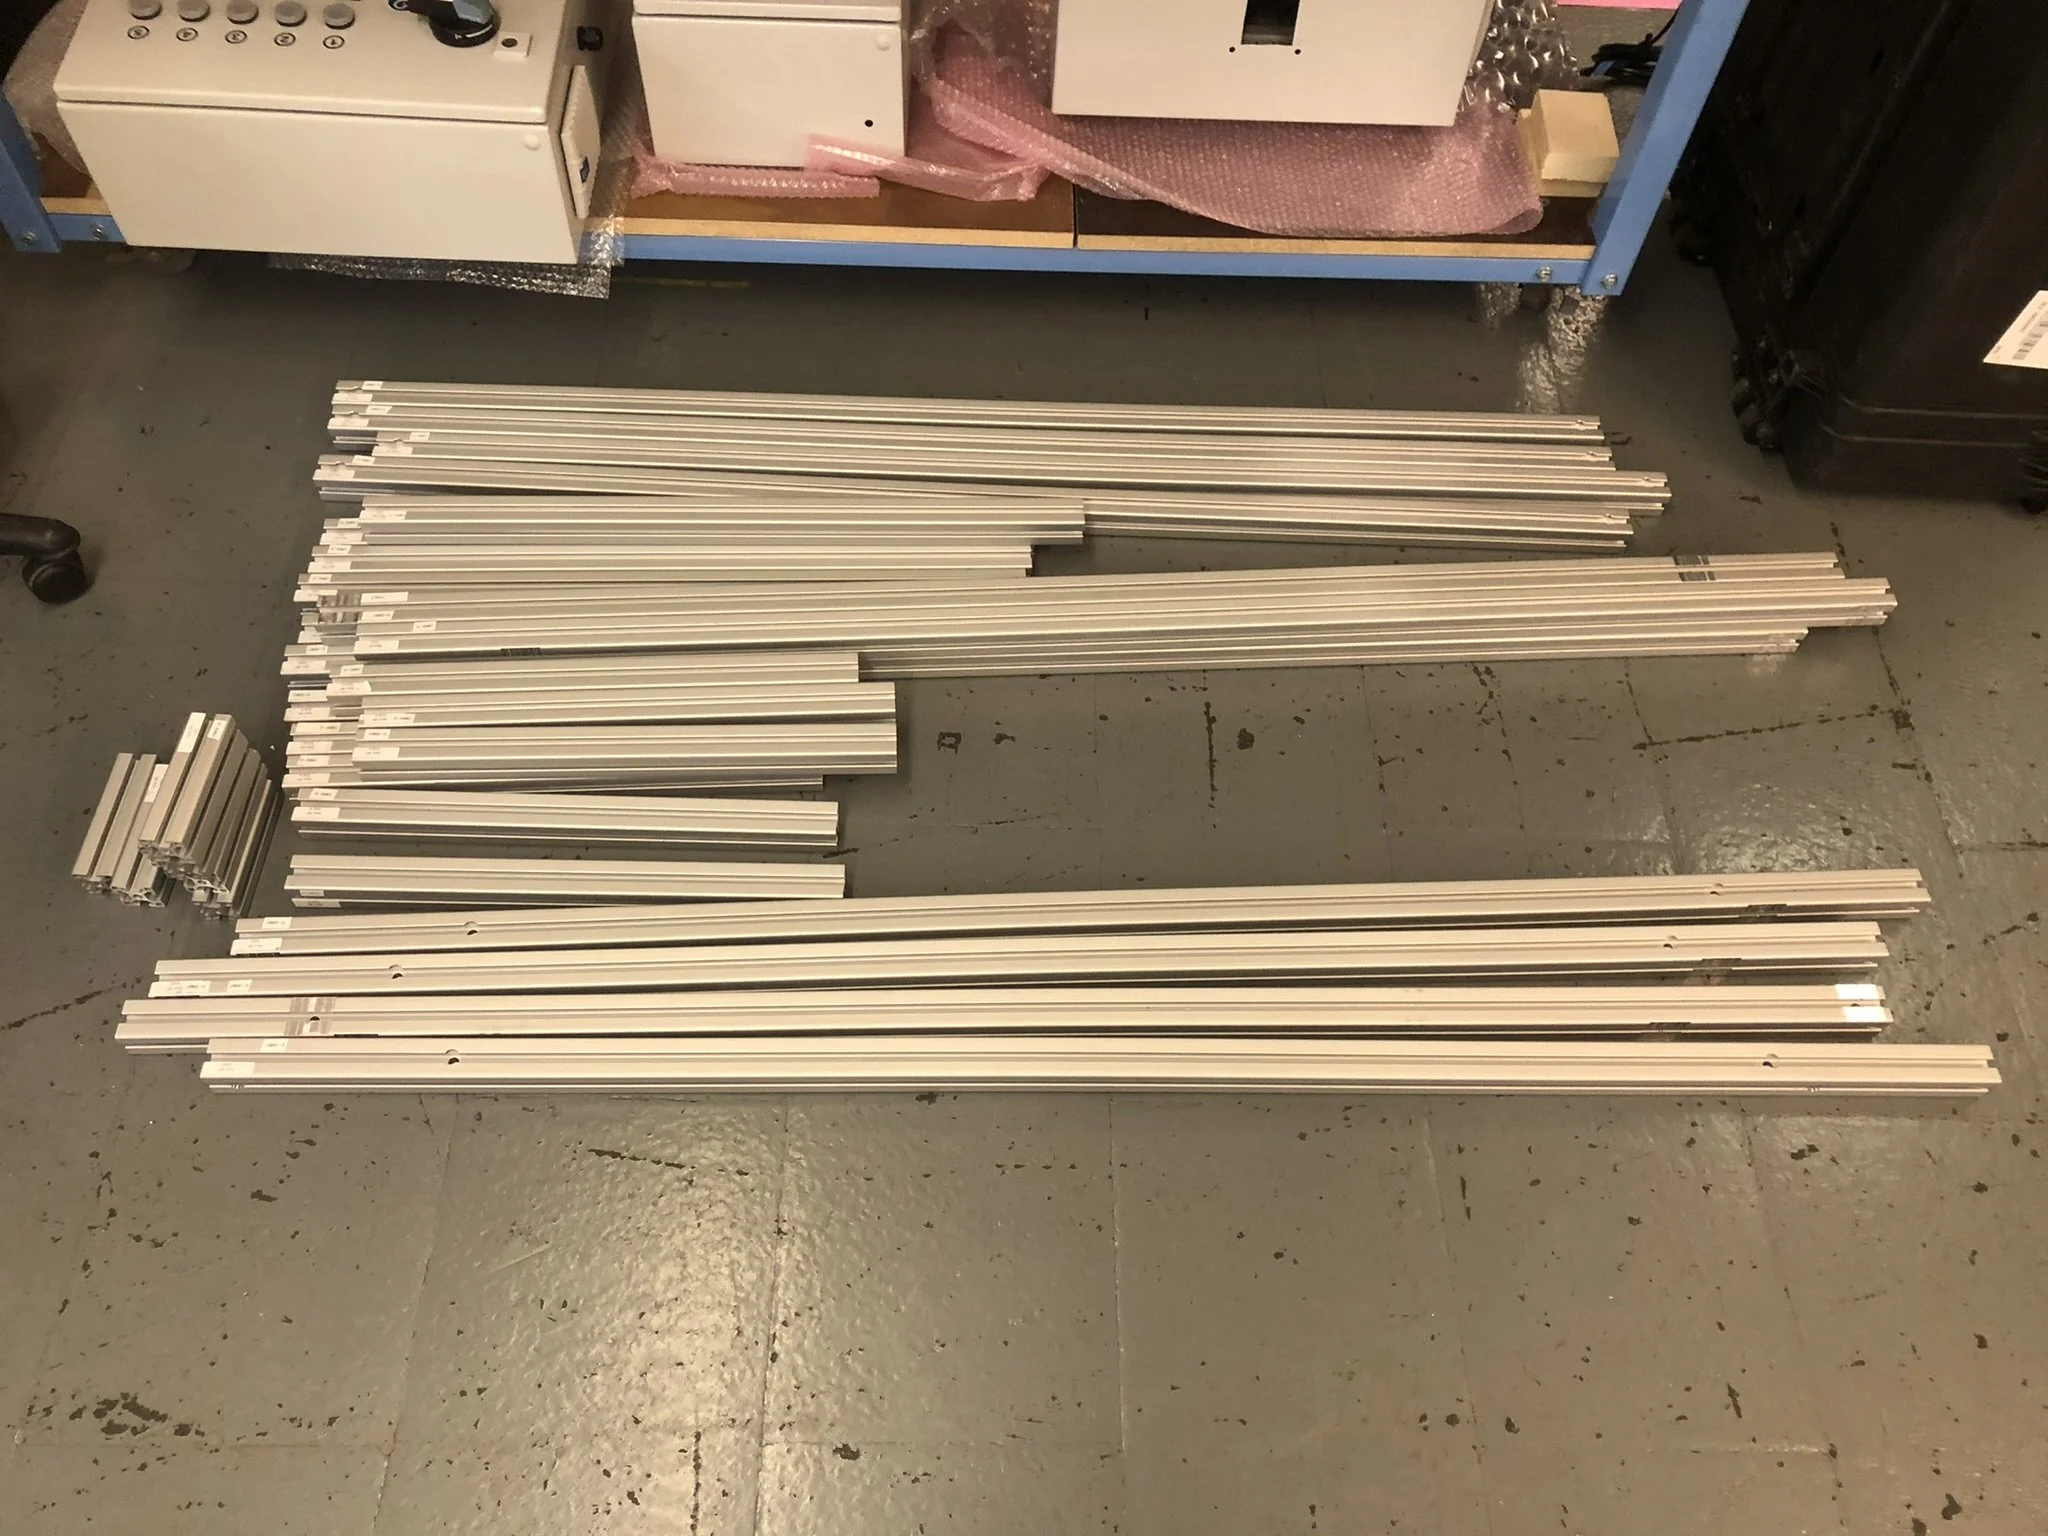
The following pictures show an idea of a smaller assembly that’s relatively standard for a project
Shipping was a critical part of our workflow, and we found it problematic to plan shipping after the project was designed. This project was the first project that was designed specifically to prioritize shipping as early as possible.
This is how I designed the packaging for Workcell 2. You can see the tall frame, ready to be installed on-site
A standard crate on the forklift. Most of our fragile electronic equipment is shipped this way. A big perk of my job is getting to do donuts in the parking lot after each shipment goes out.
This workcell was a simple workcell that integrated scanning to verify picks. The scanners are a massive pain to calibrate in the field, so I decided to integrate shipping design into our initial CAD work in SolidWorks. Designing highly custom brackets that allowed deployment engineers to install scanners and walk away was a massive time saver in the field. Before, adjustable brackets were our bane in the field, because they required precise alignment during setup, and constantly drifted away from center throughout months of picks.
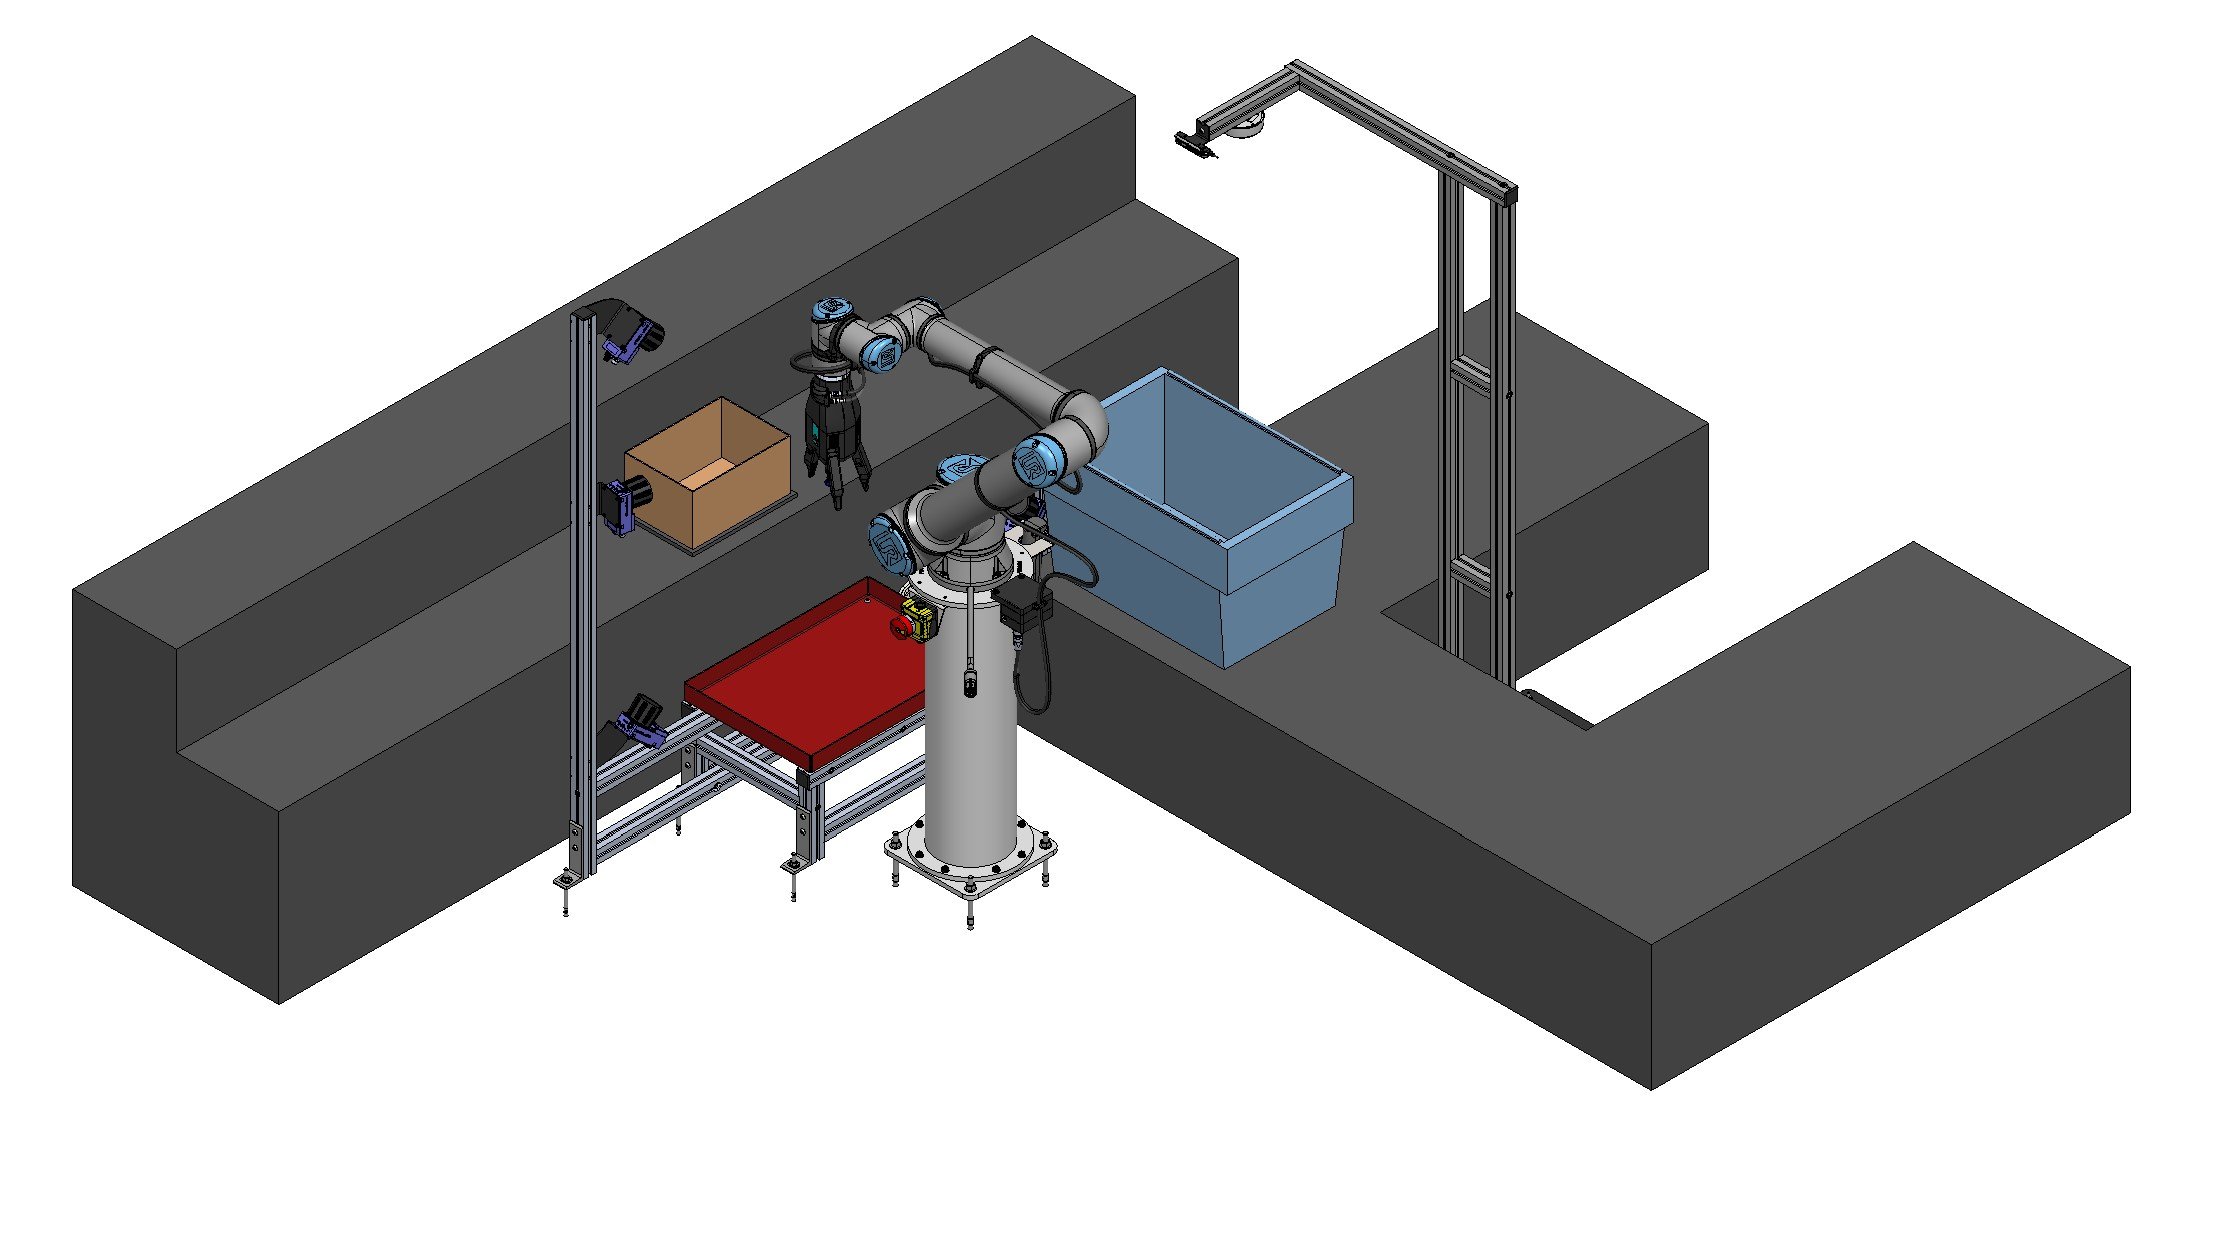
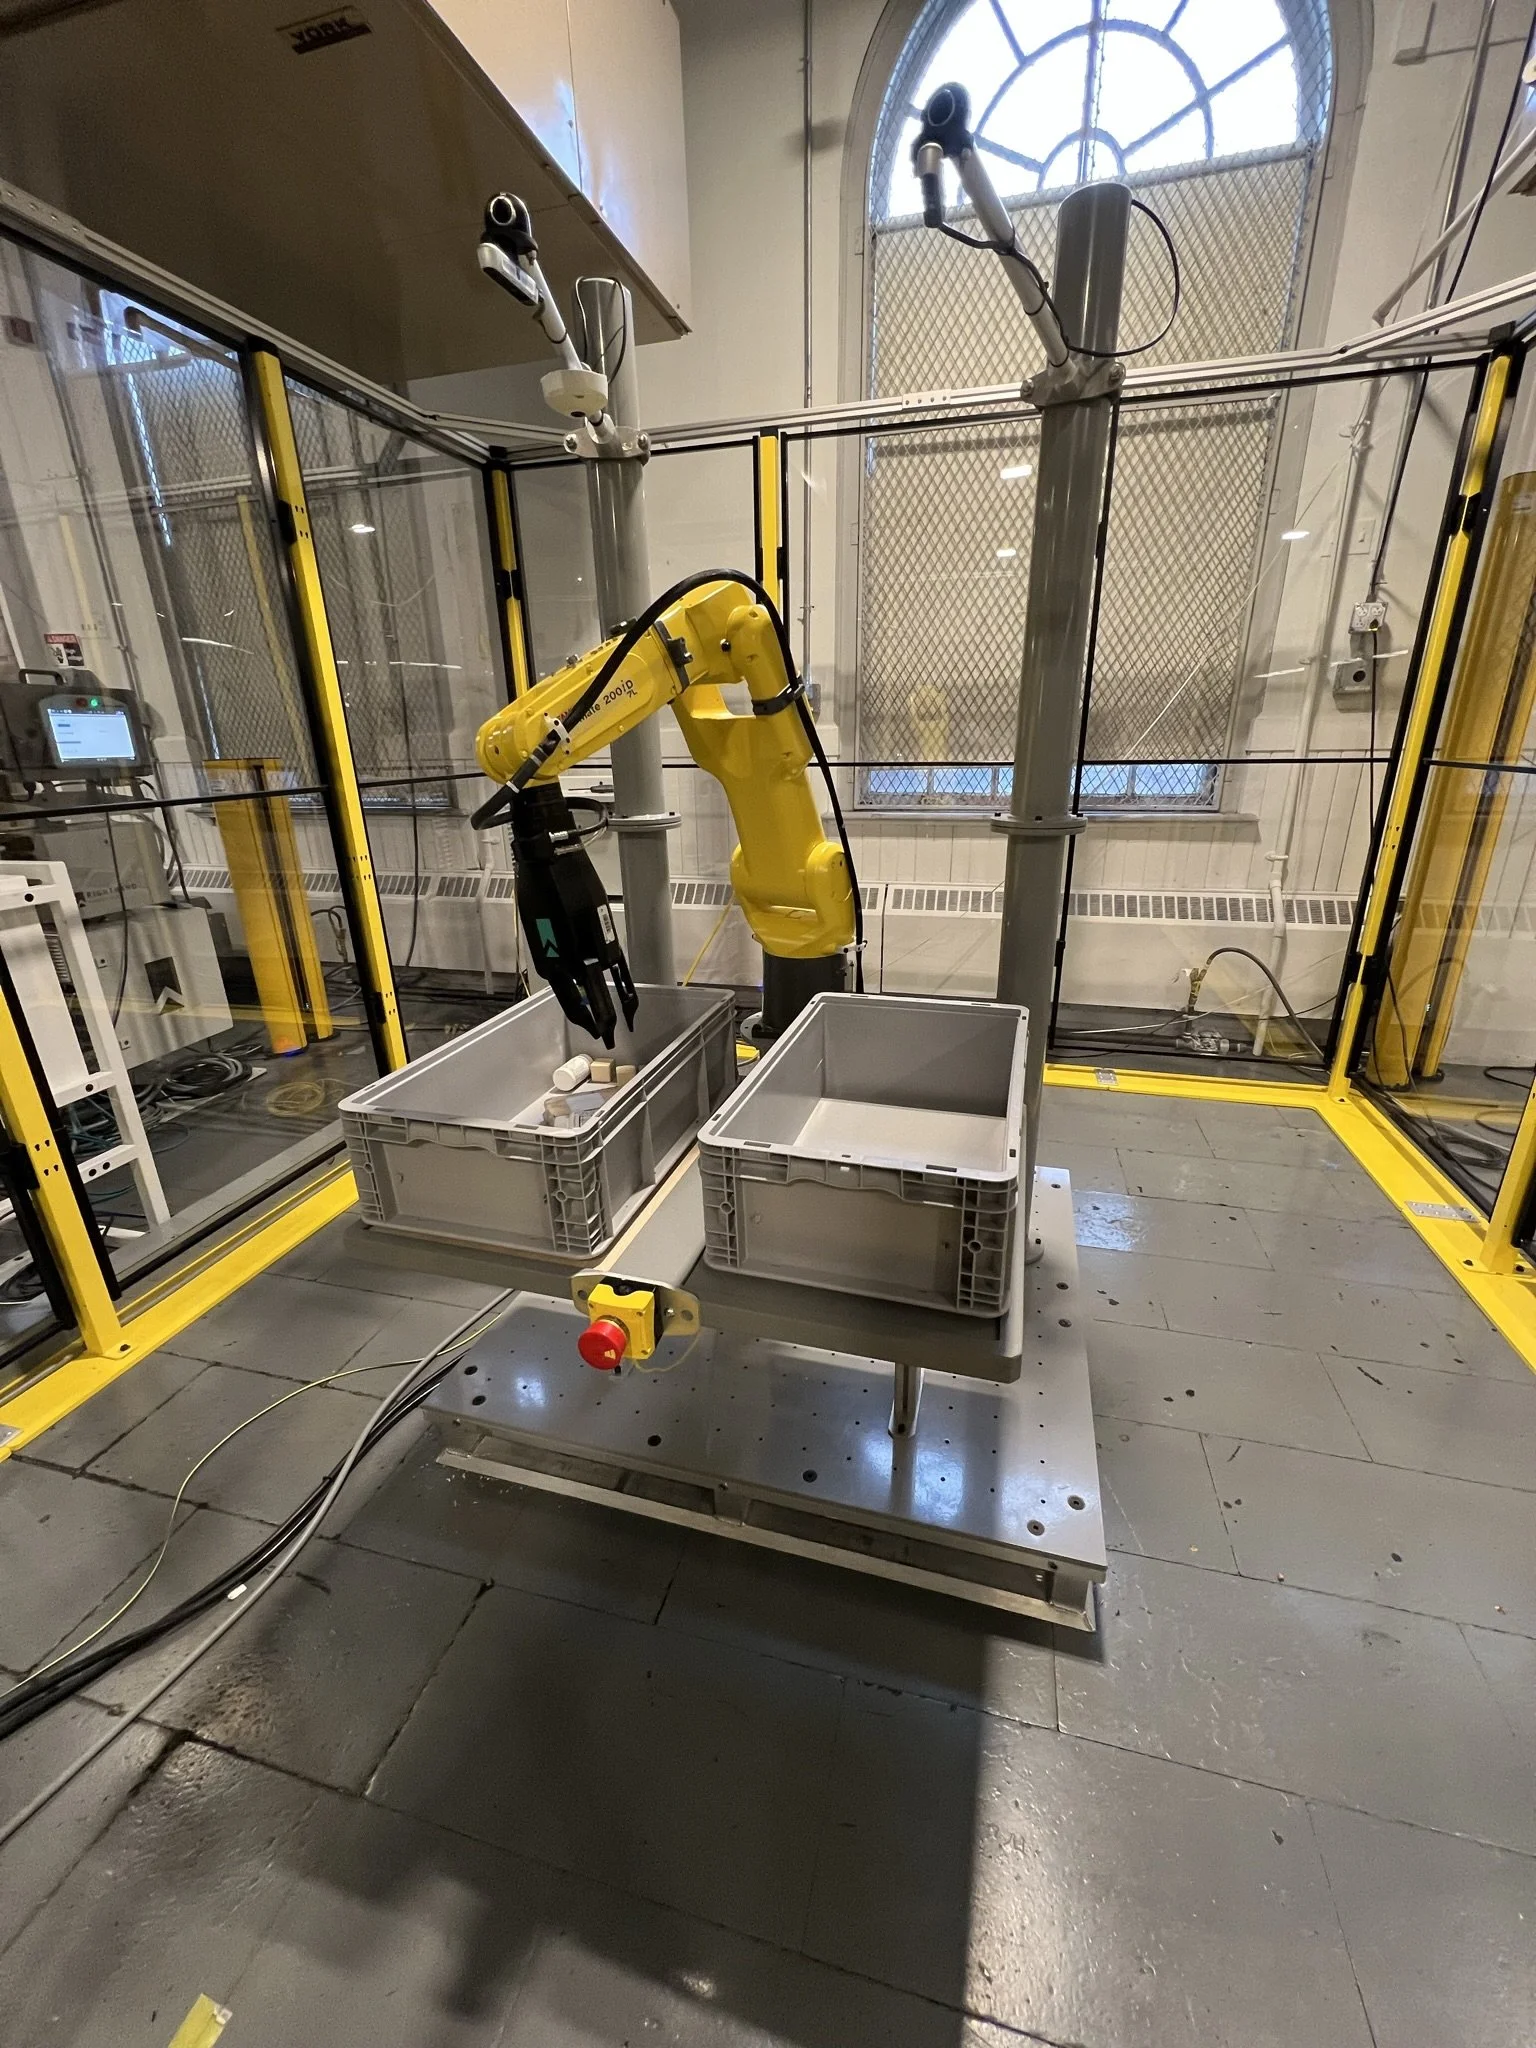
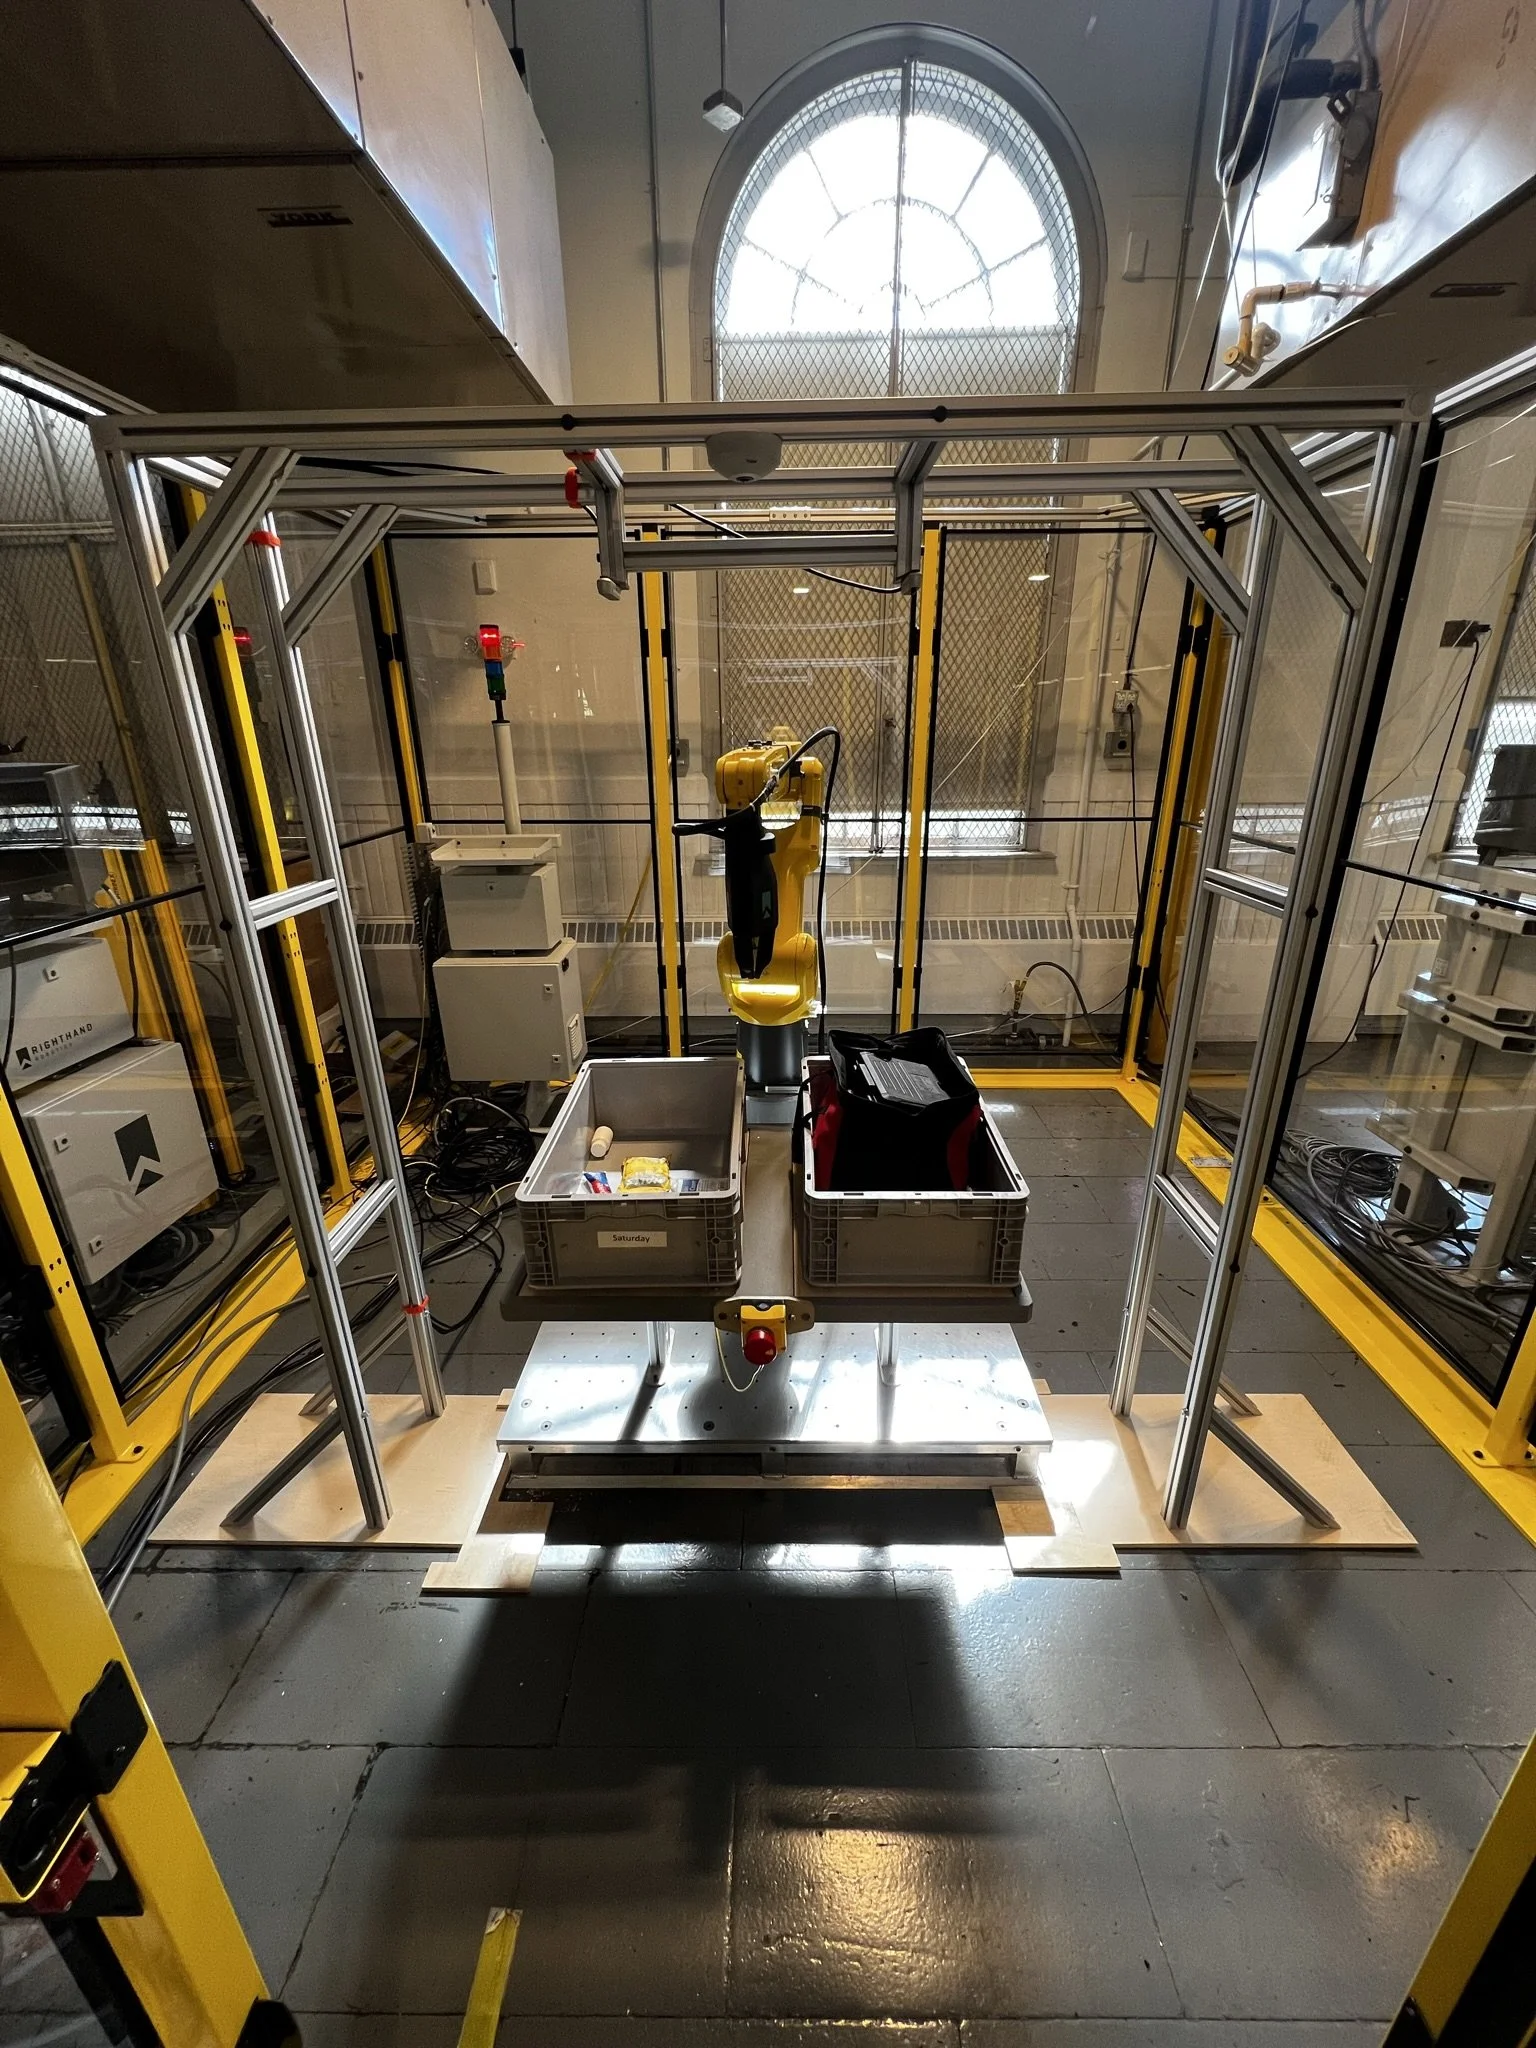
This workcell includes an industrial arm, which moves faster and has much higher inertia than our collaborative robots. While I did not do the initial design of this workcell, I was tasked with diagnosing and solving a problem unique to this workcell - the violent movement of the arm was causing the cameras to shake, and stills for calculating picks were too blurry to be used. The solution I came up with is included in the next slides.
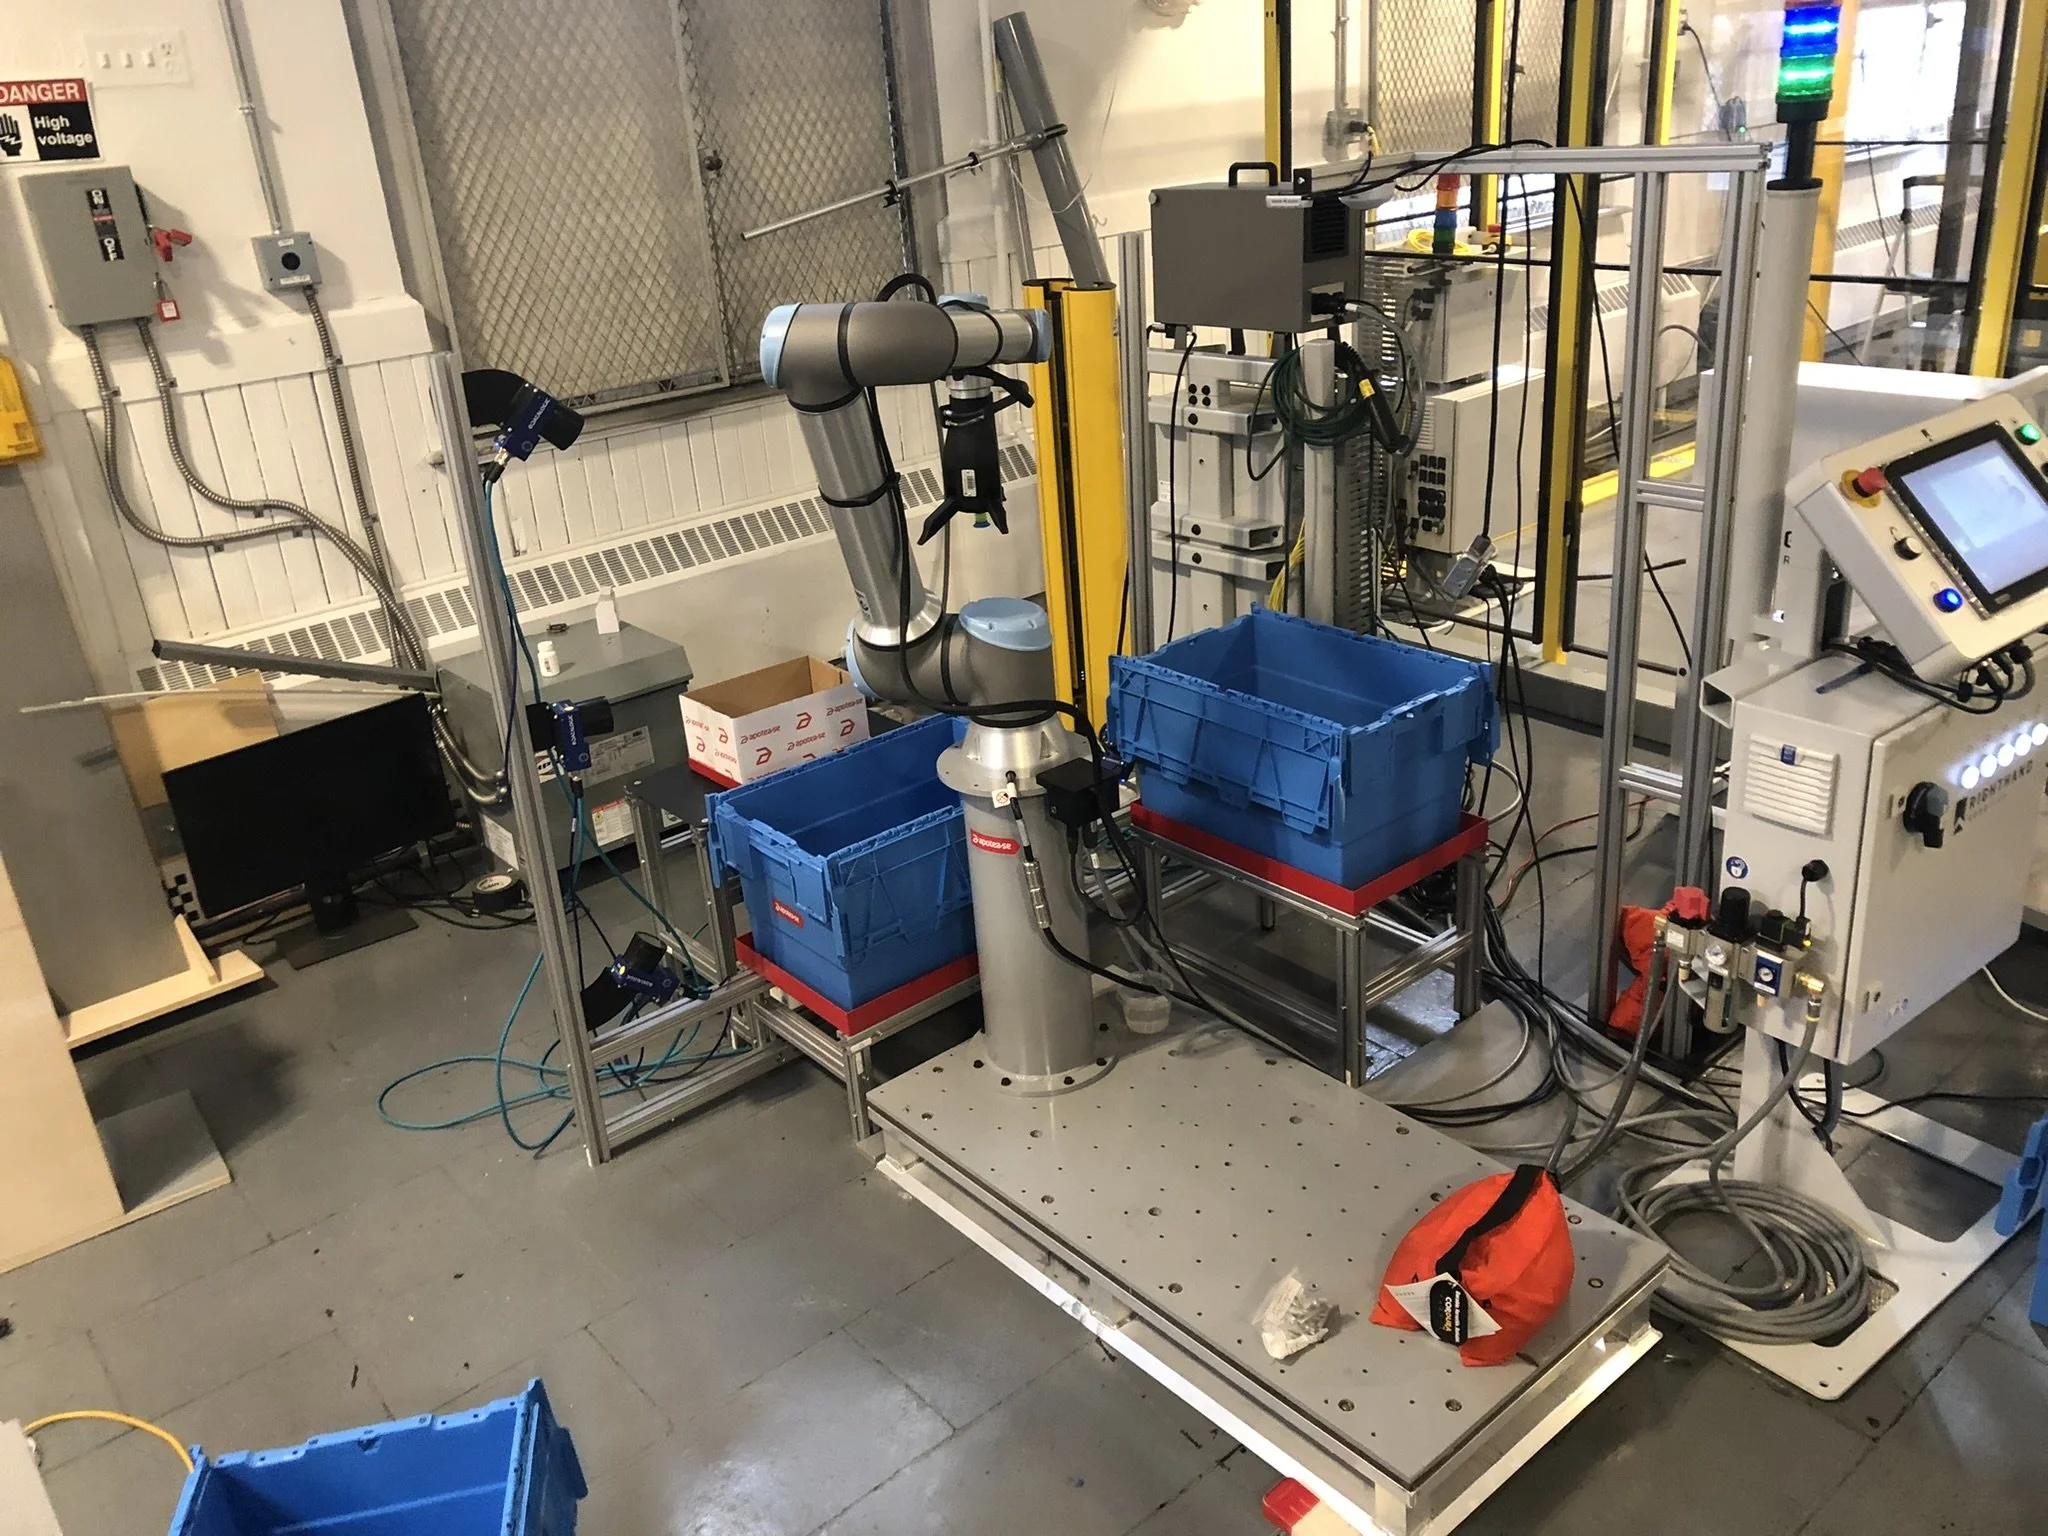
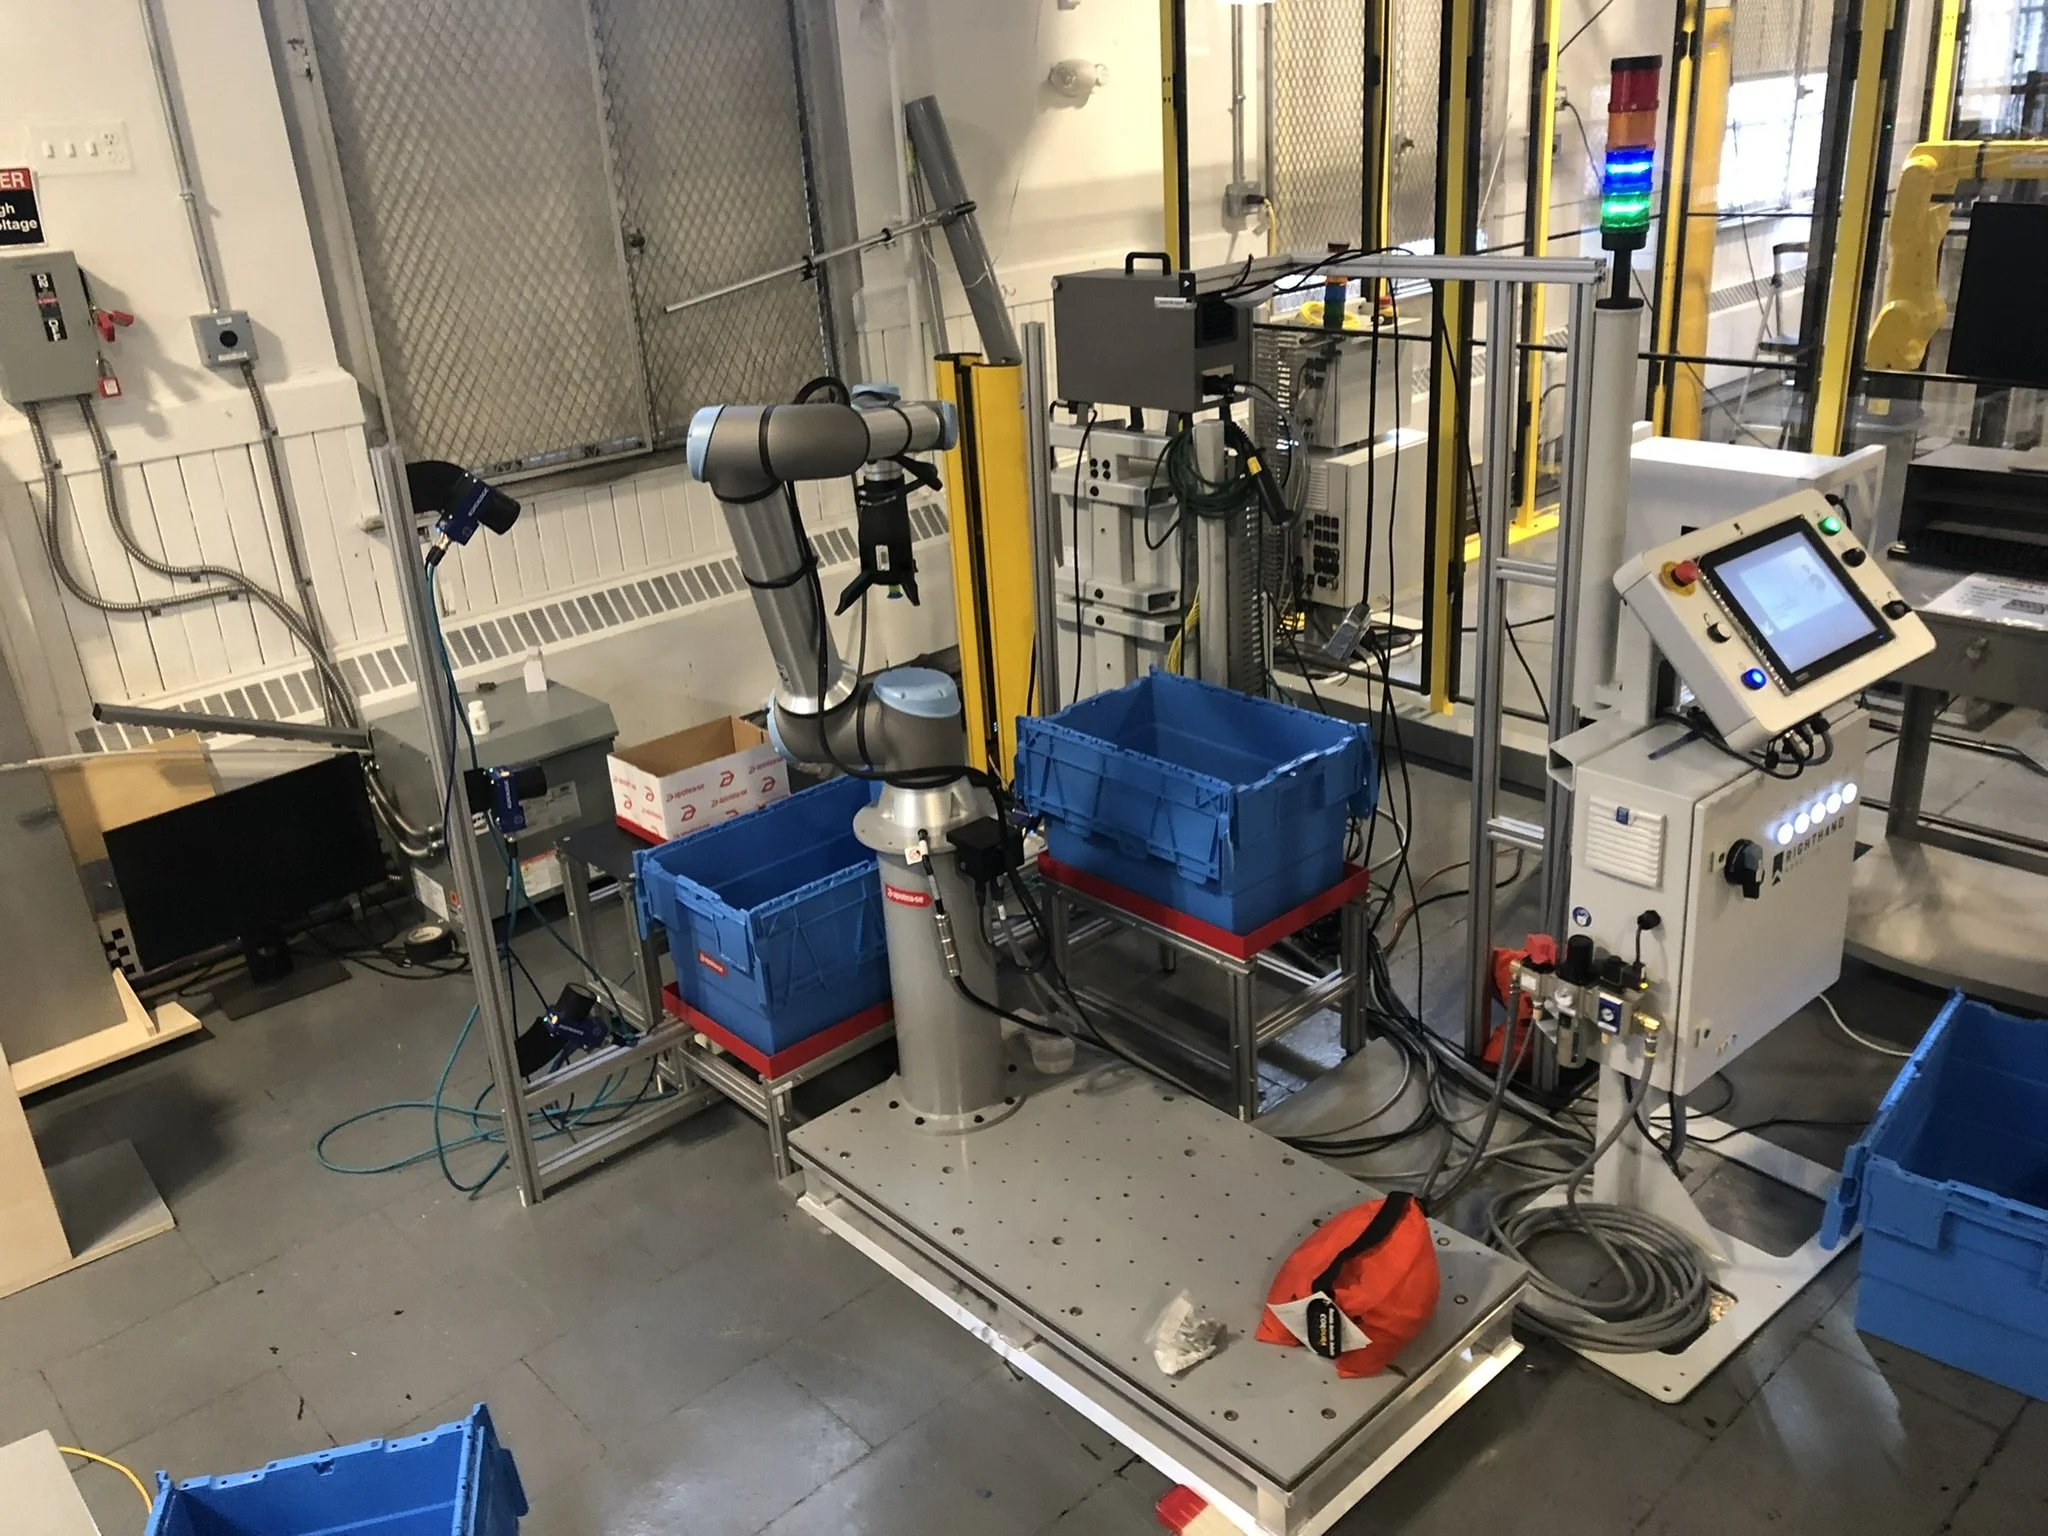
Due to the hard connection between the cameras and the baseplate, I thought it best to separate the camera mounting system from the baseplate entirely. This photo shows a test fit, using plywood baseplates that we are able to make and test in house while we wait ages for steel baseplates to arrive. This decoupling allowed the cameras to remain completely still during arm movement.
Because we are not allowed to drill into the floor in our current office, I included simple jigs that anyone can use to check alignment of the cameras. Although the cameras are no longer connected to the robot, they still need to be consistently placed in order to get properly referenced stills.
The following slides are multiple variations of the same workcell - “The ABBA Cell” whose sole intention was to pick and place from bin A to bin B, and then reverse to bin B back to bin A. They were hugely critical in testing new pick items, new code, and most importantly wowing potential investors and customers. The cells were designed to look good, be broken down easily, and highlight various important parts of our system.
This cell was designed to work like an ABBA, but have two separate item sets so that the new Suction Cup Swapper could be highlighted at trade shows.
At Raytheon Technologies, I am a Mechanical Engineer I for the Test Equipment team. We are responsible for coordinating with a team of electrical engineers to produce equipment that allows field testing of various products that Raytheon manufactures. We use Creo Parametric 5 for 3D design along with drawings of parts and assemblies and AutoCAD for 2D cable drawings.
Personally, I am responsible for the design of test equipment chassis, racks, and various custom parts that allow testing to happen. So far this year, I have designed and overseen production of three full equipment racks. This involved custom design of the overall racks and each individual chassis that is housed in the rack. Custom parts such as brackets, hinges, and adapters were required as well.
Each part and assembly designed goes through a rigorous documentation, checking, and releasing protocol, which requires attention to detail along with constant communication with senior mechanical engineers on my team. Following the release, I contact vendors for quoting and manufacturing and oversee production of my assemblies.
Additionally, I completed a 6sigma project within the first six months of working at Raytheon. A program had been using overpriced cast steel for machinery covers. They were overdesigned and the legacy vendor had not been reconsidered for years. I located this issue from working on related projects, and decided to change it. Through a simple redesign and re-quoting from a new vendor, I managed to lower the cost of a cover from $3000 to just $400. Given that each full assembly used up to 25 of the covers, the cost per assembly greatly outweighed the cost of labor to change the design.
I have signed an NDA at Raytheon, so I am unable to provide pictures of my work completed here
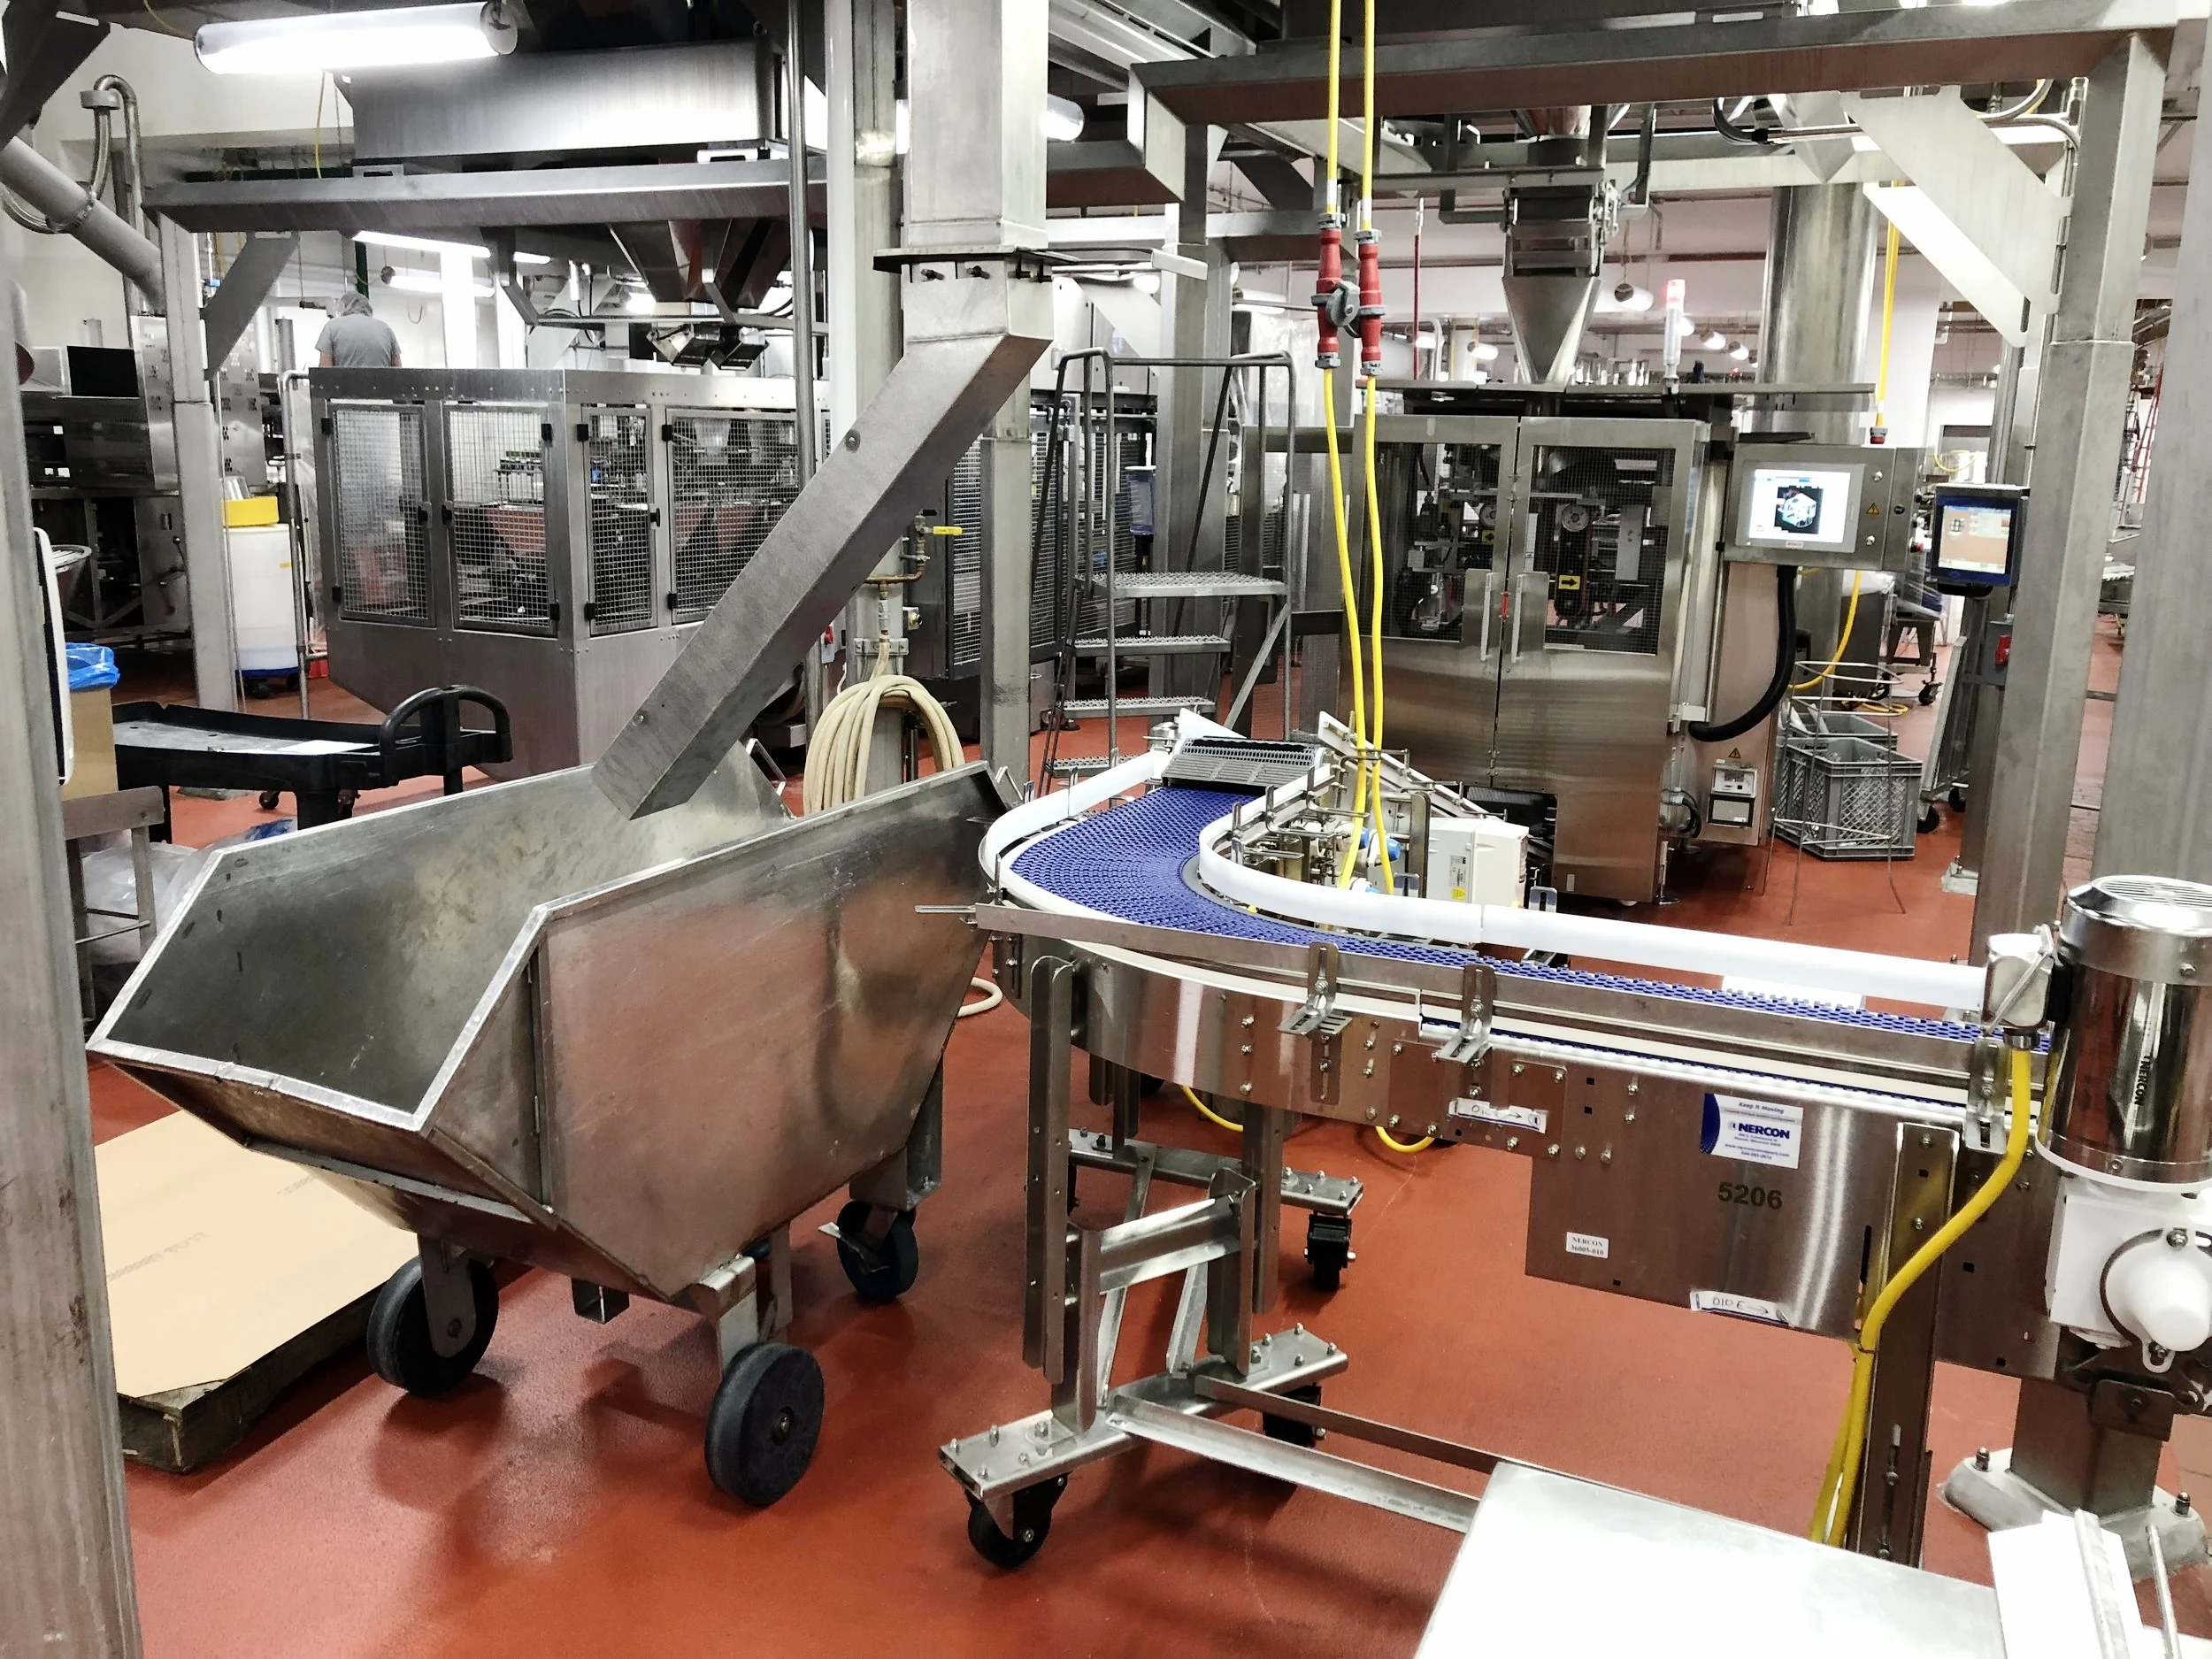
Gorton's seafood is the largest frozen seafood company in America. At Gorton's, I was responsible for increasing productivity of production lines through engineering. More specifically, I designed and implemented 18 design changes and new parts onto multiple production lines. Along with this, I translated safety and training materials from English to Spanish for temporary workers, developed line setups for new production lines, and implemented a localized dust collection system with a budget of $75,000.
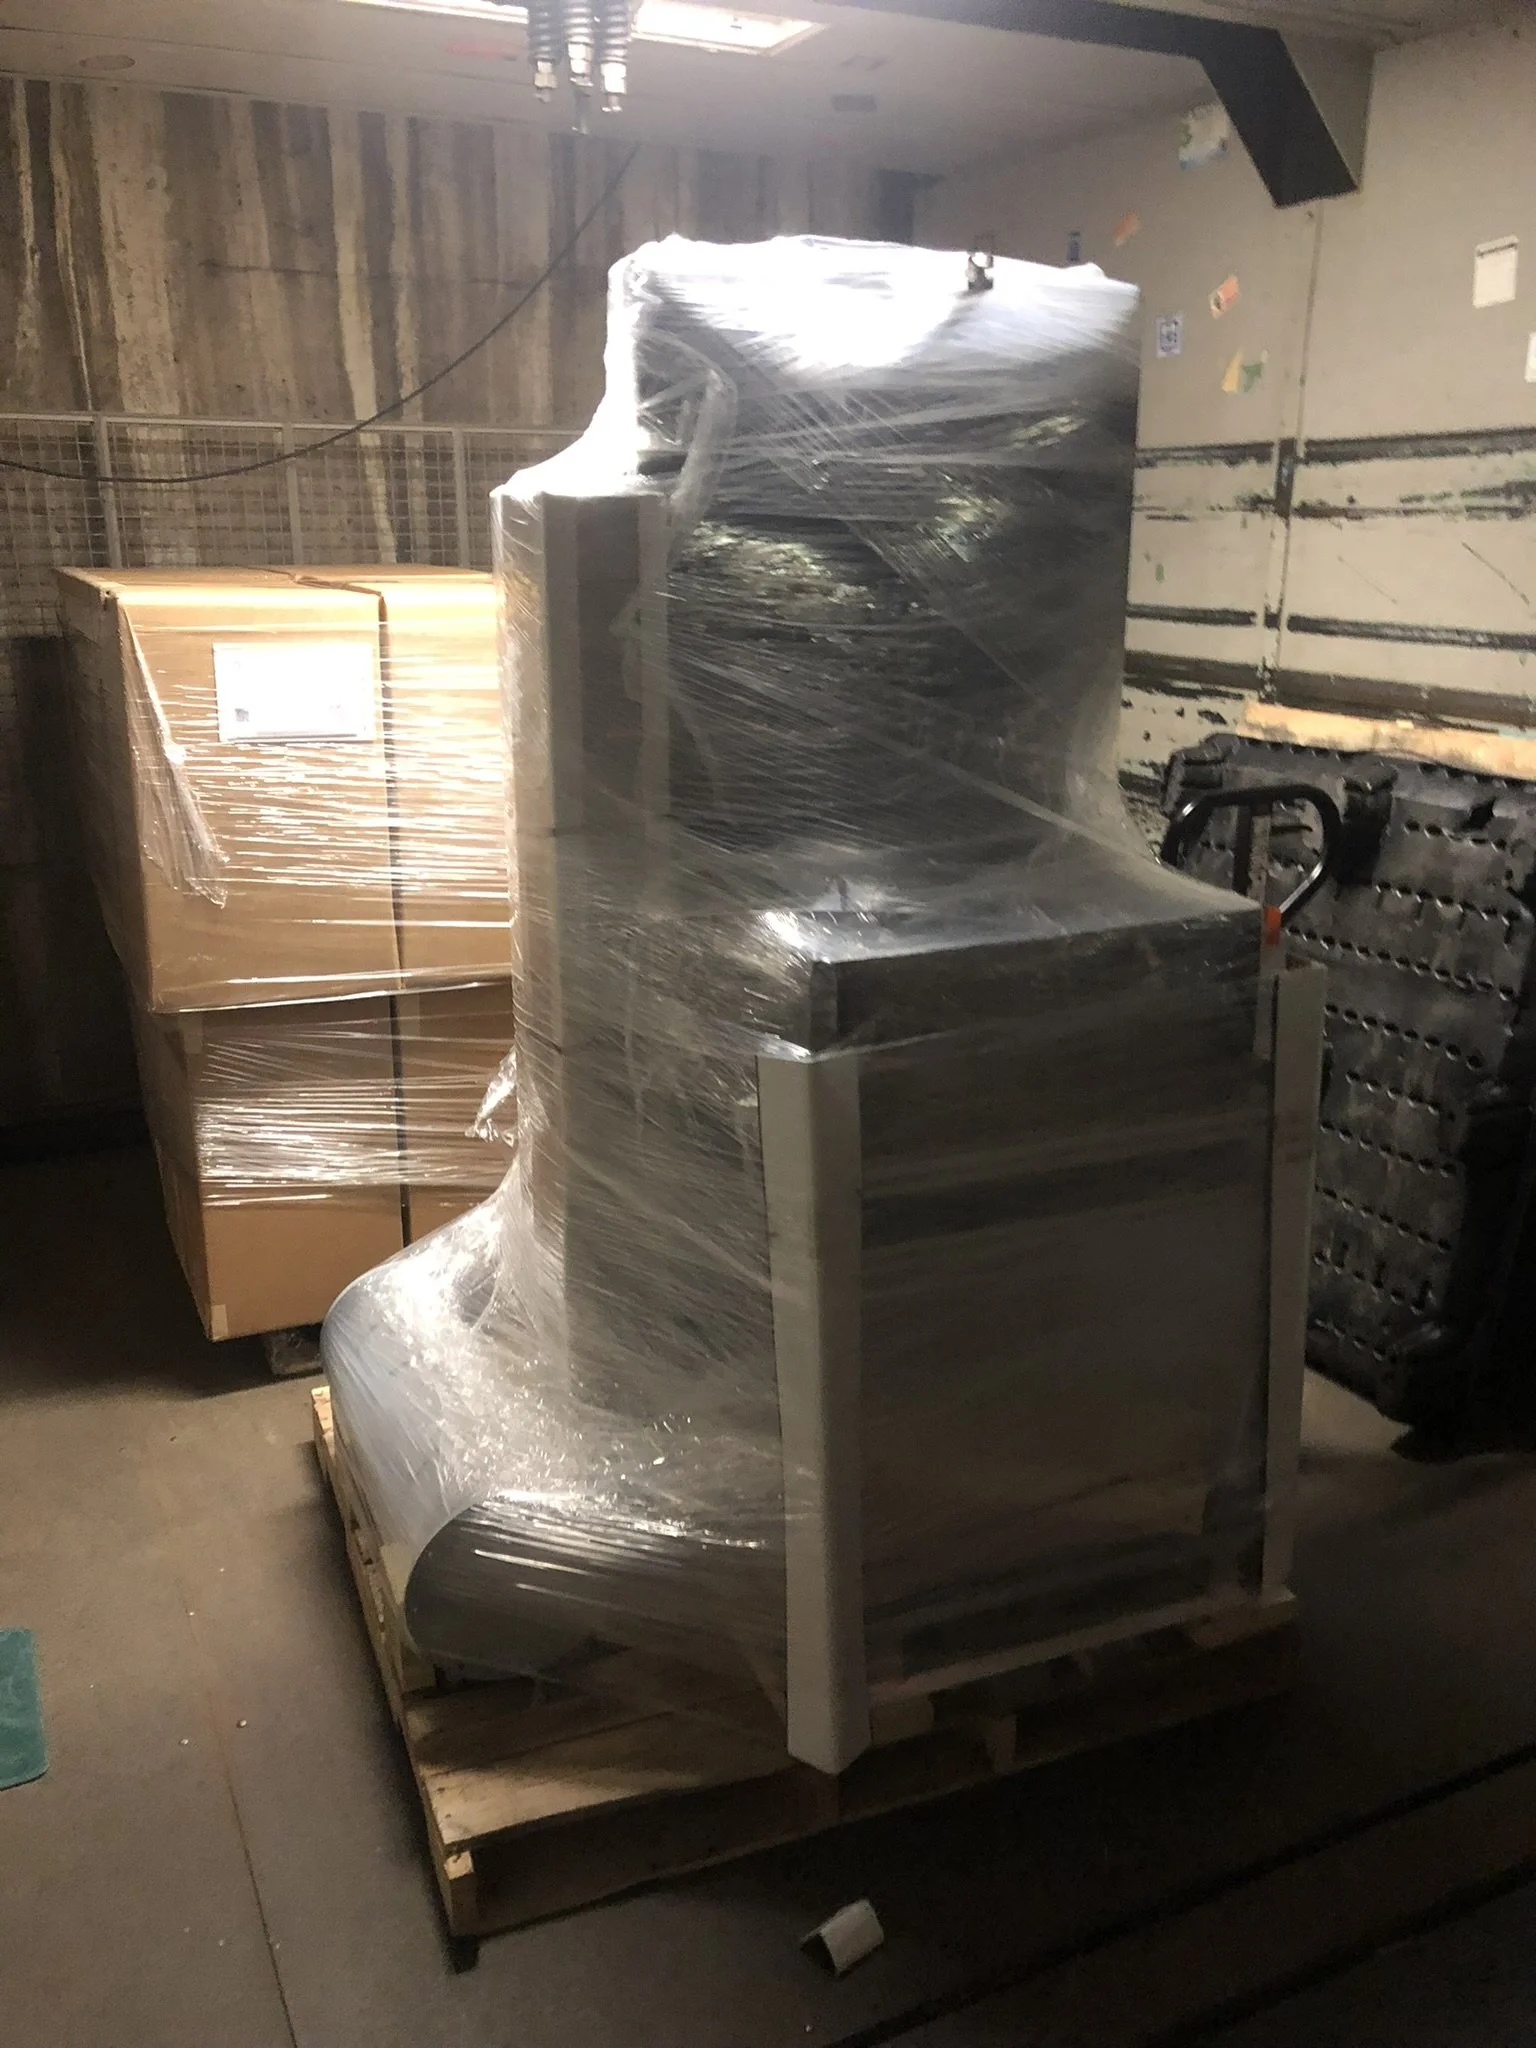
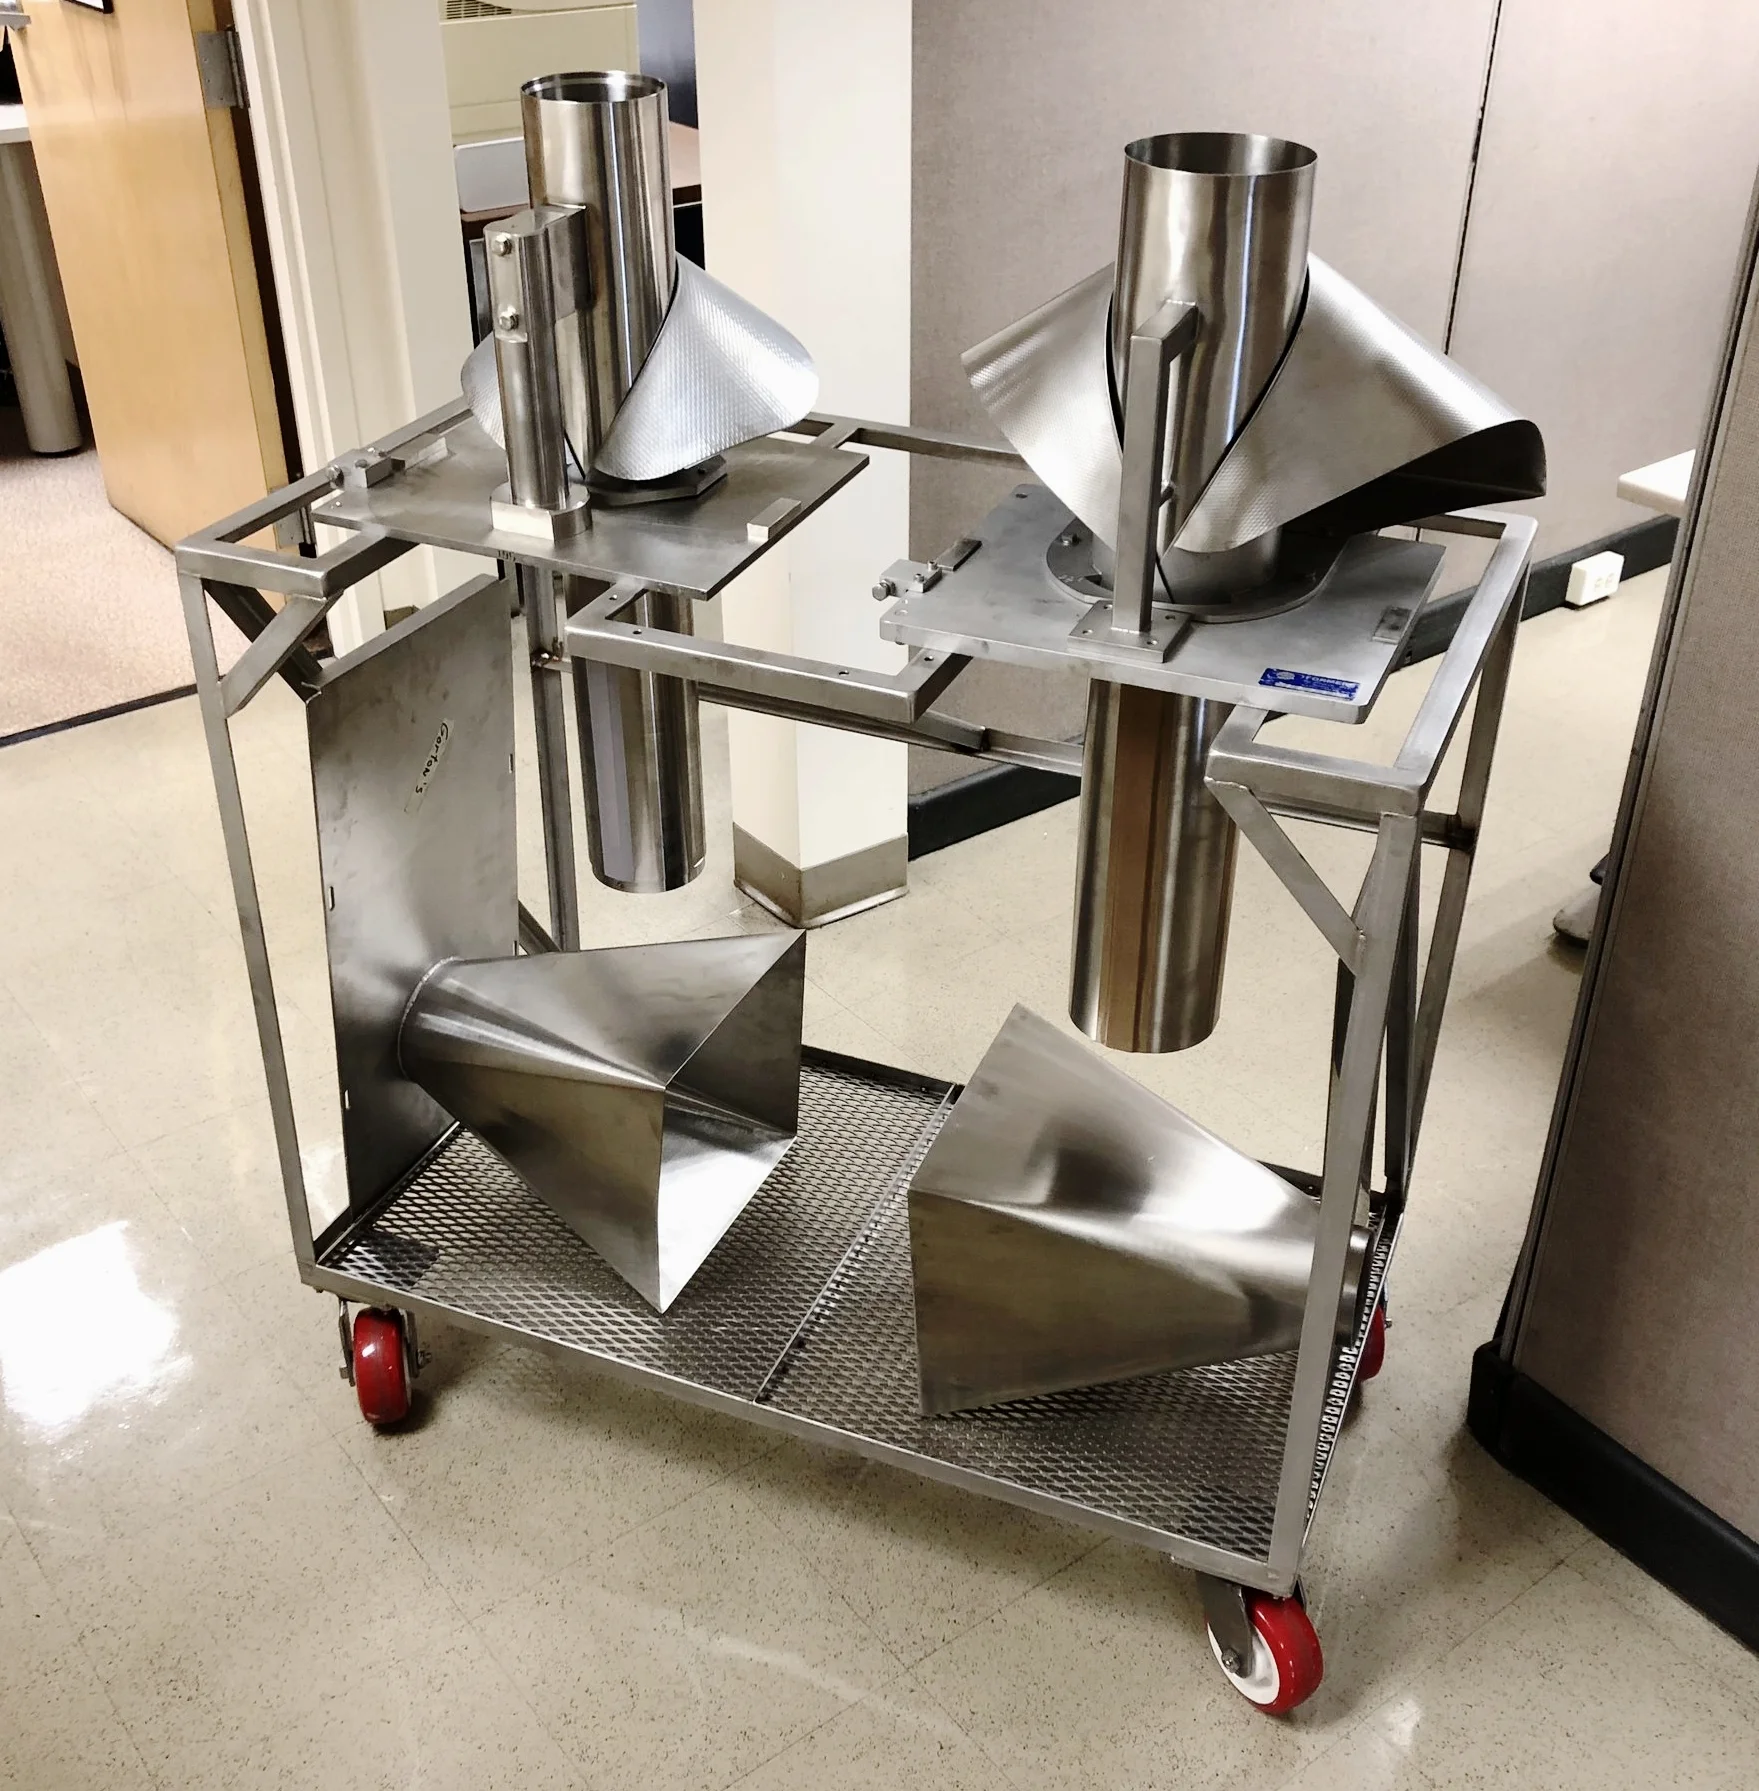
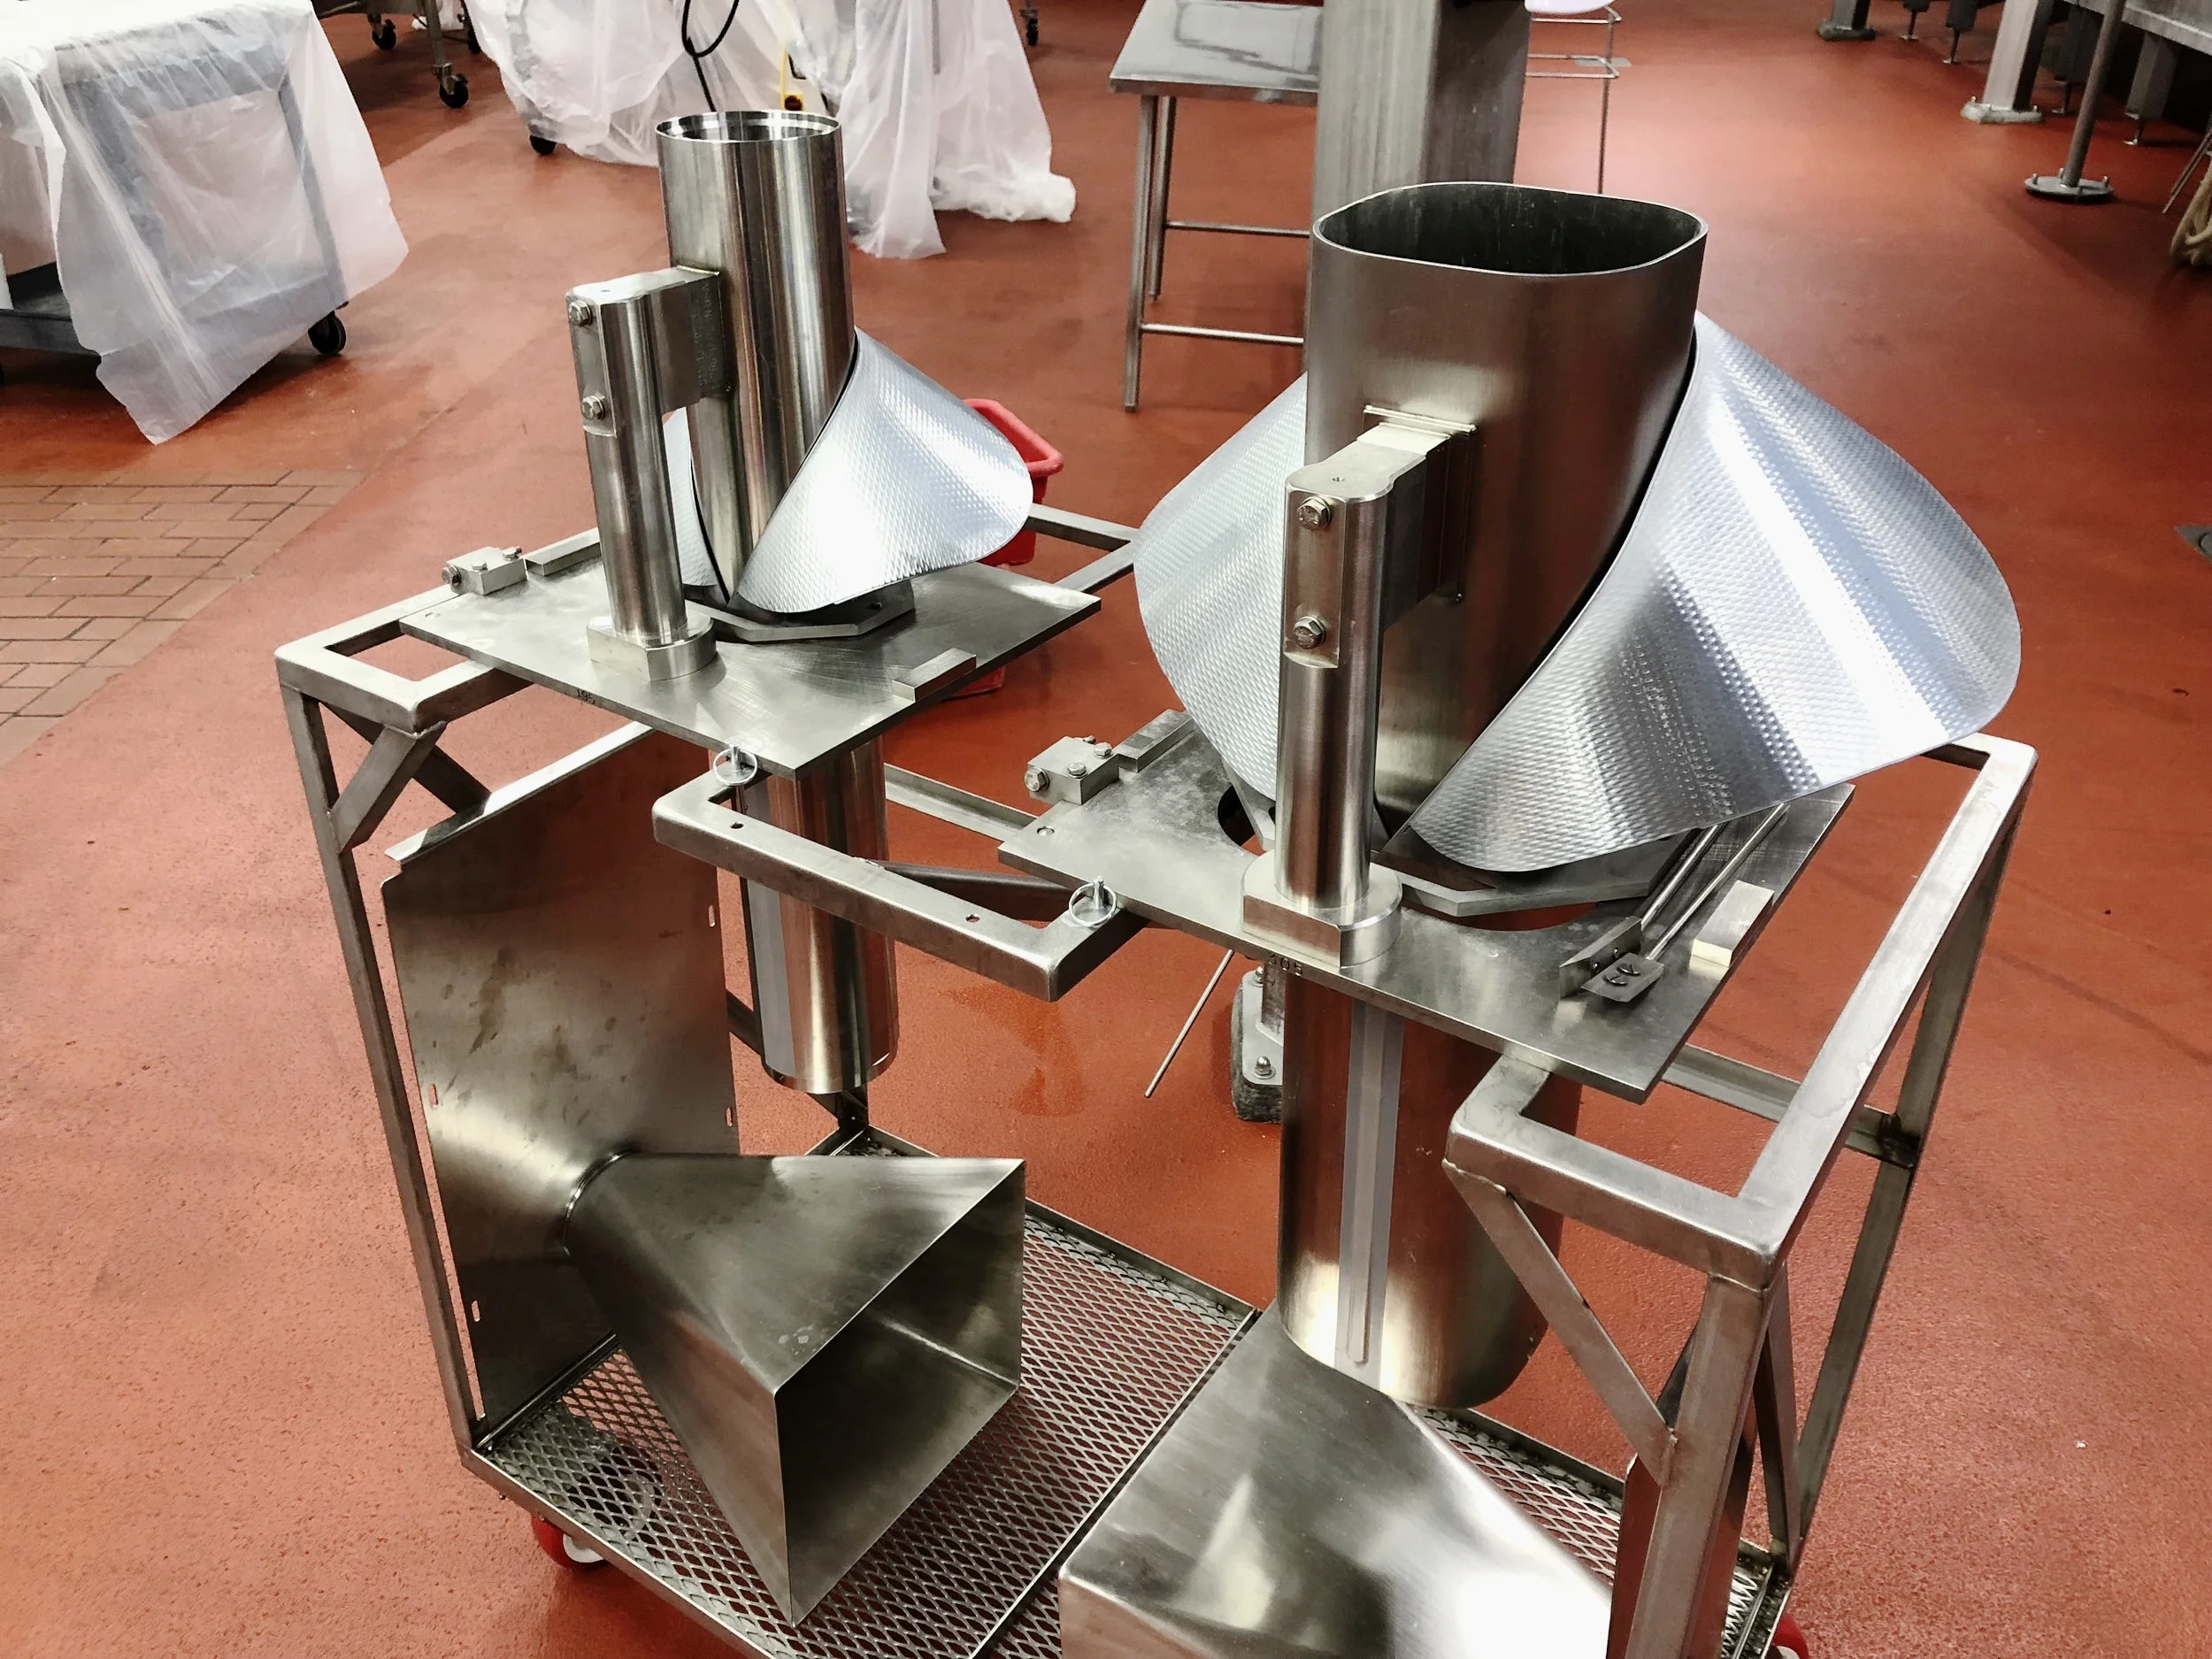
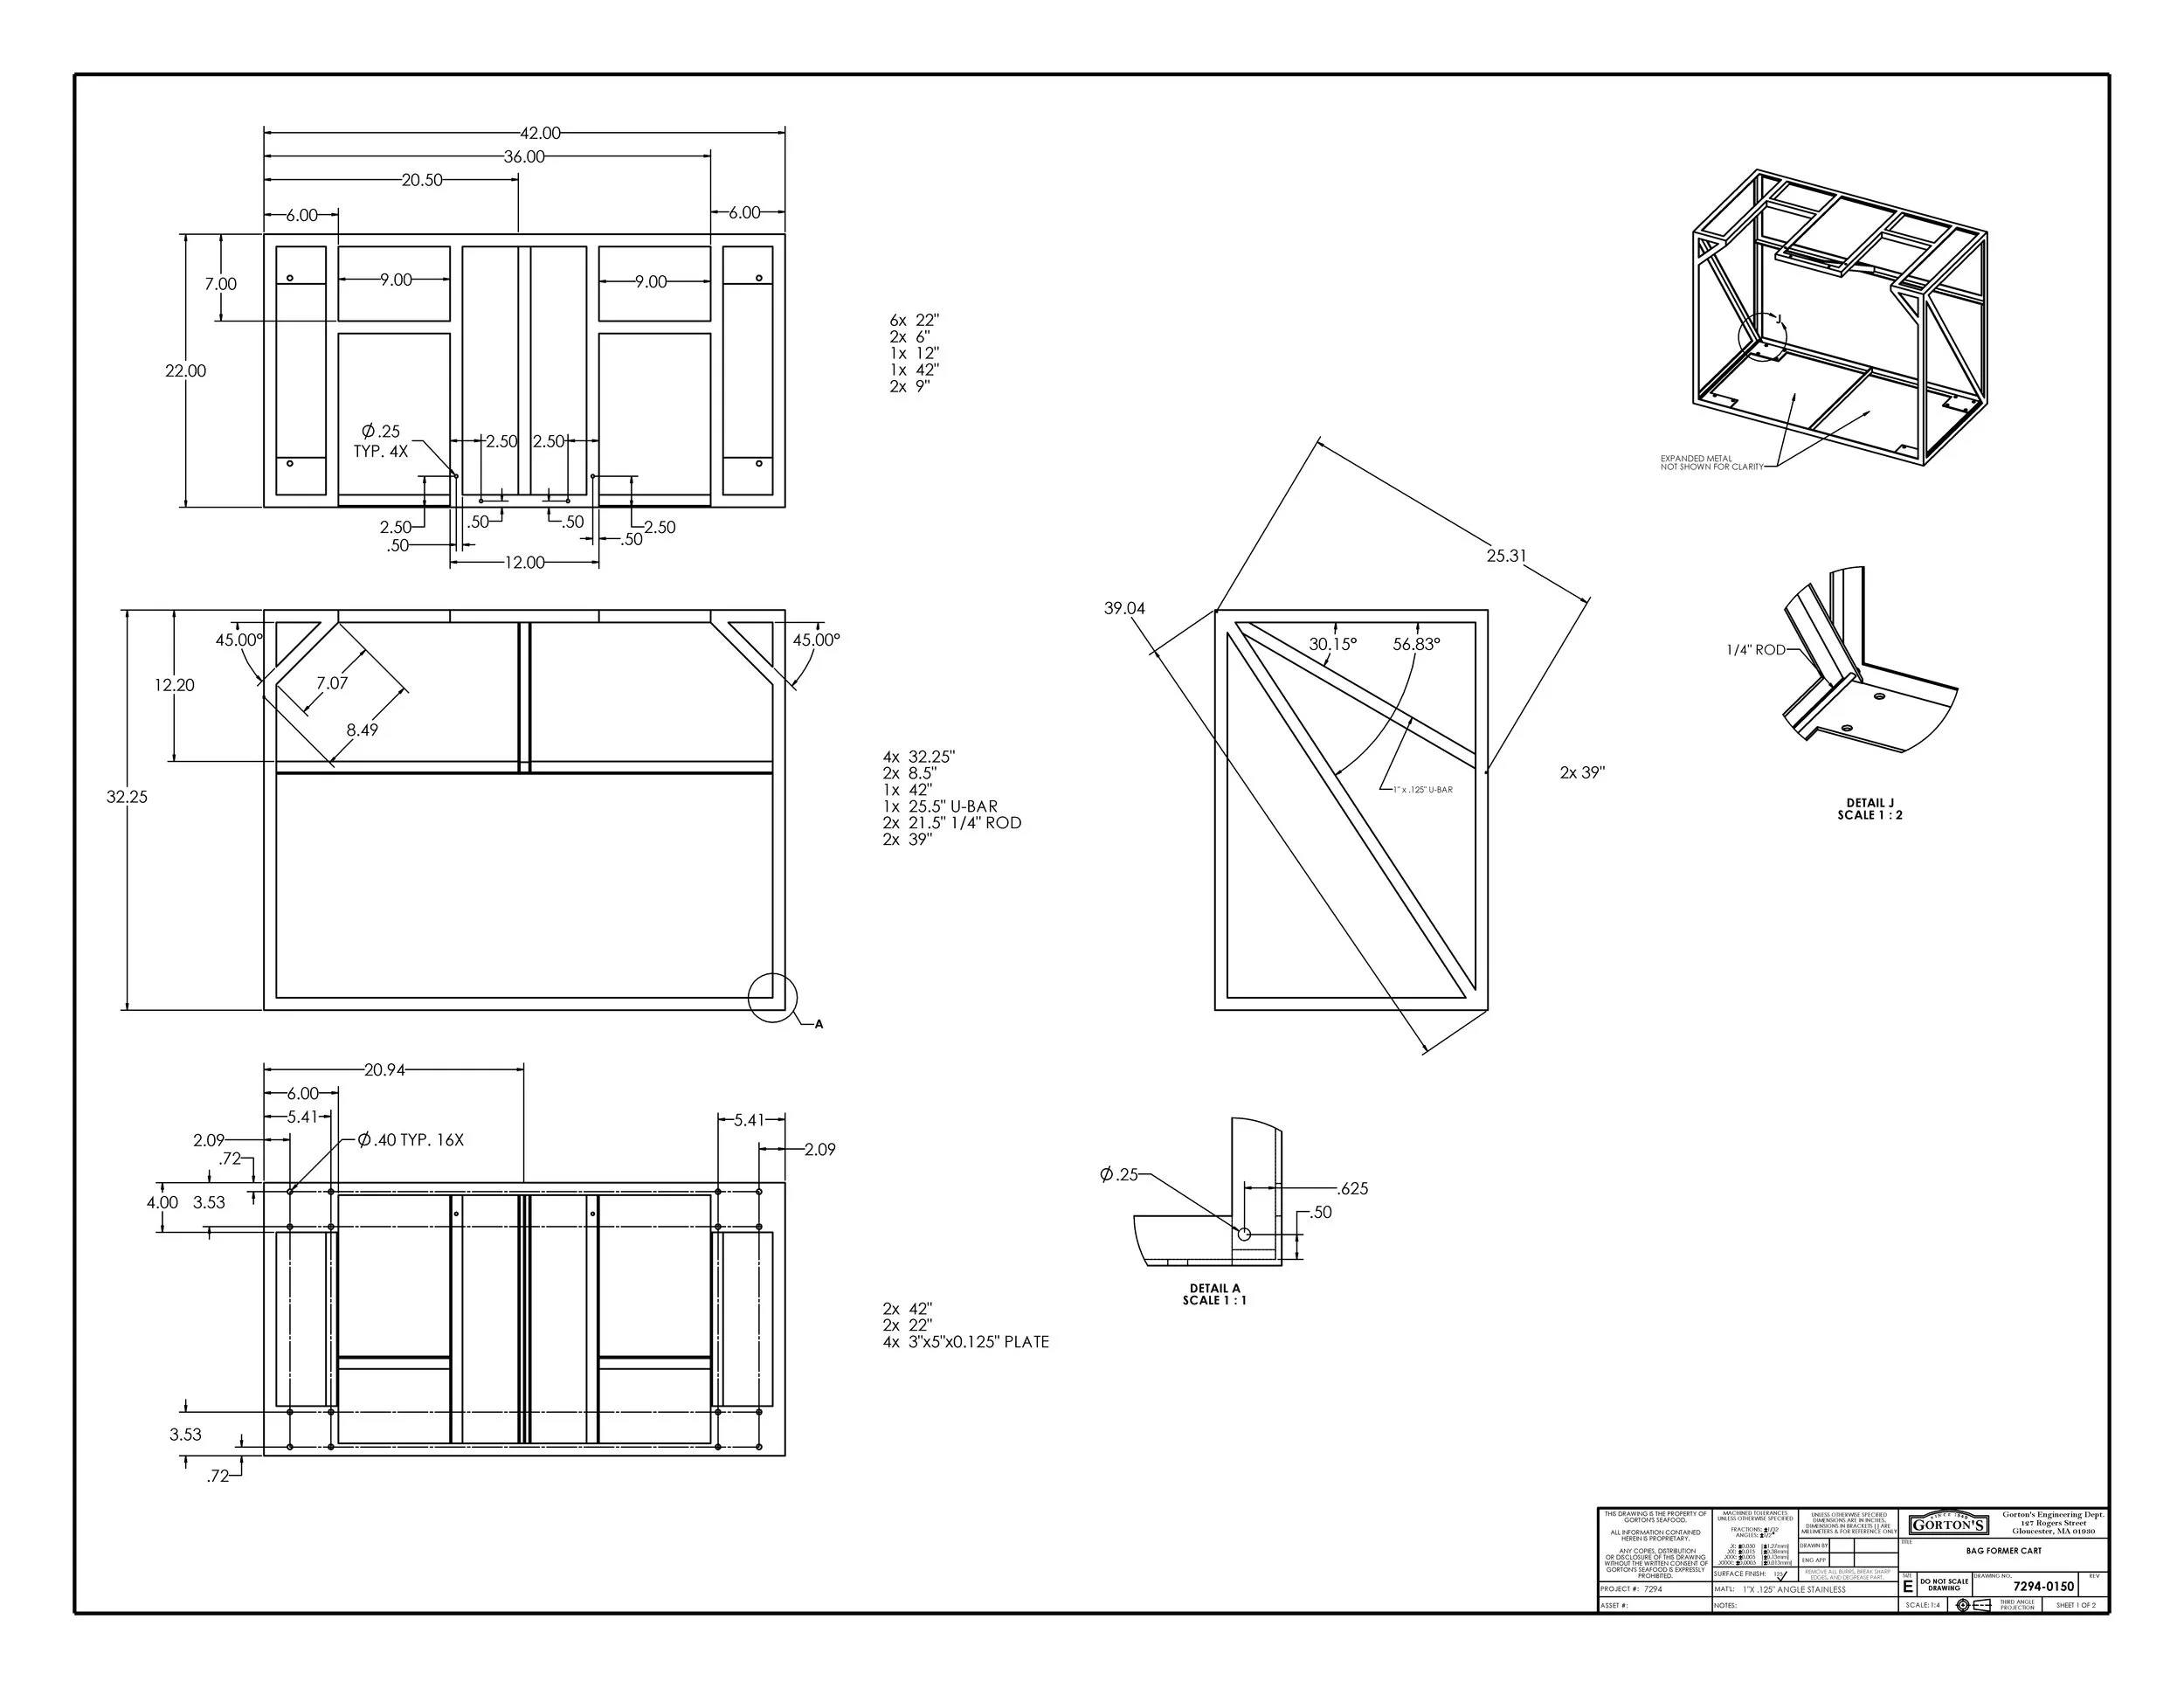
The two tubes and funnels in this picture are expensive and fragile, and we needed a way to store and transport them easily. I designed this cart to give technicians an easier time when dealing with these parts.
The cart had to be easy to use and roll to various locations, while protecting the expensive tubes from damage. The tube were also quite heavy, so the cart had to be strong enough to support their weight. With the addition of some supports and by using 1/8” angle iron, the cart was strong enough for this task.
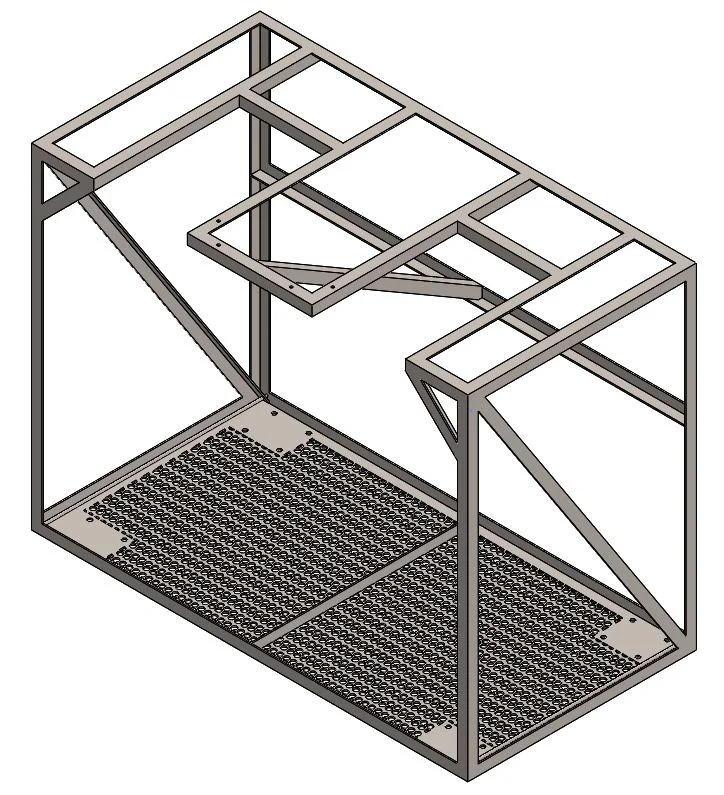
This is the design that I constructed using SolidWorks 2014
Click the image to download high resolution PDF of drawing.
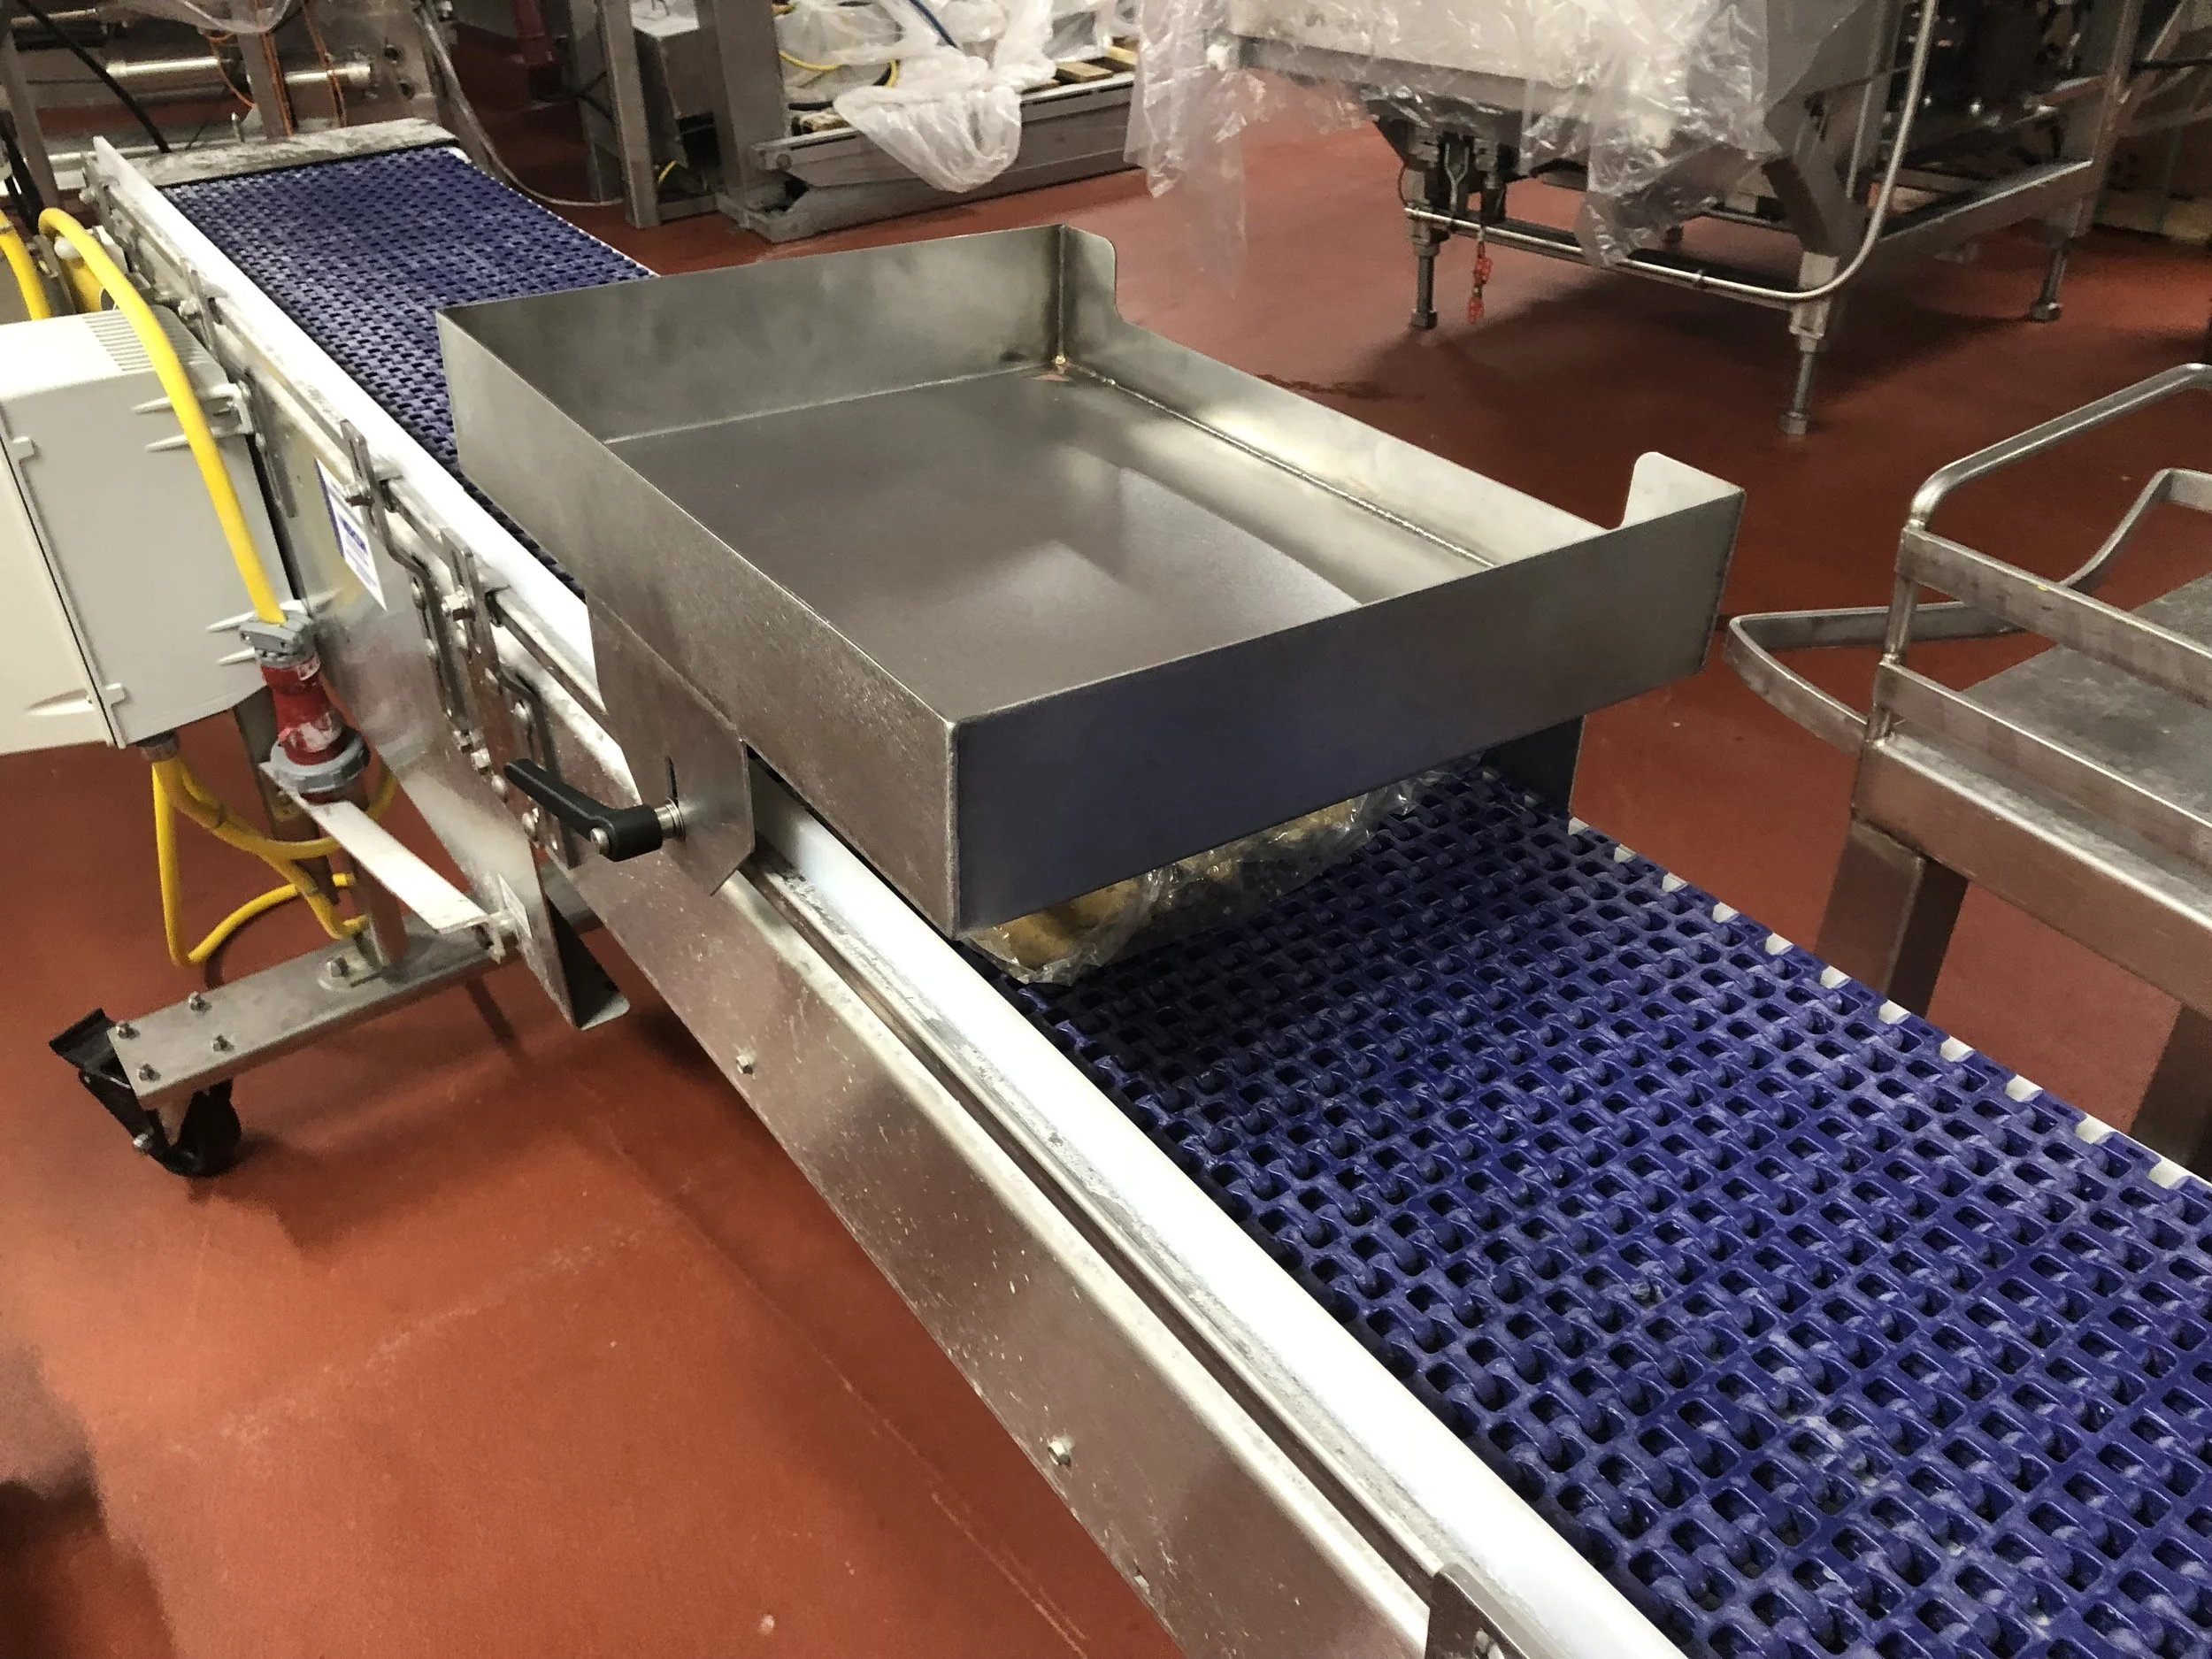
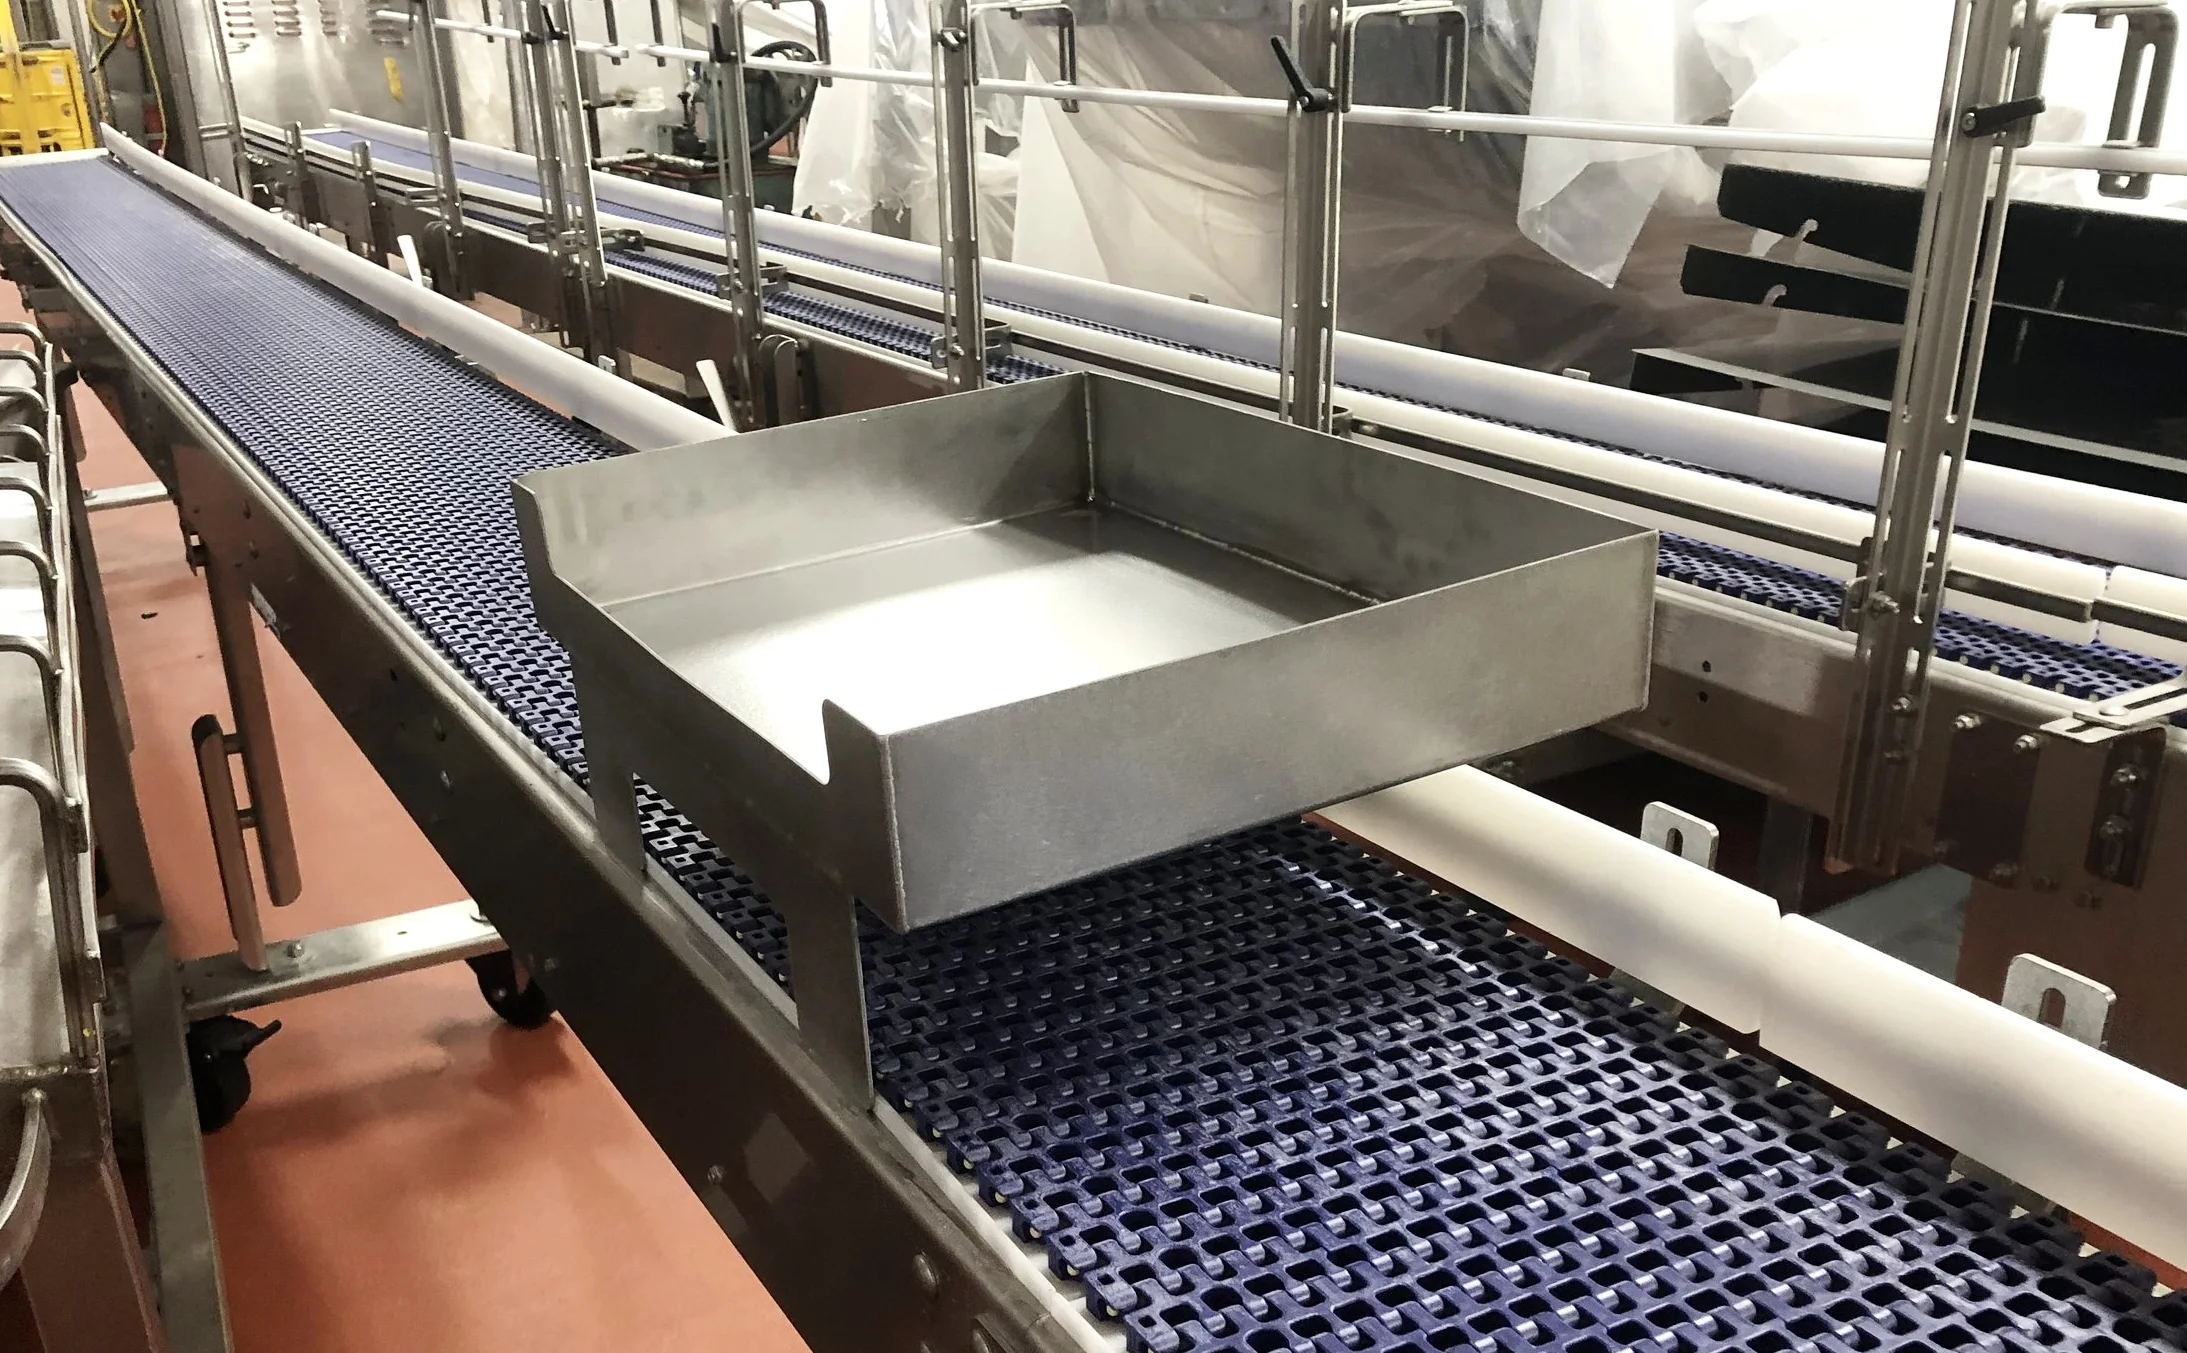
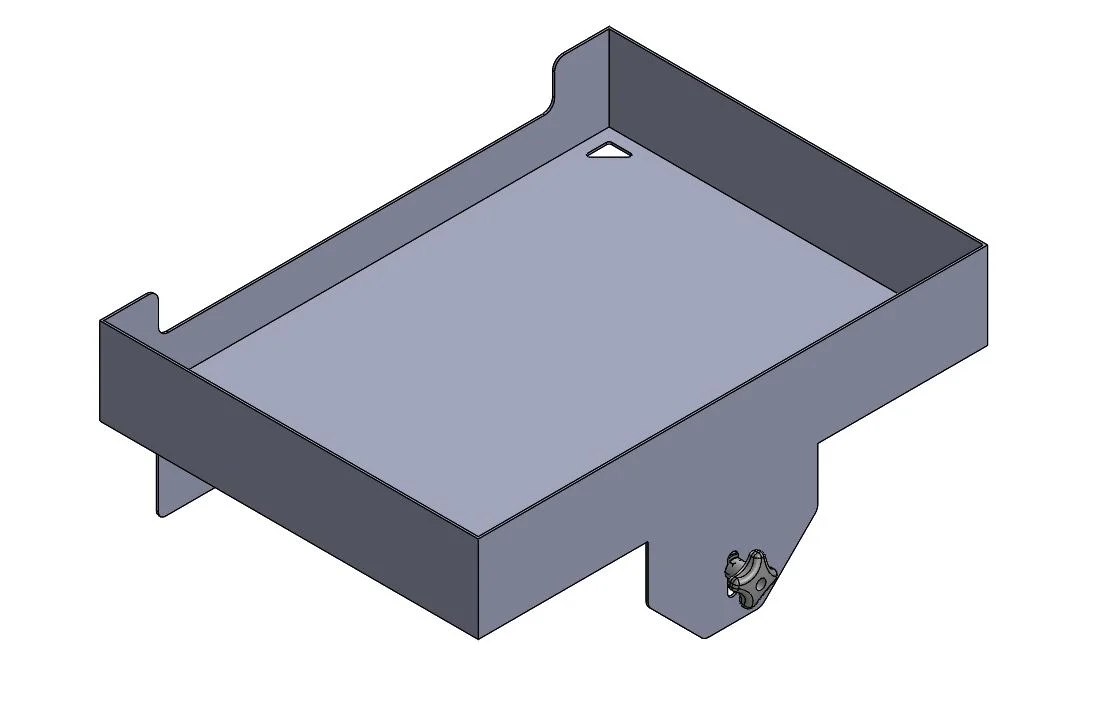
Production workers were finding that there was no ergonomic way to add sauce packets and coupons into boxes. I designed this tray to be placed on top of the conveyor belt that also allows bags of product to flow underneath. The tray needed to be adjustable, so that production workers could change the angle to their preference, and it had to be washdown-ready in case a sauce packet broke on it.
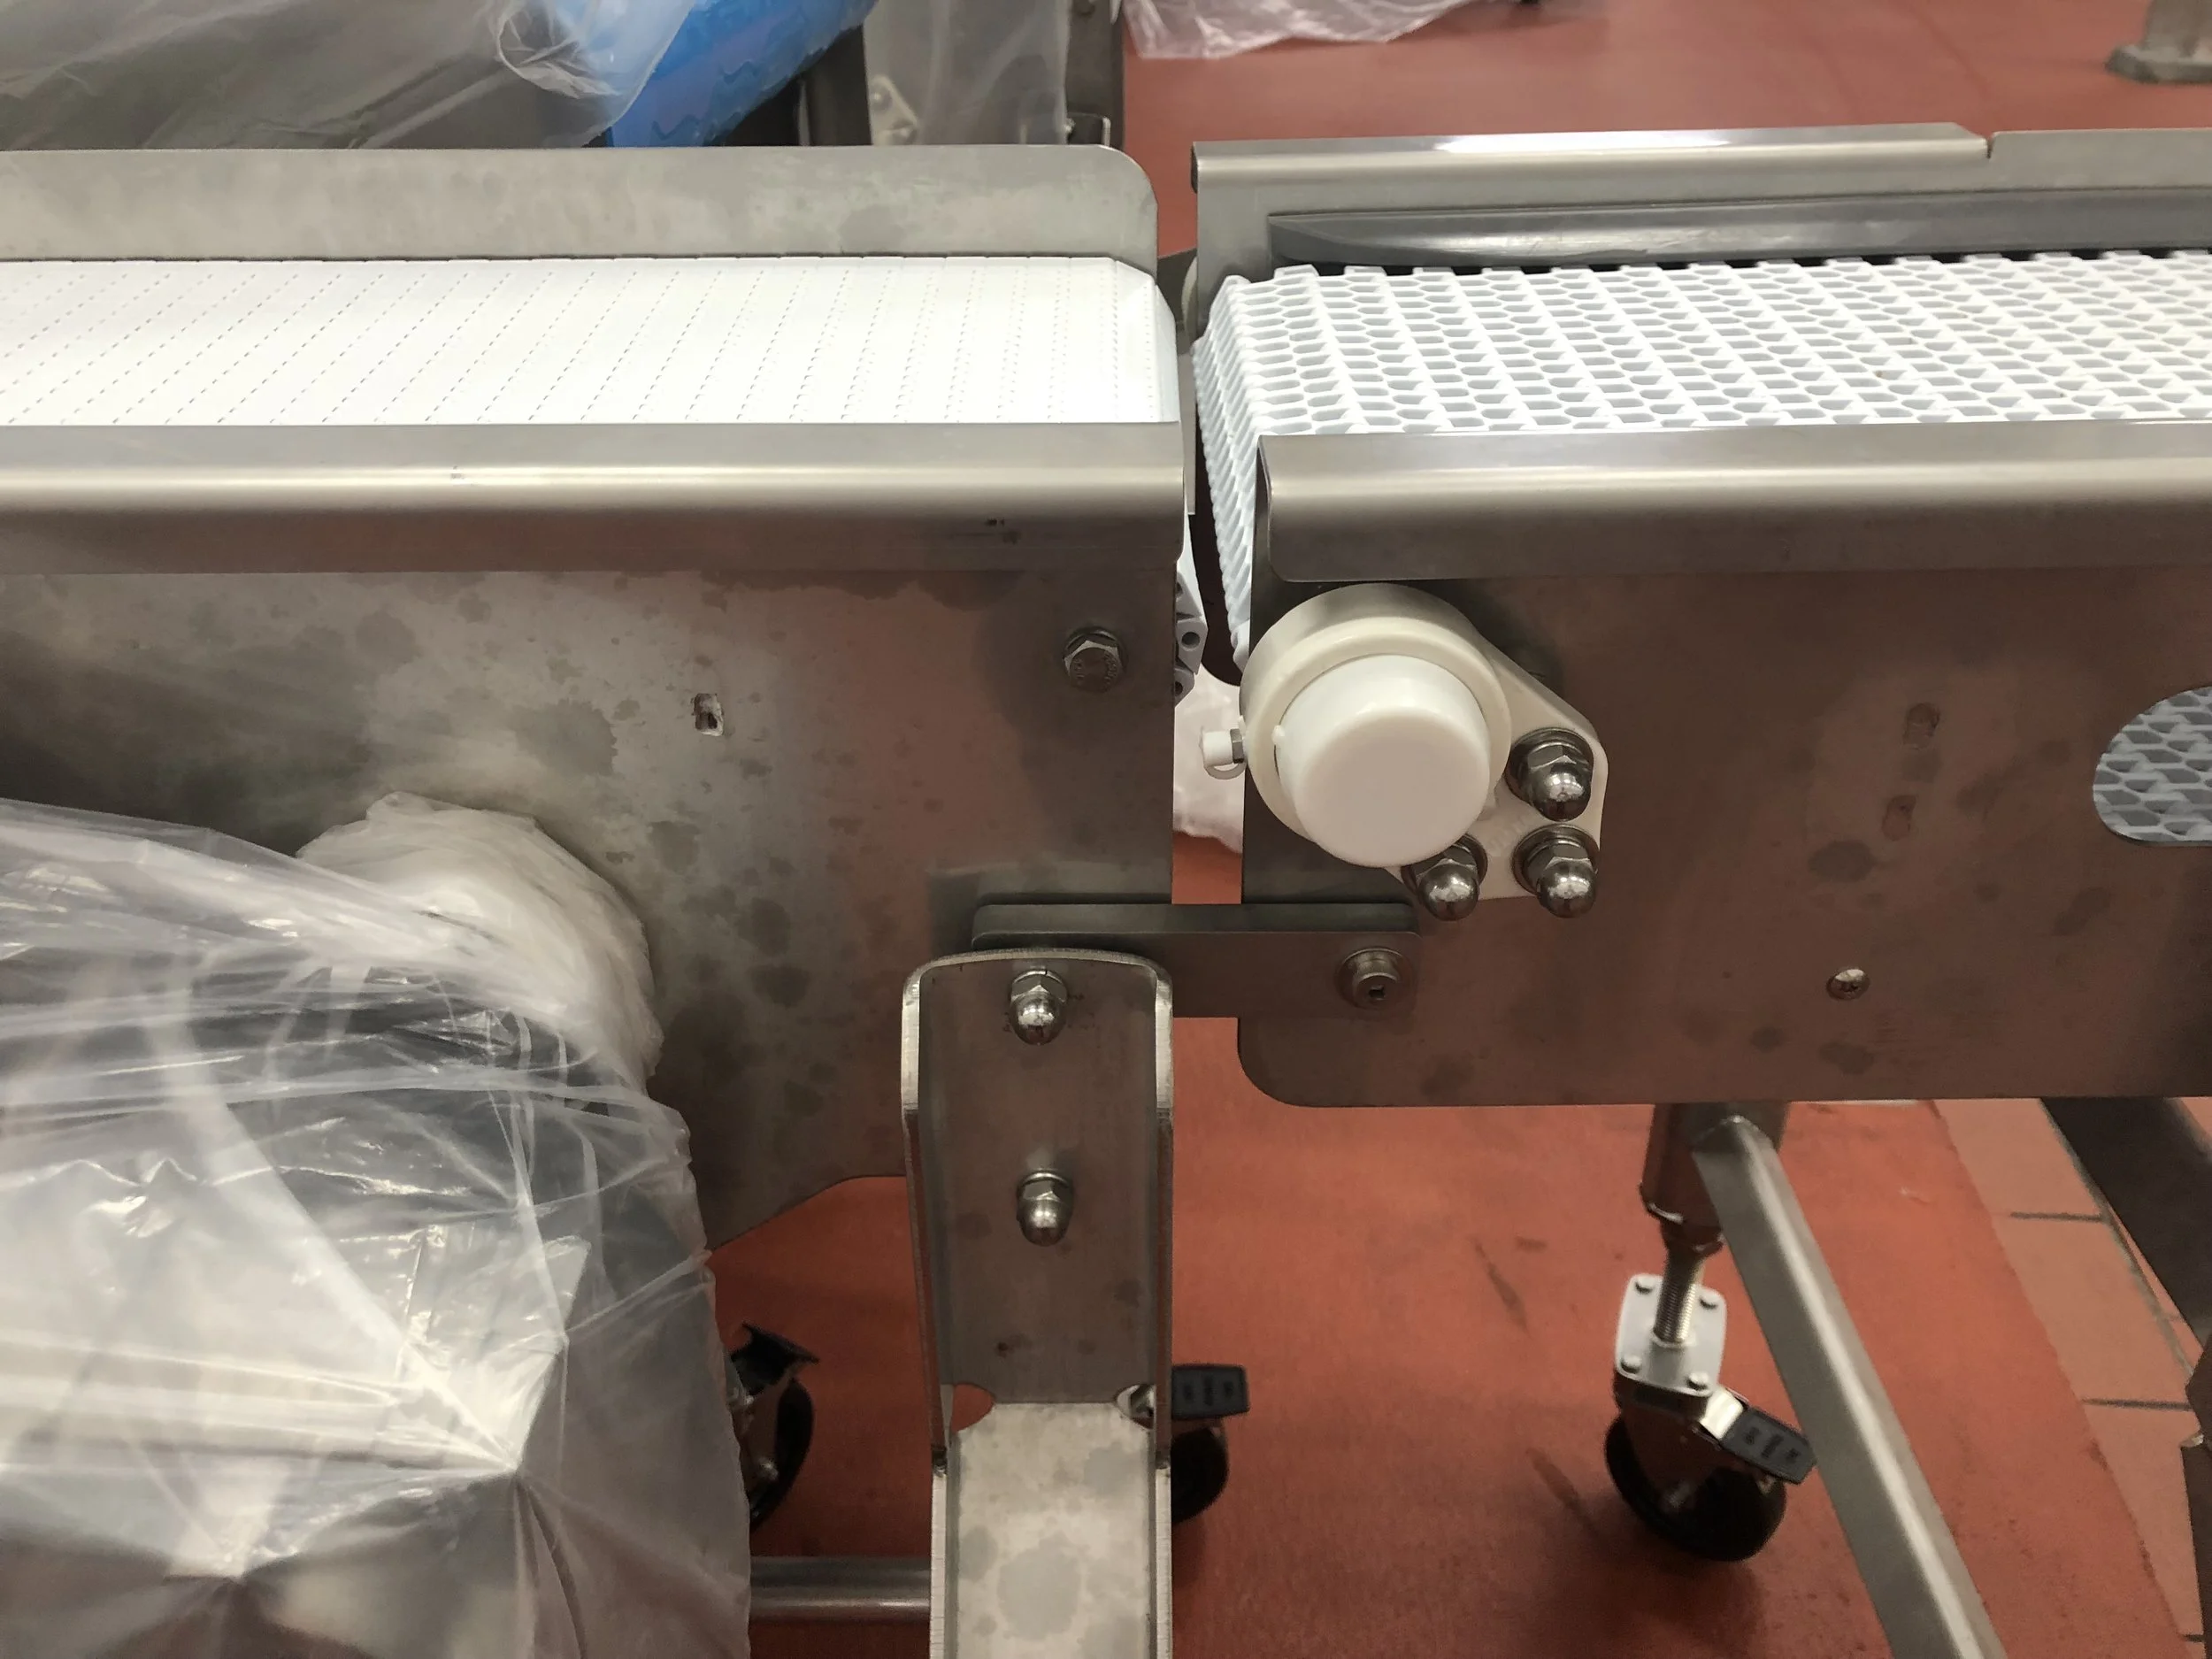
I designed the device in this picture that connects the two conveyors. The goal of this design was simplicity. We wanted to be able to lock and unlock the conveyors to and from one another, quickly and securely, without using any tools.
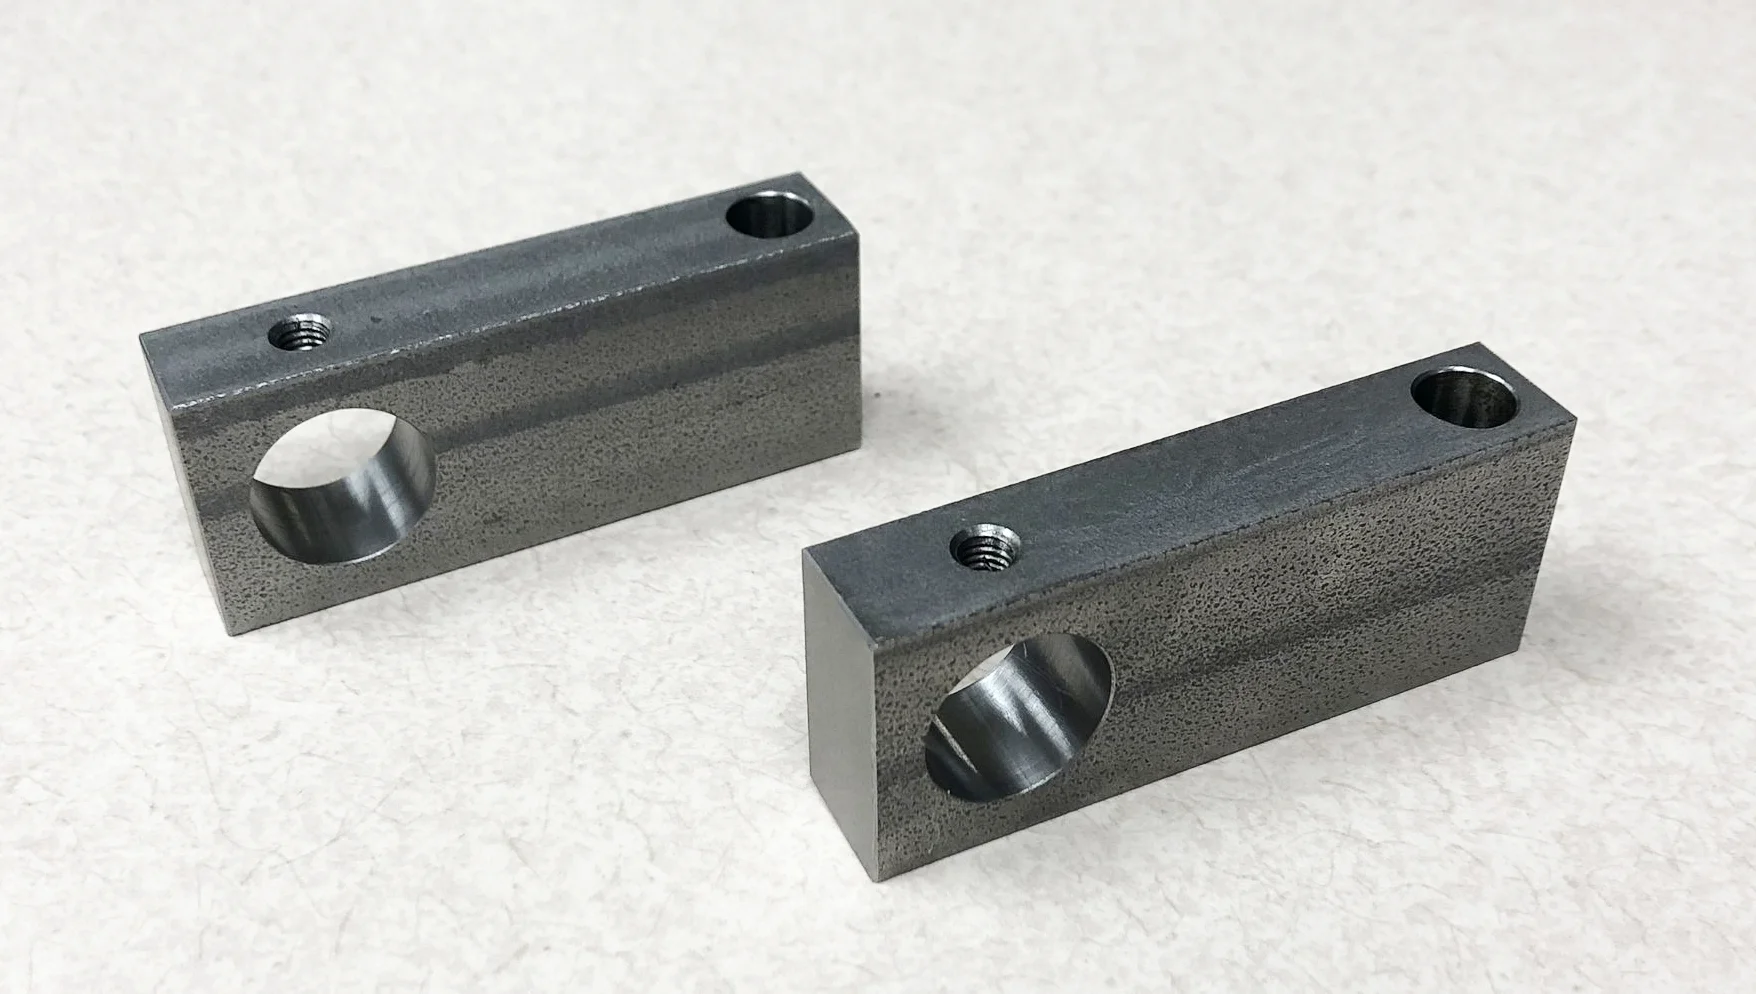
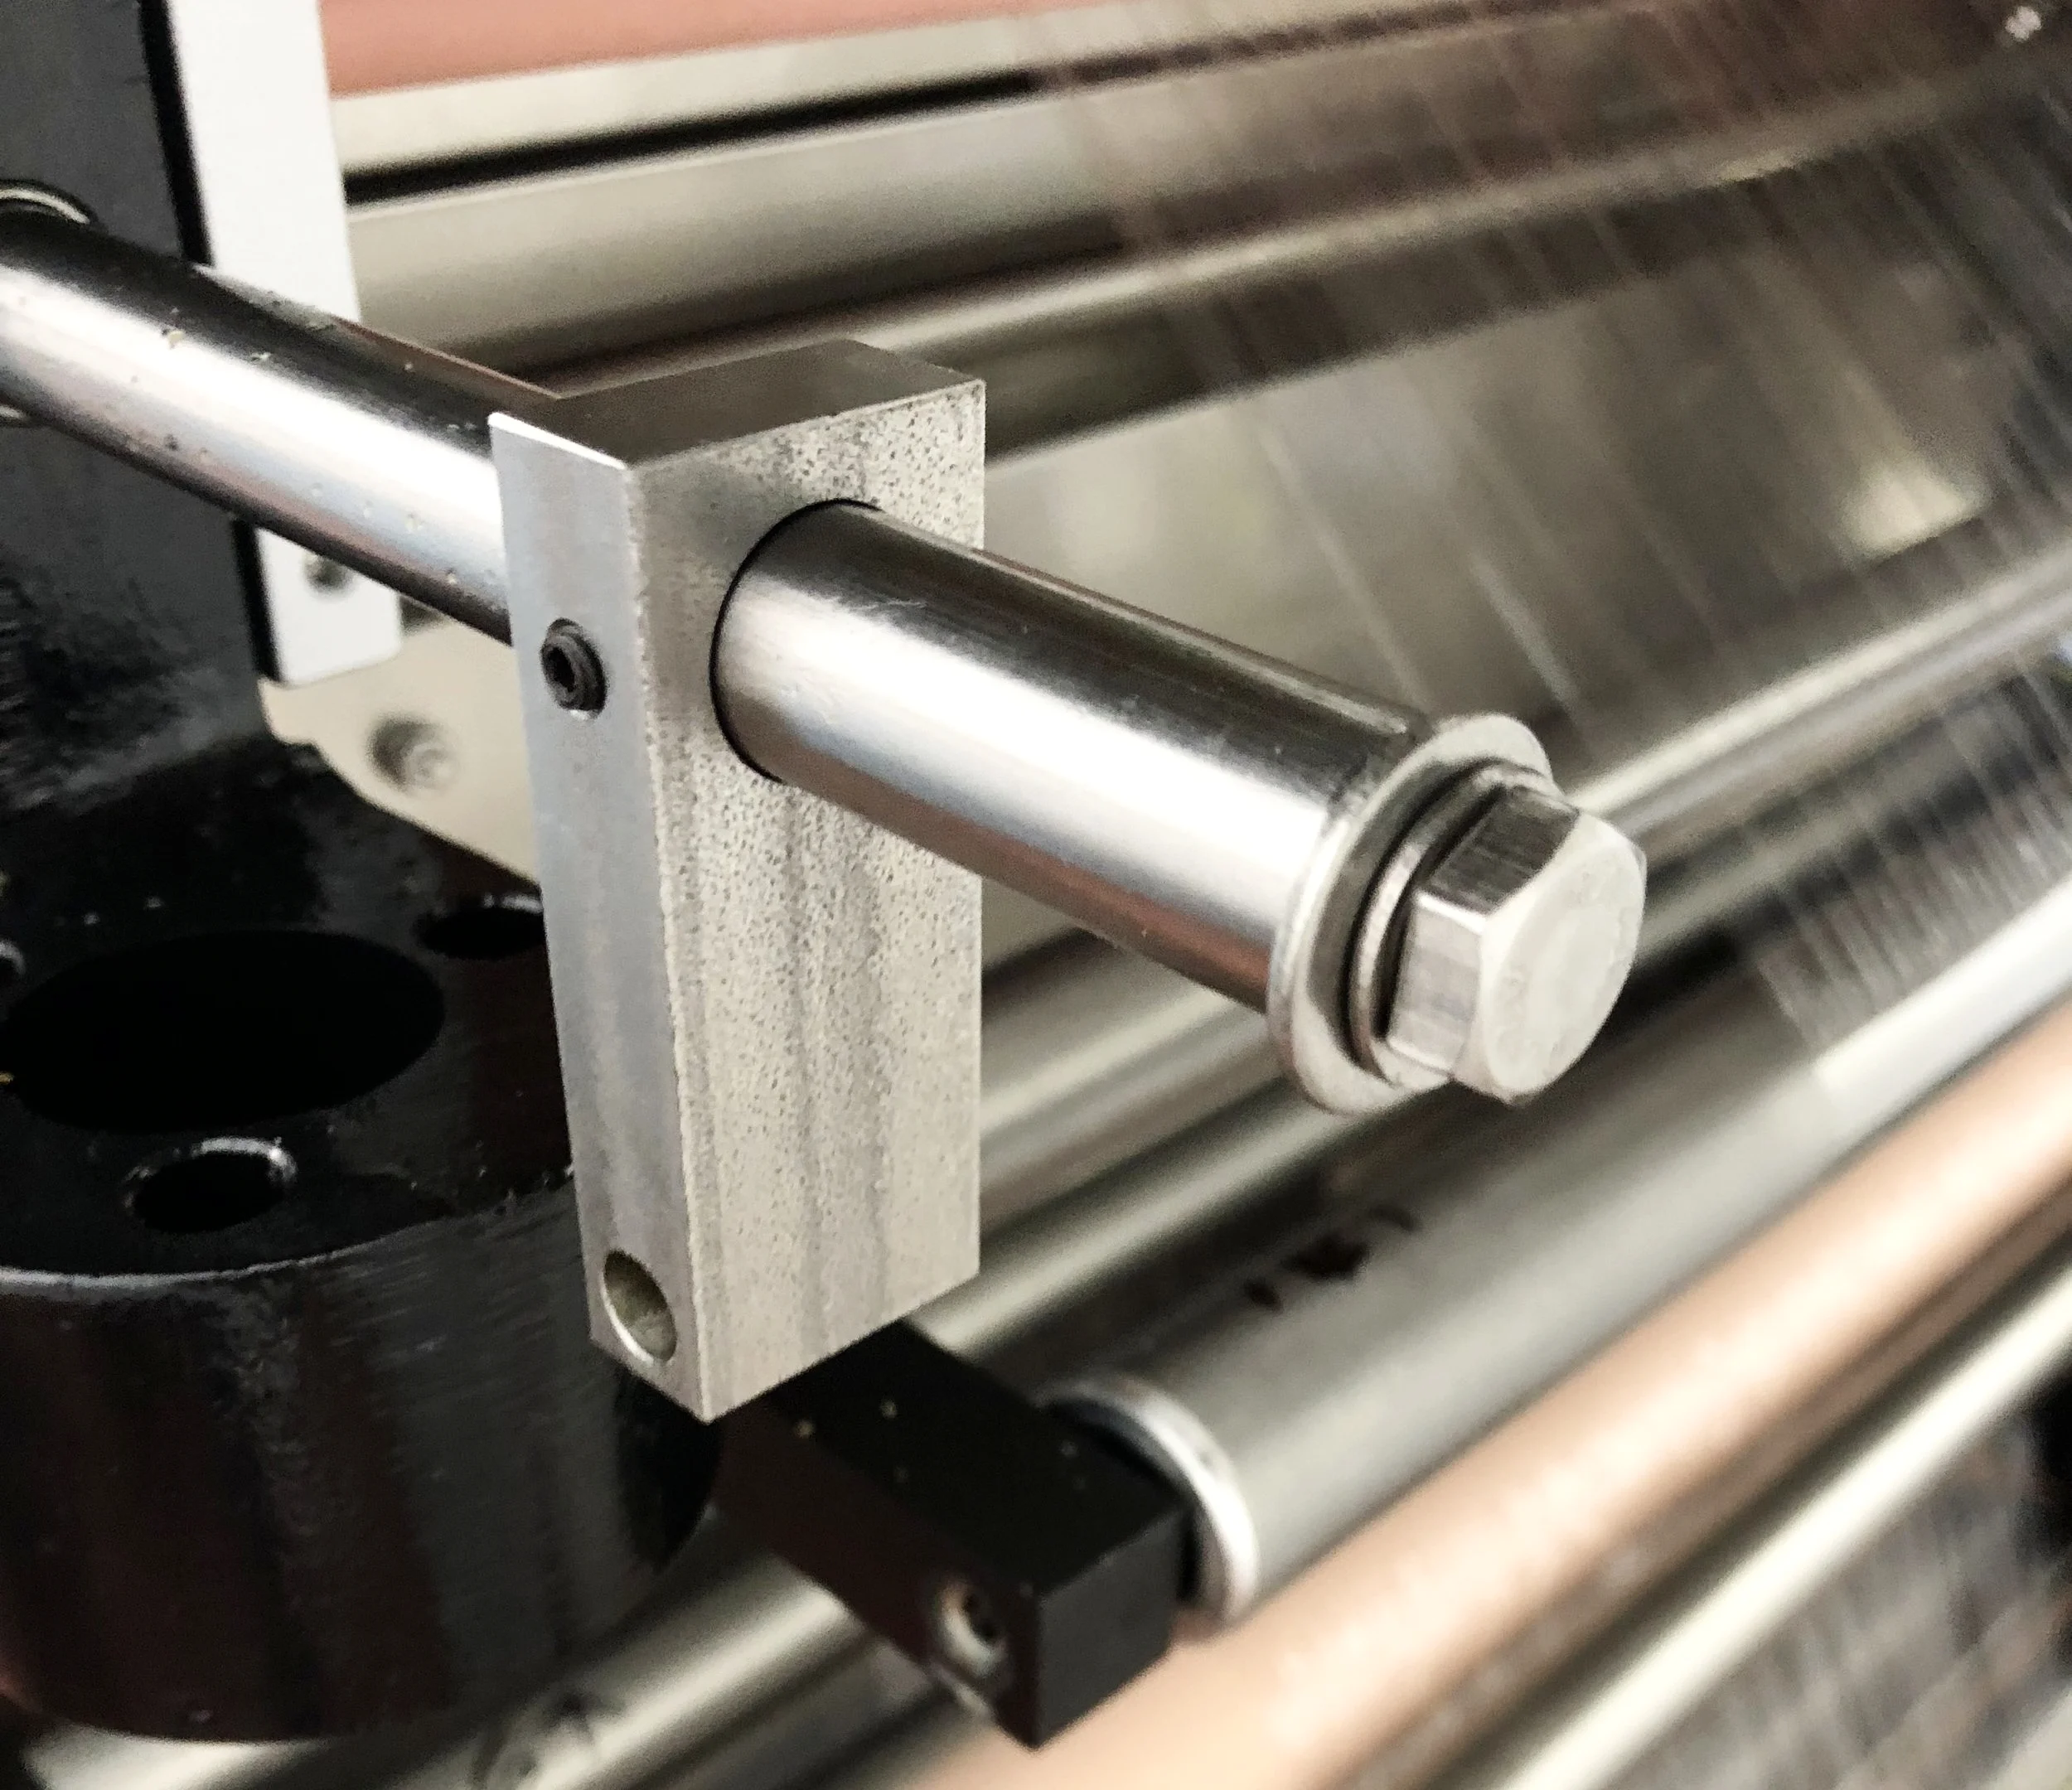
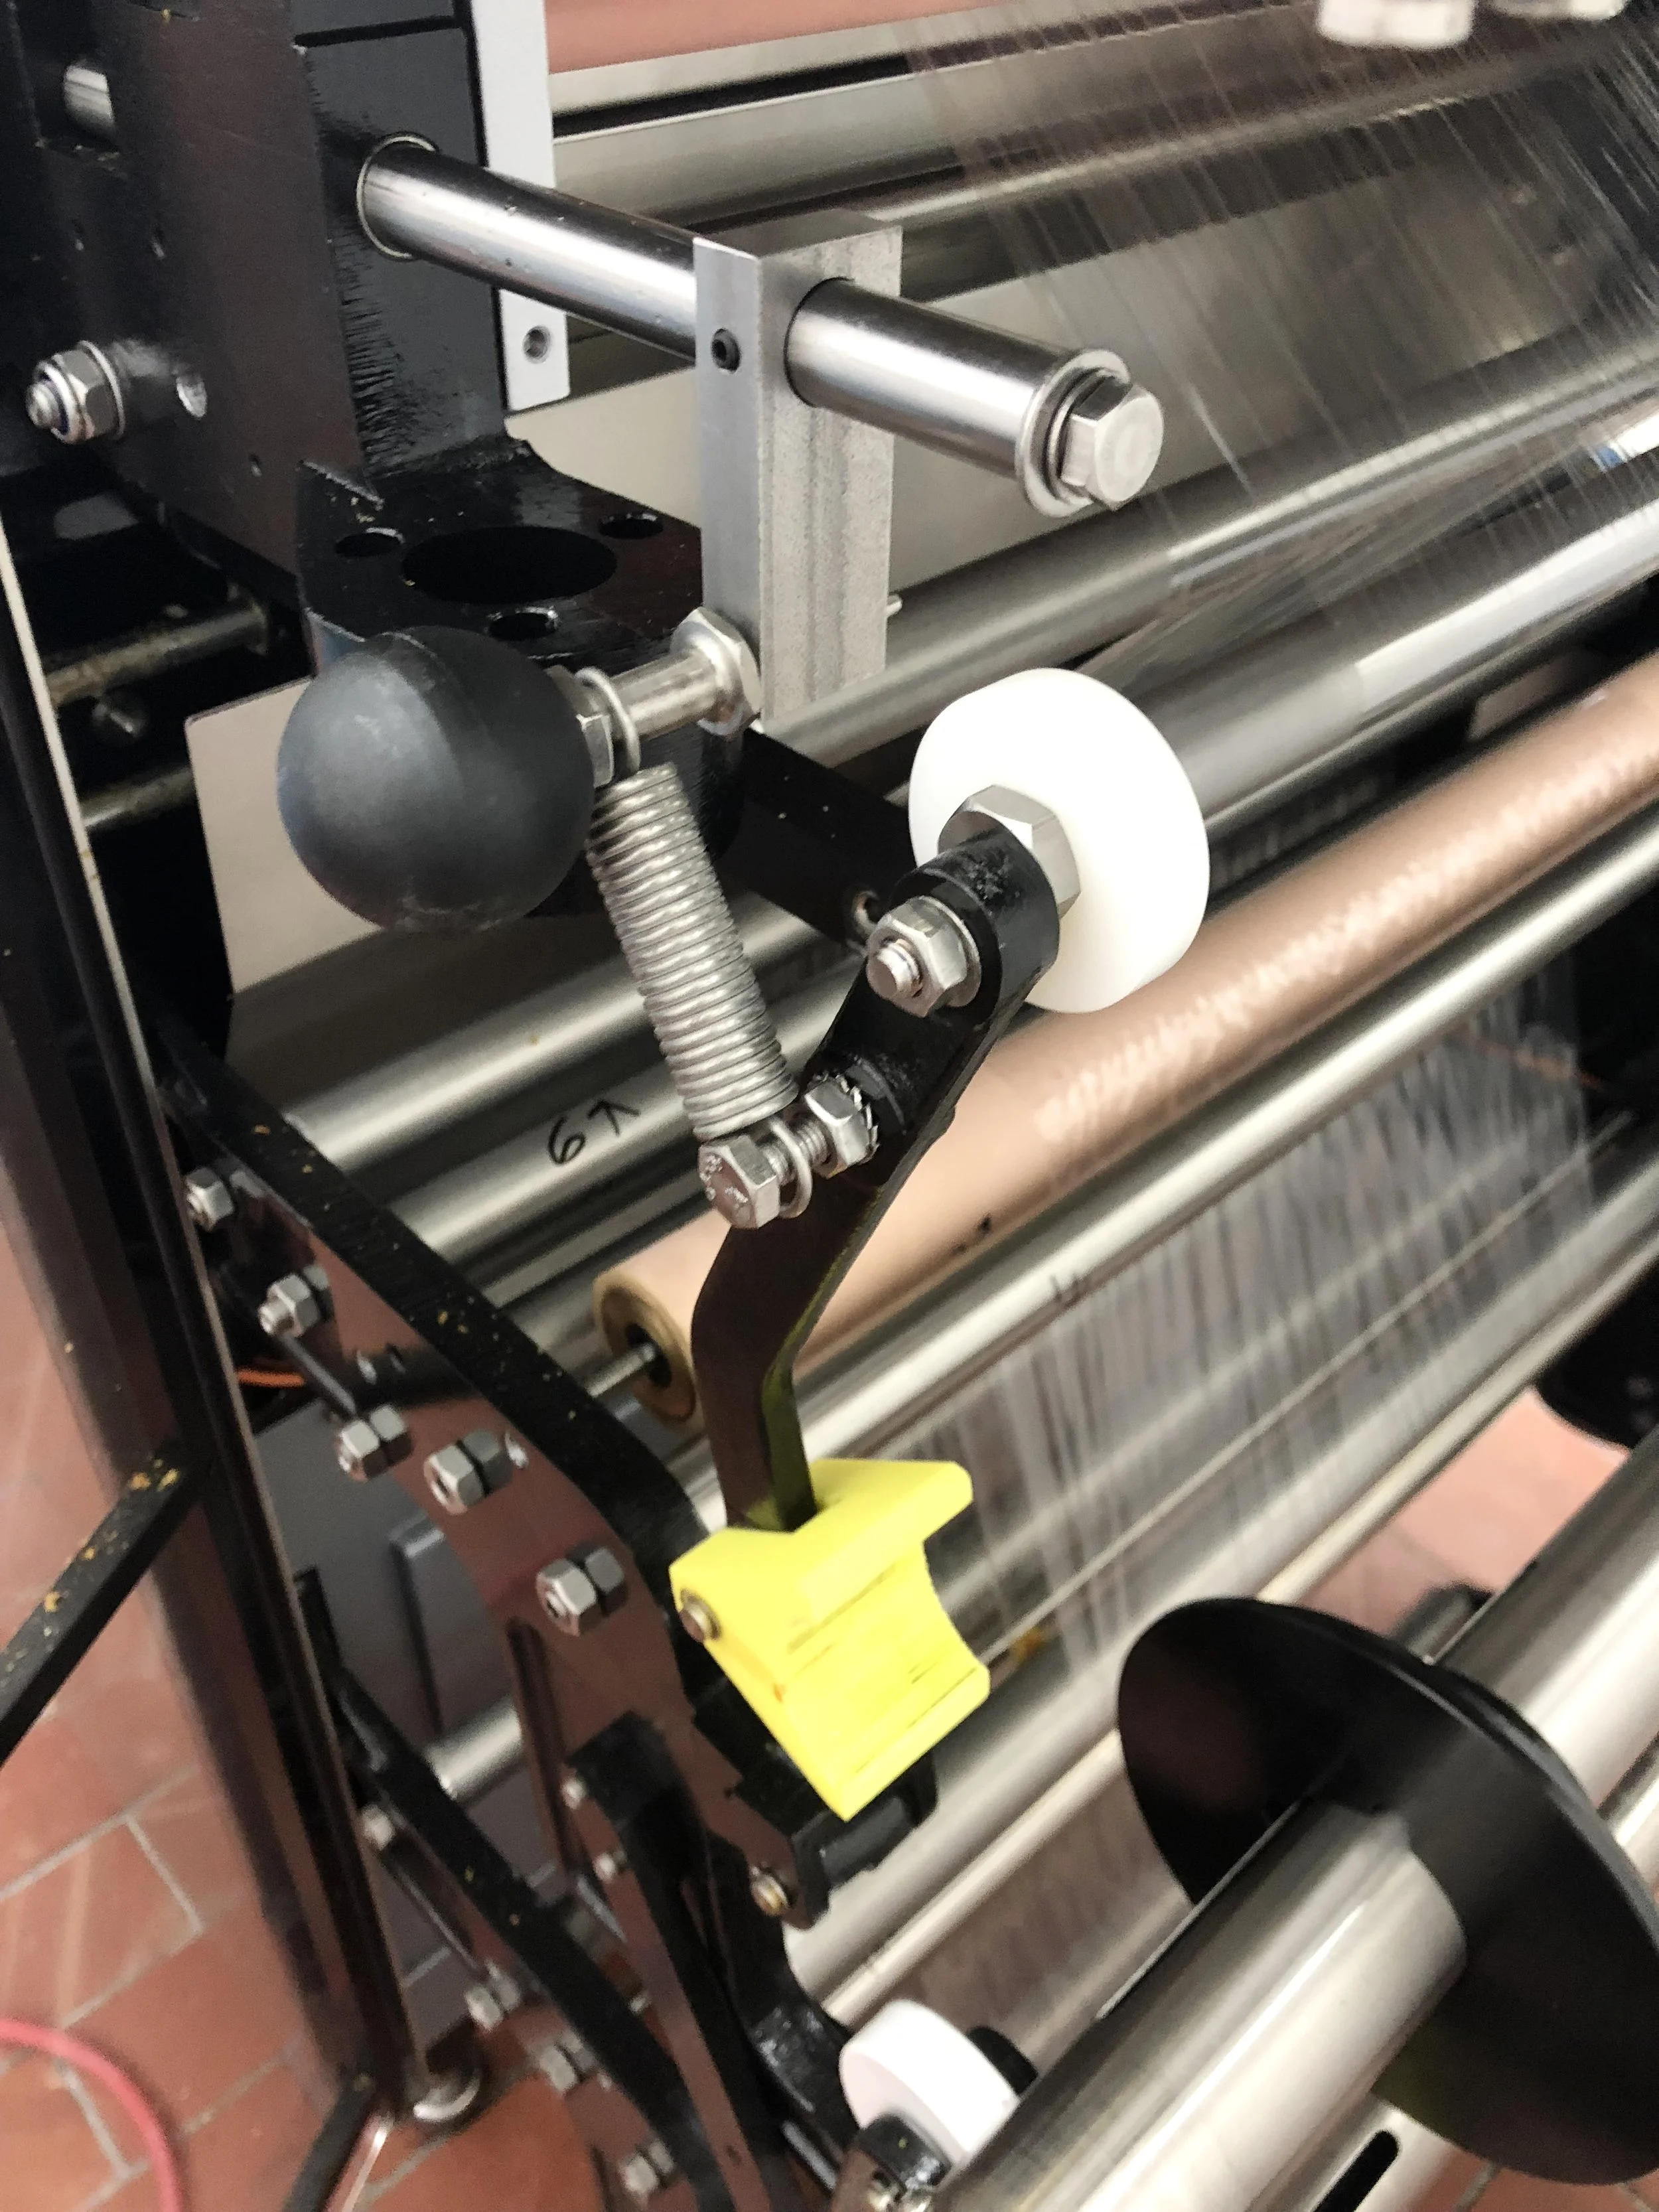
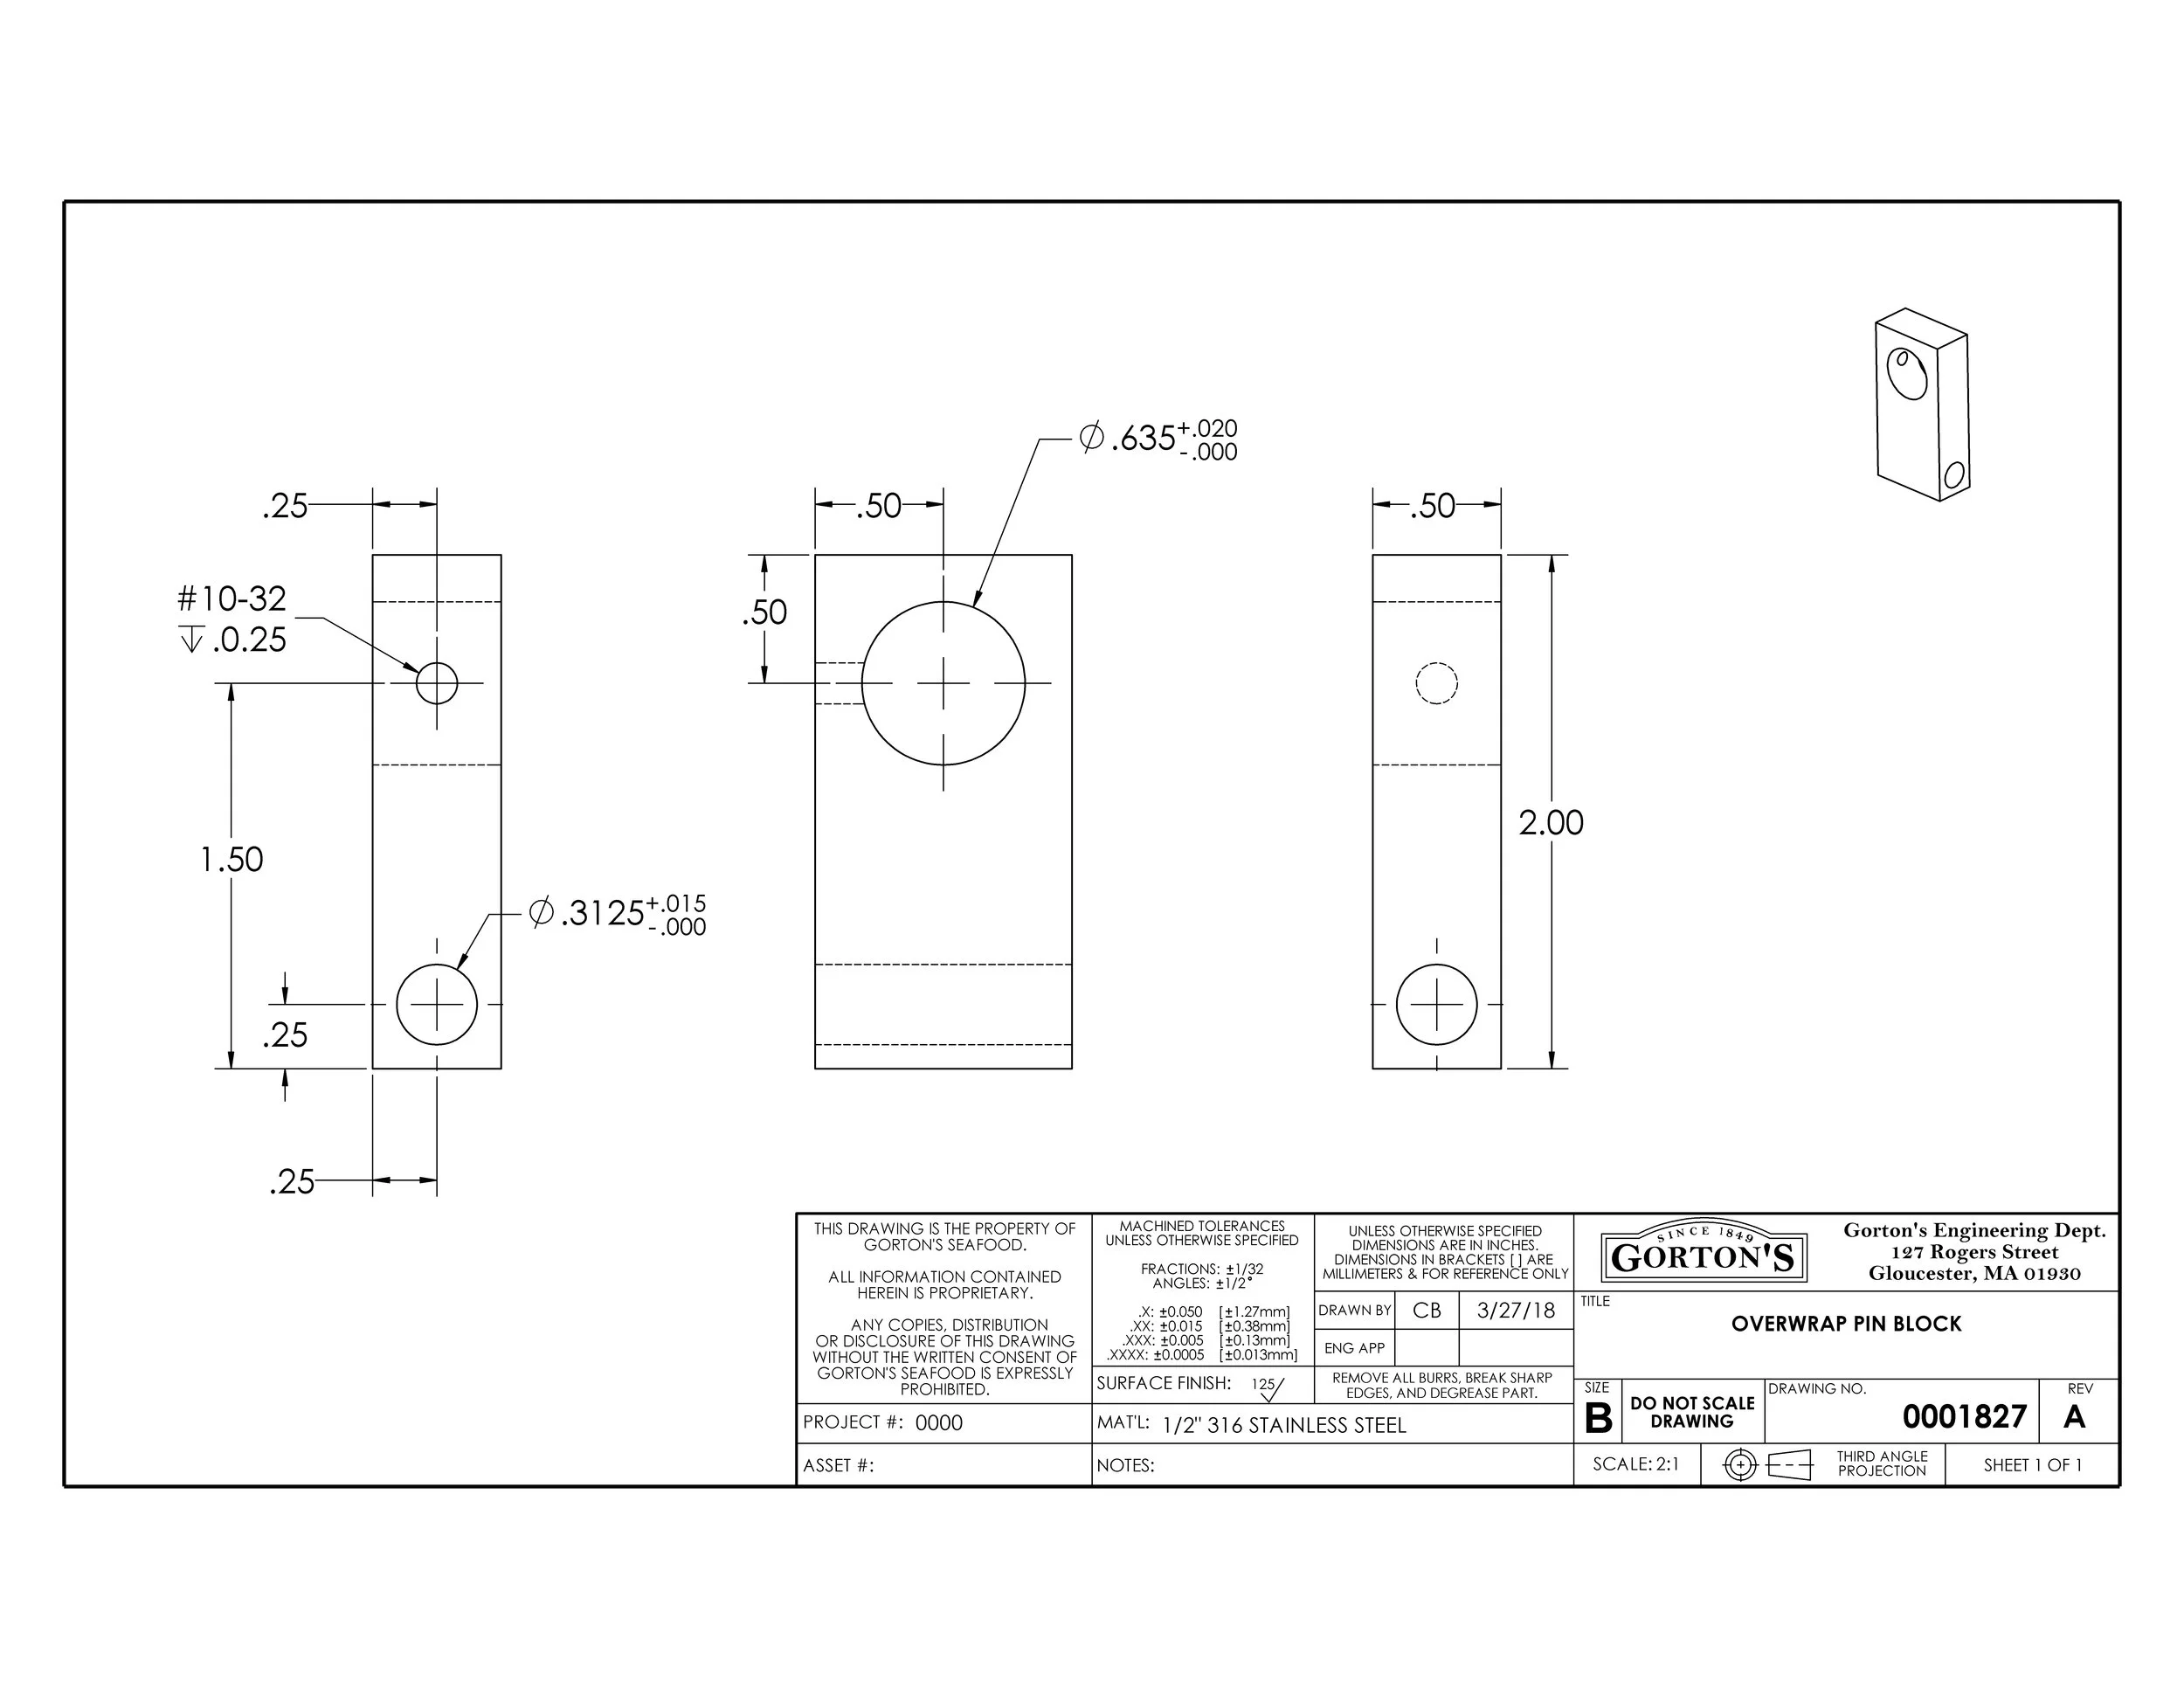
Floor technicians were complaining that it was difficult to install new rolls of film in this overwrap machine, since they needed to hold the retaining arm up while trying to lift a heavy roll of film. I designed these small blocks, which you can see installed in the next two pictures, in order to hold those arms up while technicians could safely and efficiently replace the rolls of film.
We wanted a simple, semi-permanent solution that could handle everyday use. The horizontal rod was already part of the machine, so I decided to integrate this block onto that rod using a small set screw. This allowed for easy installation and removal if needed, but was strong enough to hold onto the smooth rod without rotating.
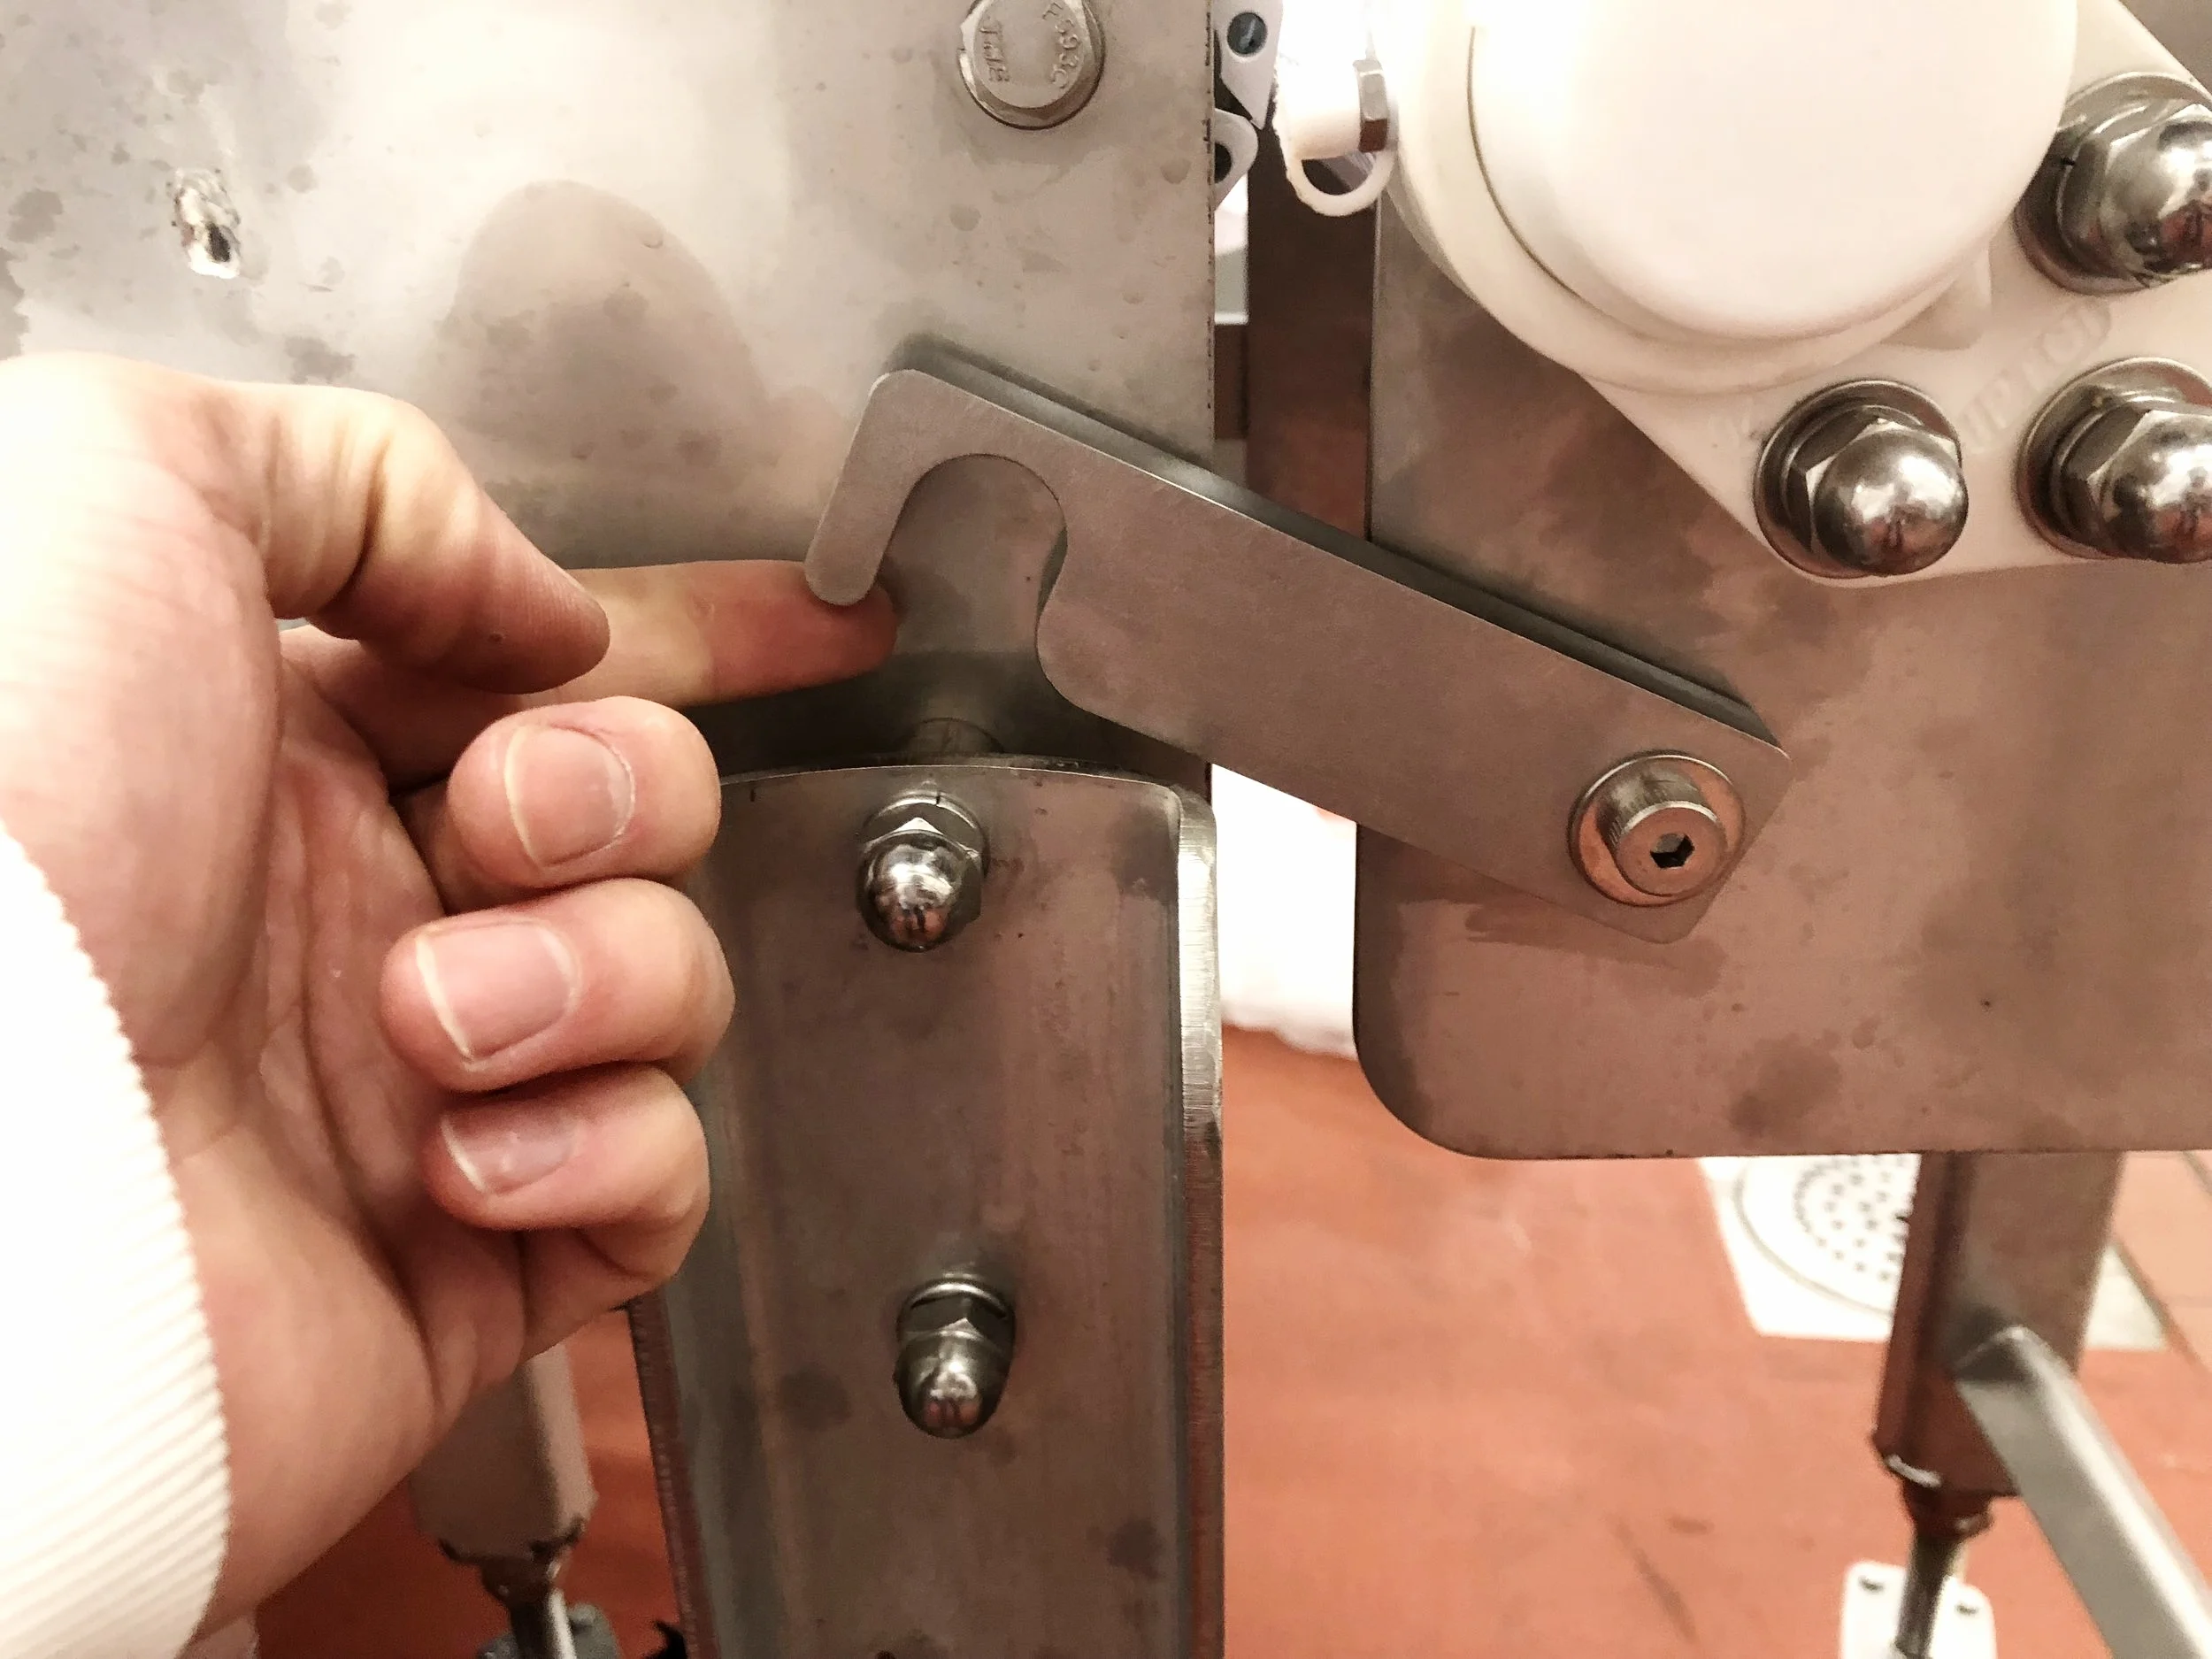
This is the pin block in action. The arm being held up is in the way of the technicians when they are replacing film rolls, but the pin block effectively holds the arm out of their way.
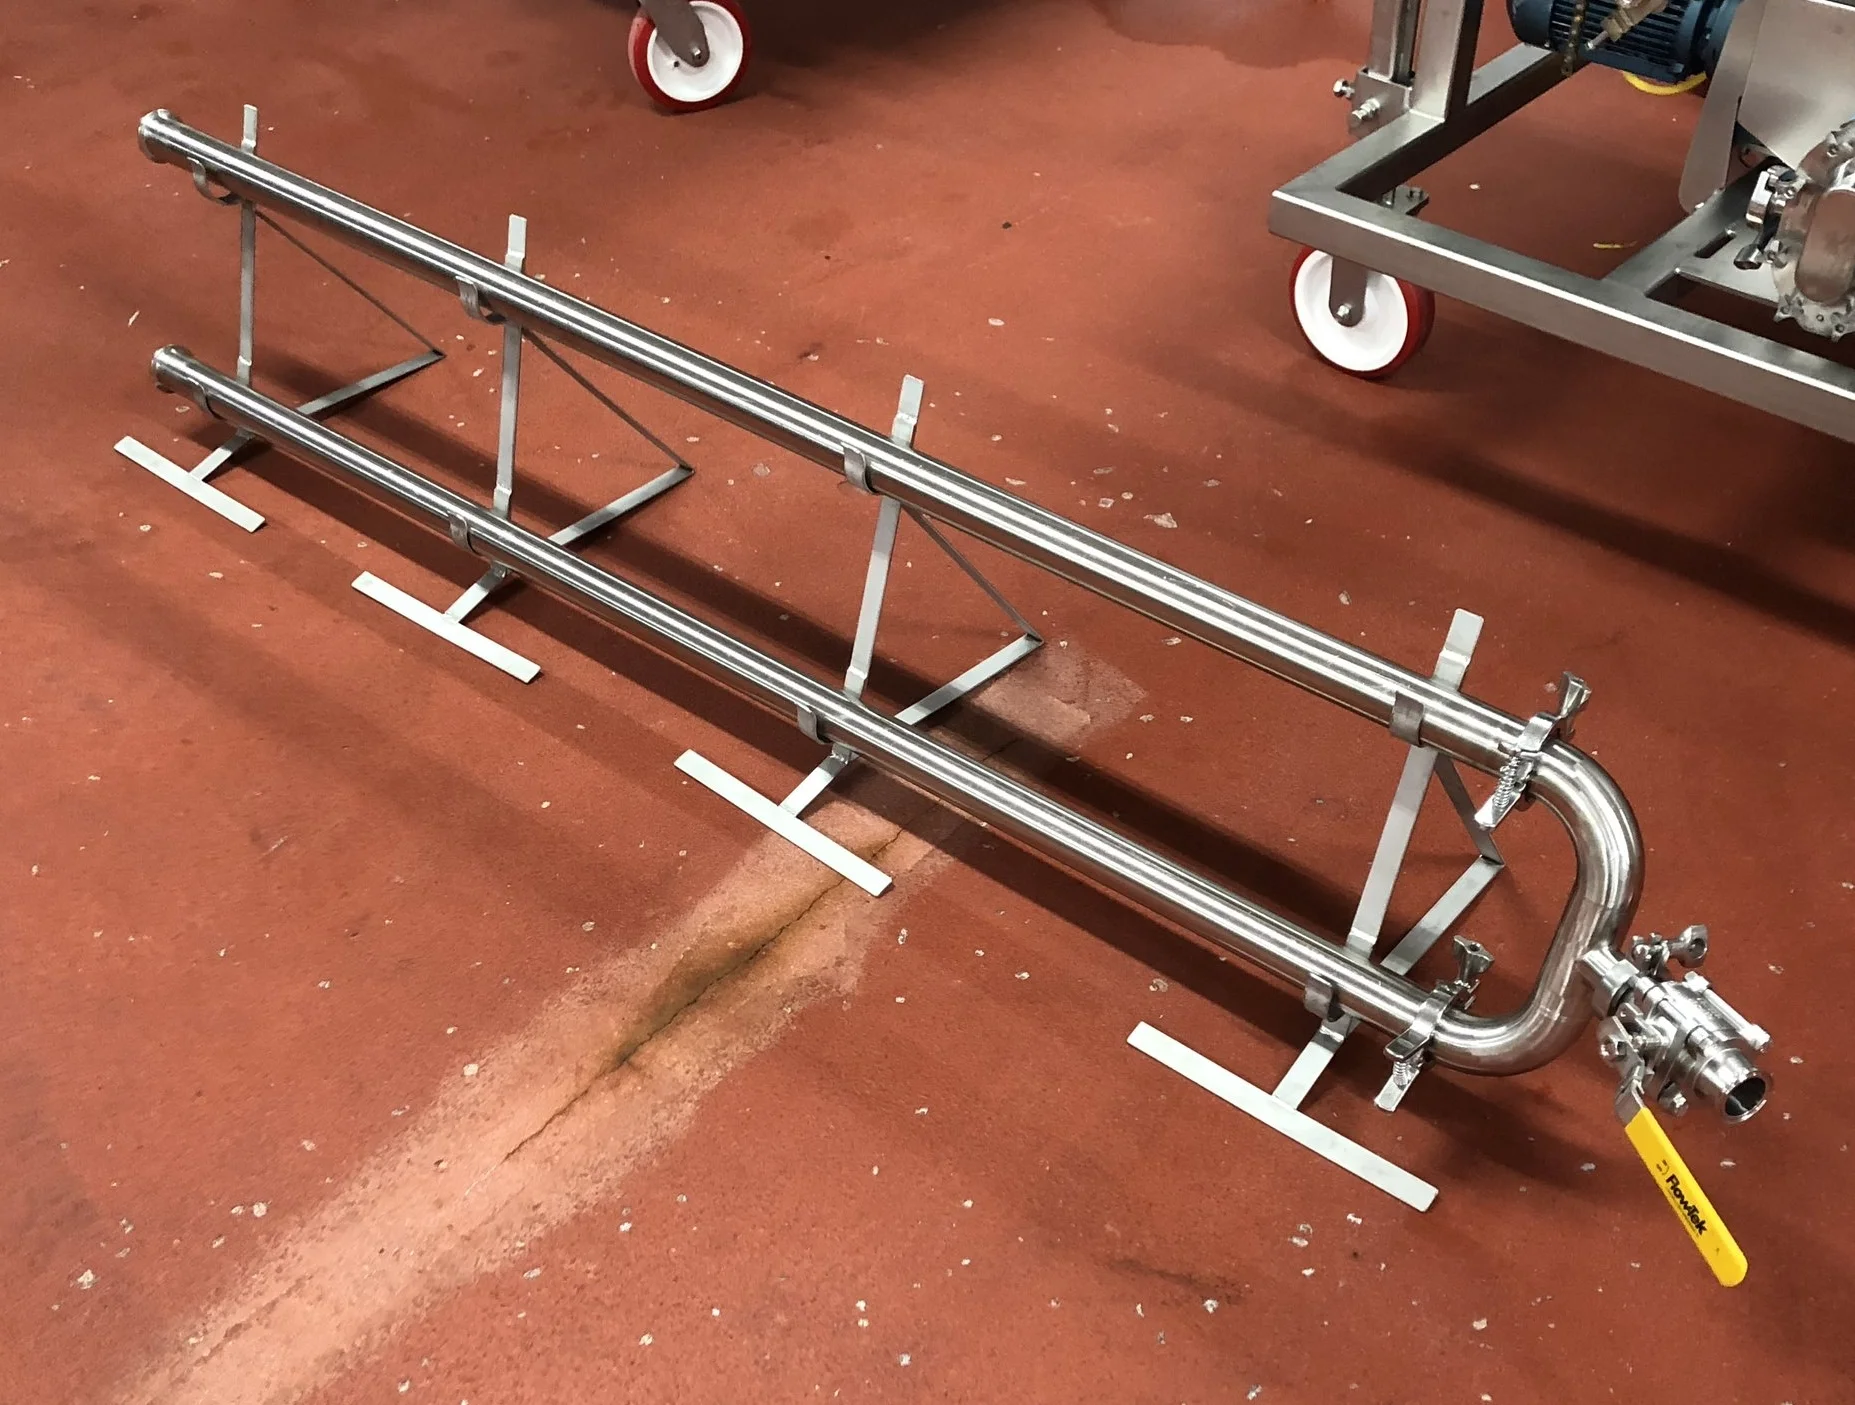
Production workers and sanitation teams needed a permanent solution to keep the batter piping horseshoe off of the ground. Originally, it hung from pipes or valves, which was disorganized and raised hygiene concerns. The feet I designed effectively held the batter piping off the ground and offered a durable, inexpensive, and sanitary solution to this problem.
We needed to funnel bulk fish into bulk boxes for storage. When we ran this line to cook fish, but not immediately package it, this chute was critical. It is simple to install and clean, and it effectively funneled fish into the bulk boxes.
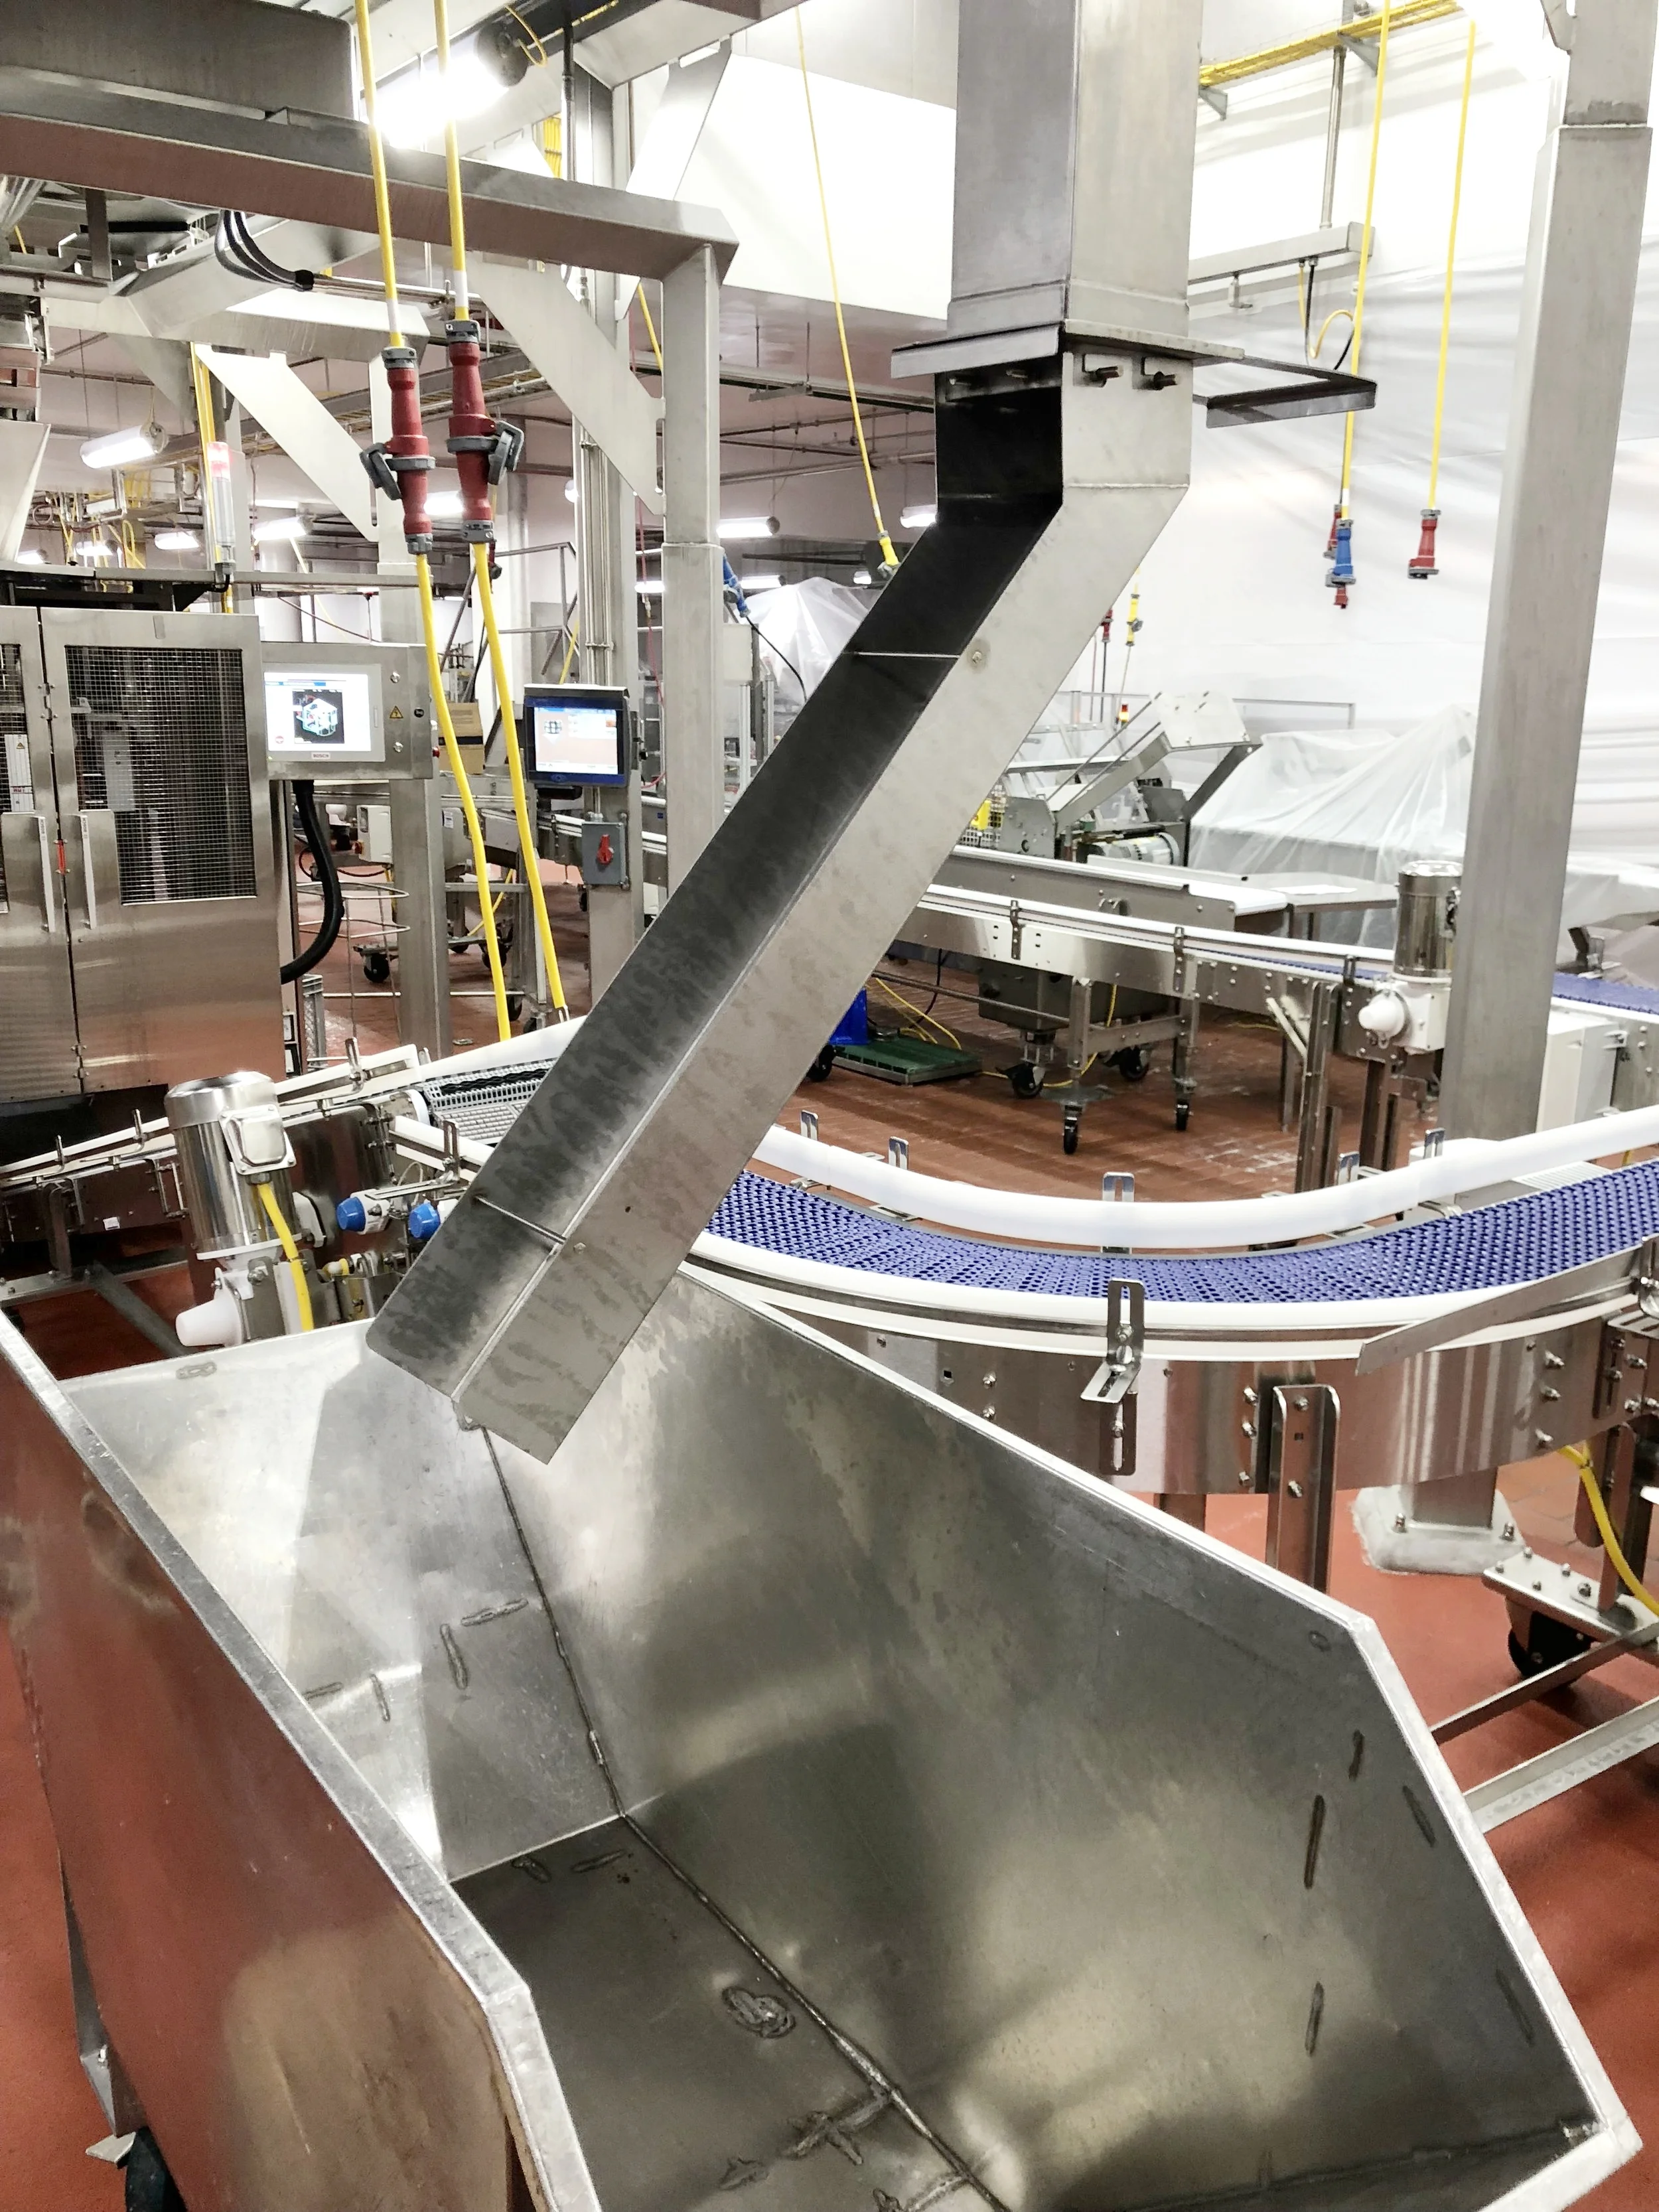
The angled section of the vertical chute is the part I designed in this picture. This was needed to collect crumb from an overhead platform during production.
While using certain conveyor configurations, as shown in the photo above, the conveyors would impede with cart placement and wouldn’t allow for proper collection. With the addition of small pins welded to the chute, the angled chute can be removed and rotated without using tools.
January 2017 - June 2017
At Sikorsky, my job revolved around completing engineering changes in order to further the development of the VH-92A Presidential & VIP Helicopter.
I have signed a strict NDA, which is why I cannot include any photos of my work at Sikorsky.
- Developed wiring harnesses in CATIA 3D modeling system for VH-92A program
- Created pictorial and technical installation instructions for wiring harnesses for technicians
- Managed and completed 12 engineering change orders for a variety of installations including parts lists, installation instructions, and life cycle management
- Implemented design changes on aircraft on-site
- Trained employees on CATIA 3D modeling system, LCA life cycle management, and MatrixOne part organization software
- Presented engineering changes weekly to group settings for approval
New Product Development Engineer
January 2016 - June 2016
My main role at Harvard Apparatus was making changes and building custom products based on customer requests. This included designing, modeling, prototyping, ordering from suppliers, testing, redesigning if necessary, manufacturing, and shipping to customers.
My role also included first article inspections and testing, resolving issues with RMA parts, and recording and evaluating data for validation reports.
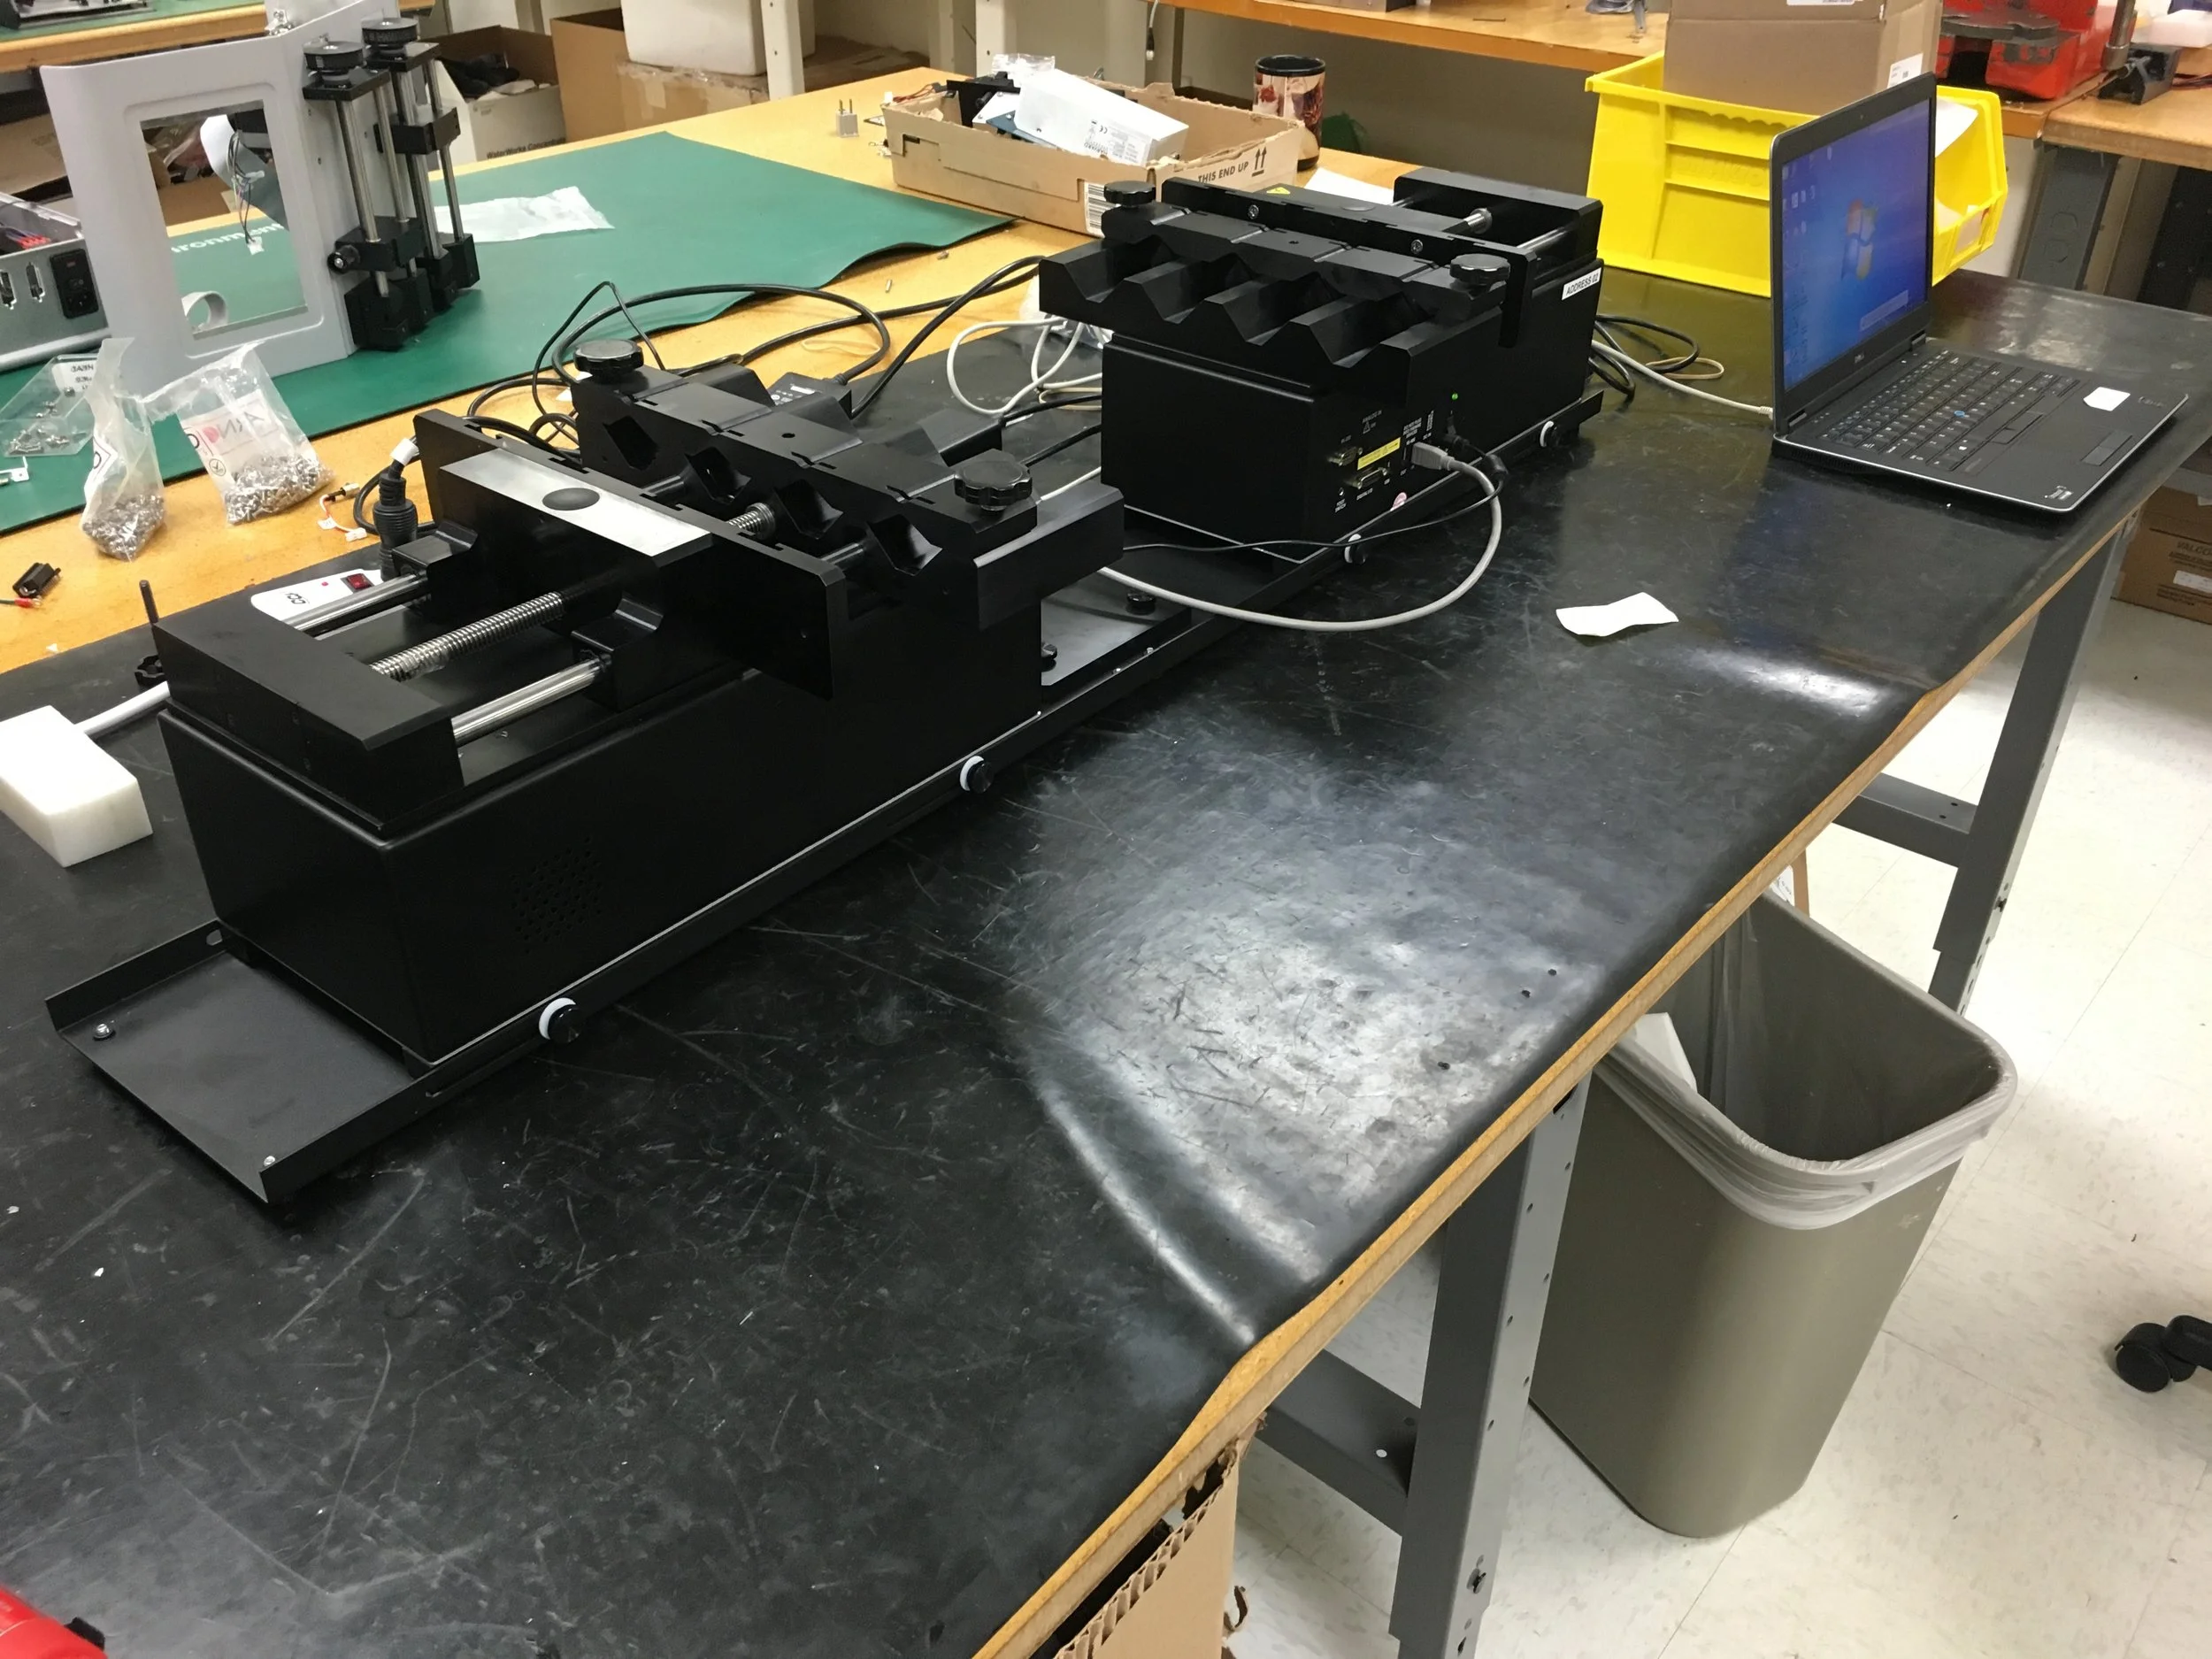
For this product, a customer required two high-force XF pumps to be mounted on a system where two syringe pumps needed to be rigidly affixed to something in order to remove the load from the syringes connected across the gap between the pumps.
This project was completely under my command and I had the responsibility of creating a product that would fulfill the need for the customer.
The new baseplate that I designed had to be lightweight enough to be shipped and handled easily while still being able to support the weight of the pump and the force of the pushing. this was achieved using steel with 90 degree bends at the corner with steel thick enough to withstand said forces.
This joining plate was designed so that the rail system that the pumps were on could be disconnected and shipped easily. This joining plate would also be going under significant load, since the pumps are capable of exerting 1000 pounds of force in either direction. This plate needed to be sturdy, rigid, and easy to assemble.
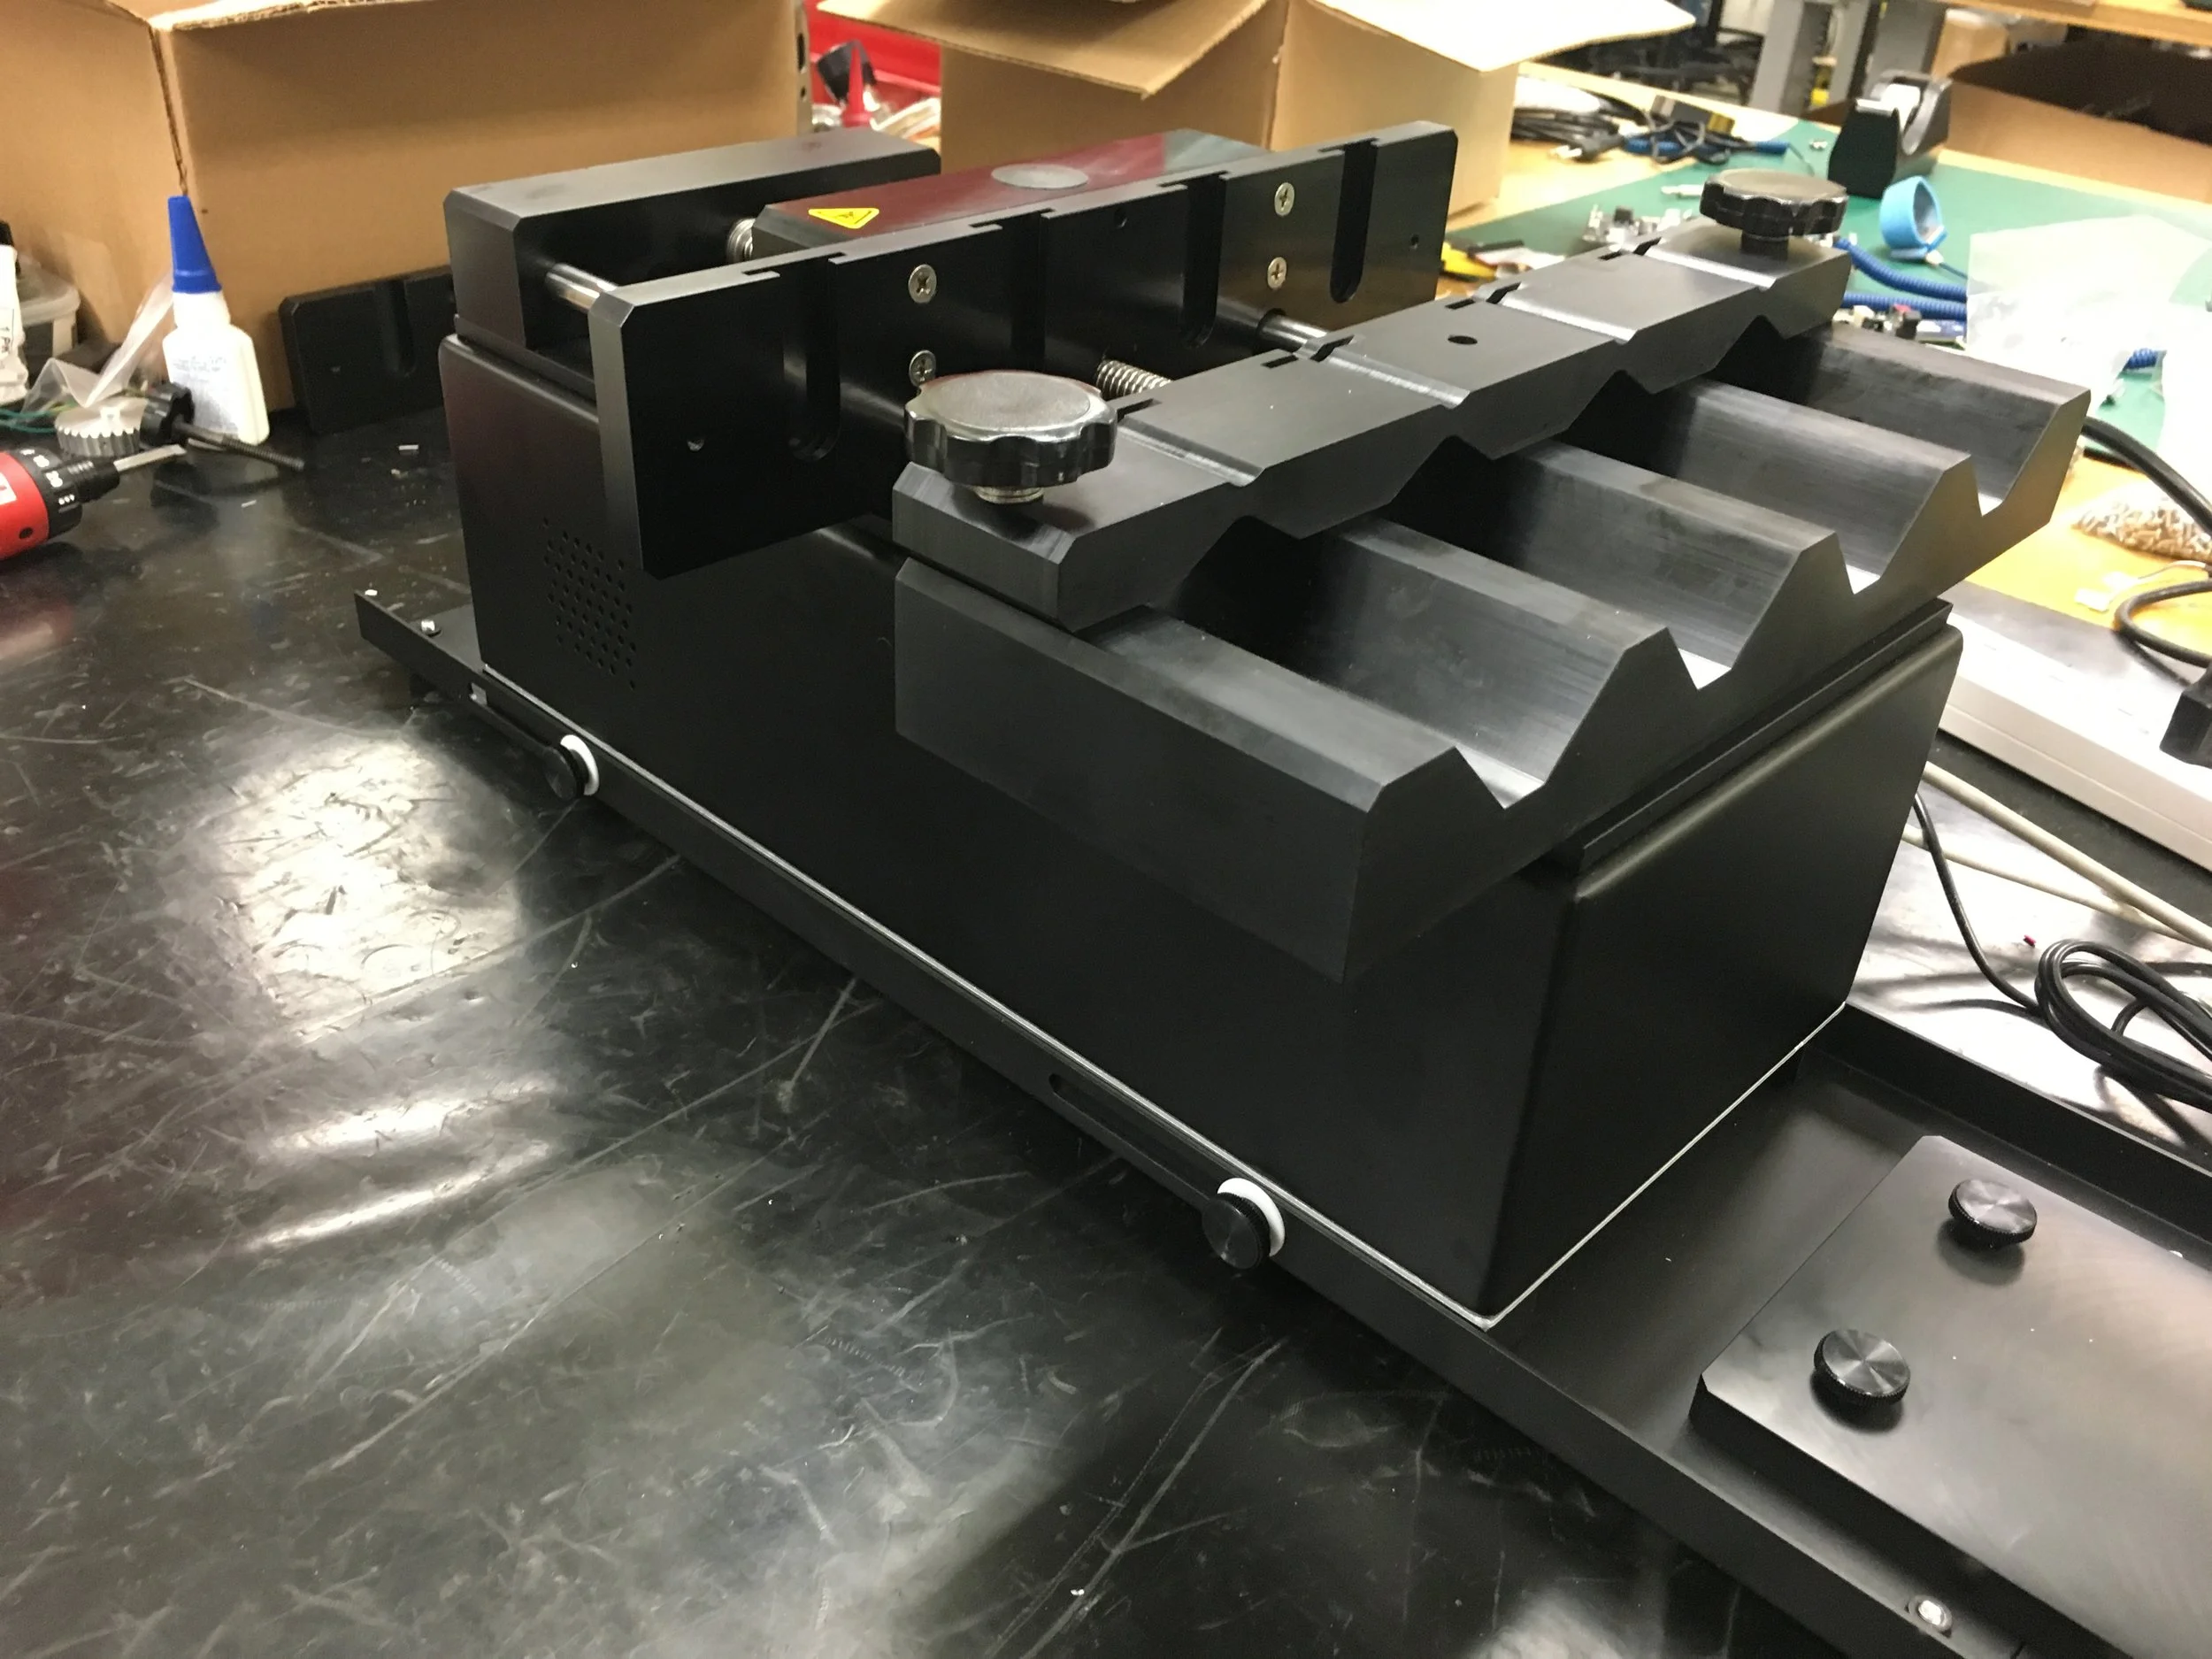
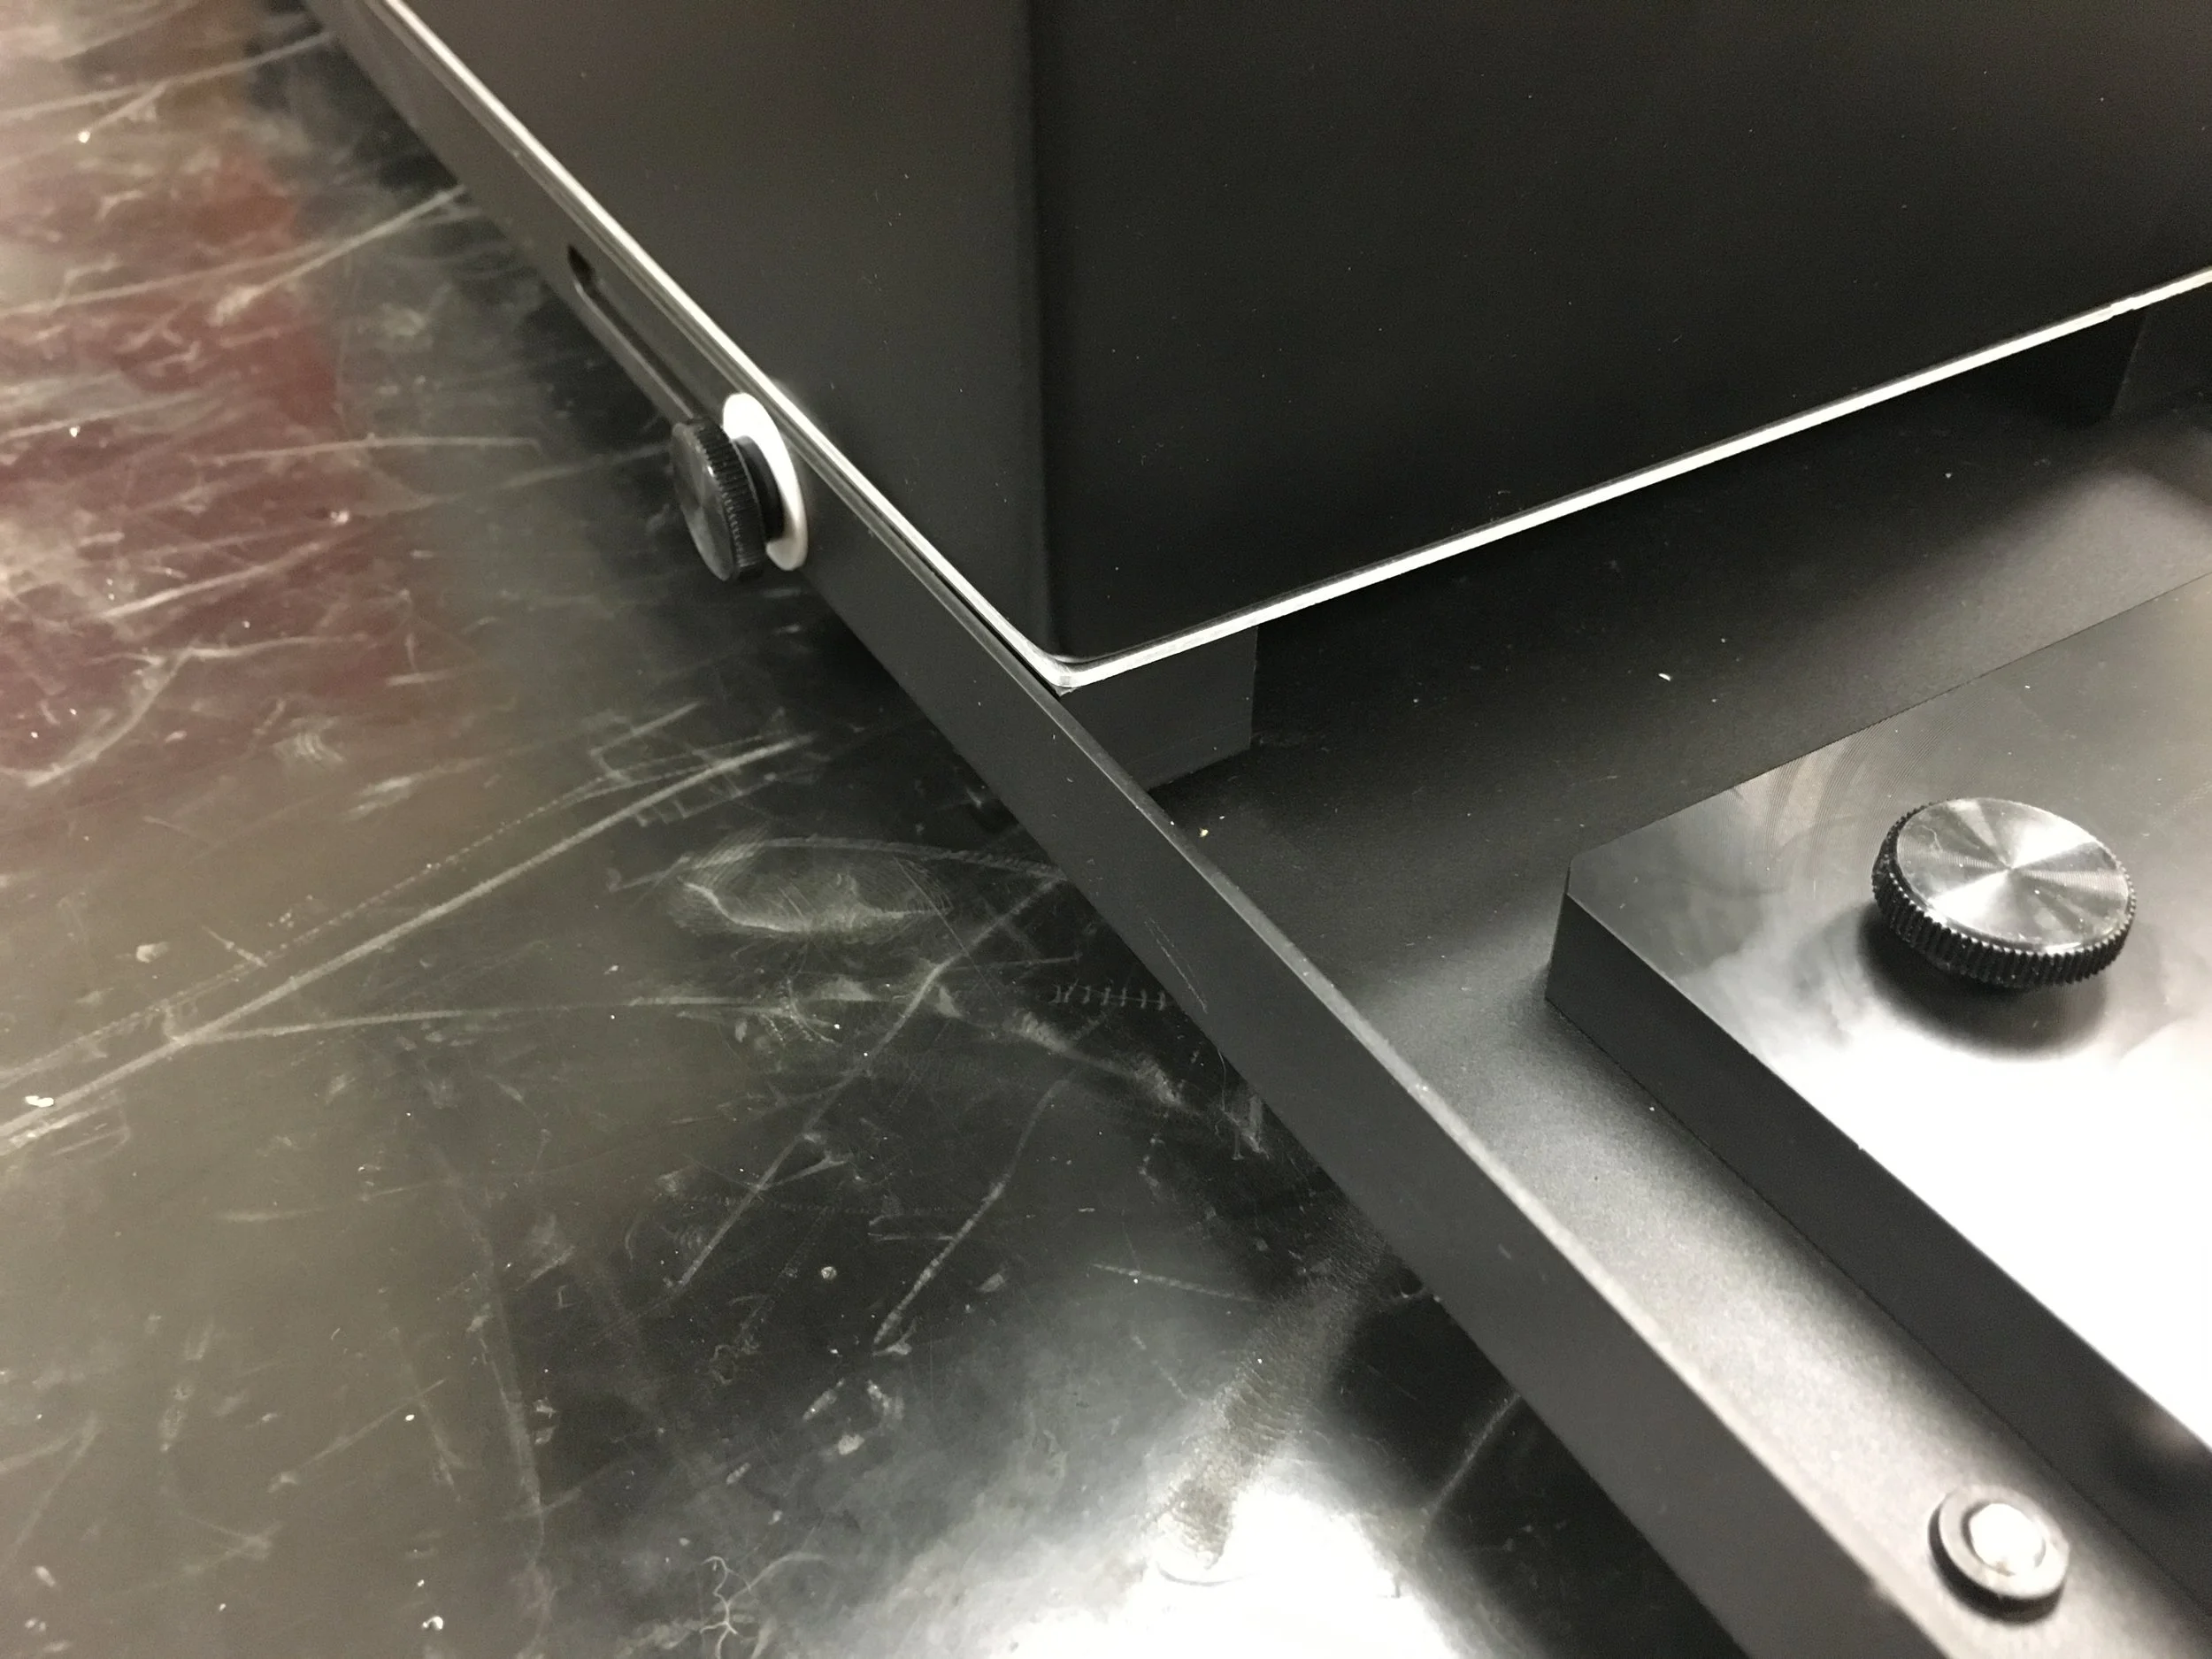
I designed custom guide rails to replace the rubber feet that were standard on this pump. These external rails matched the slots along the edge on the trays where thumb screws could be used for assembly.
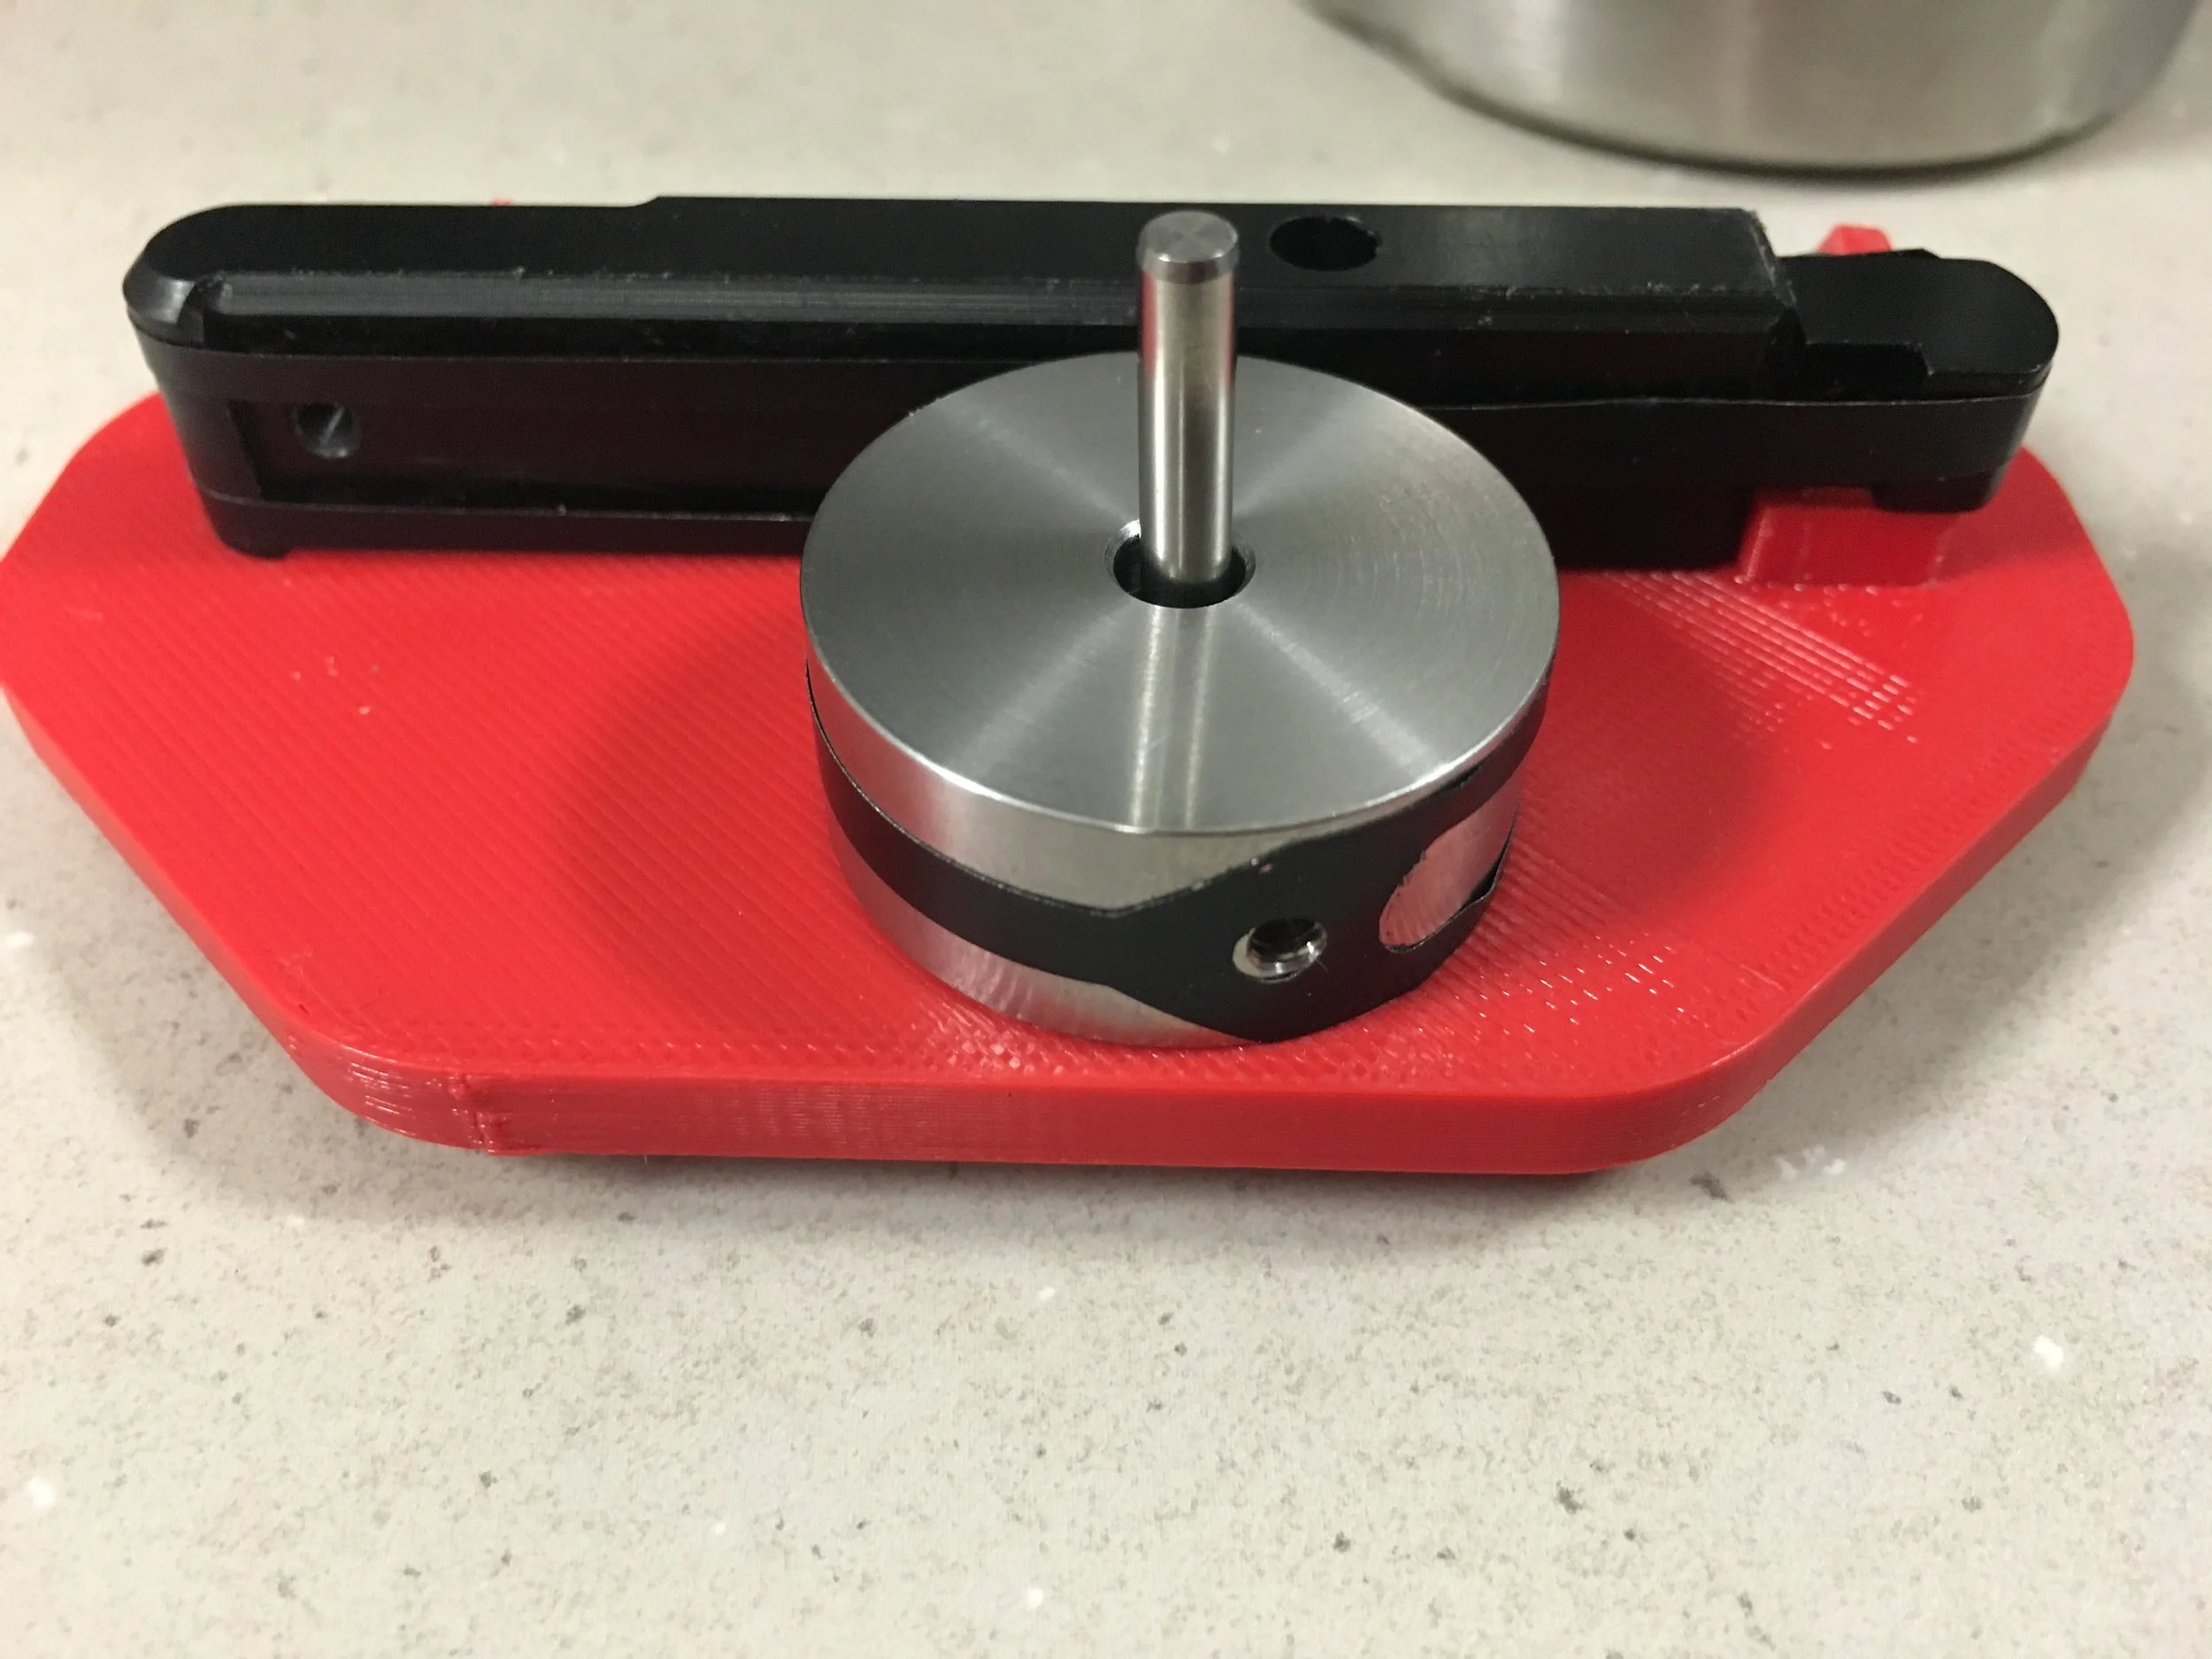
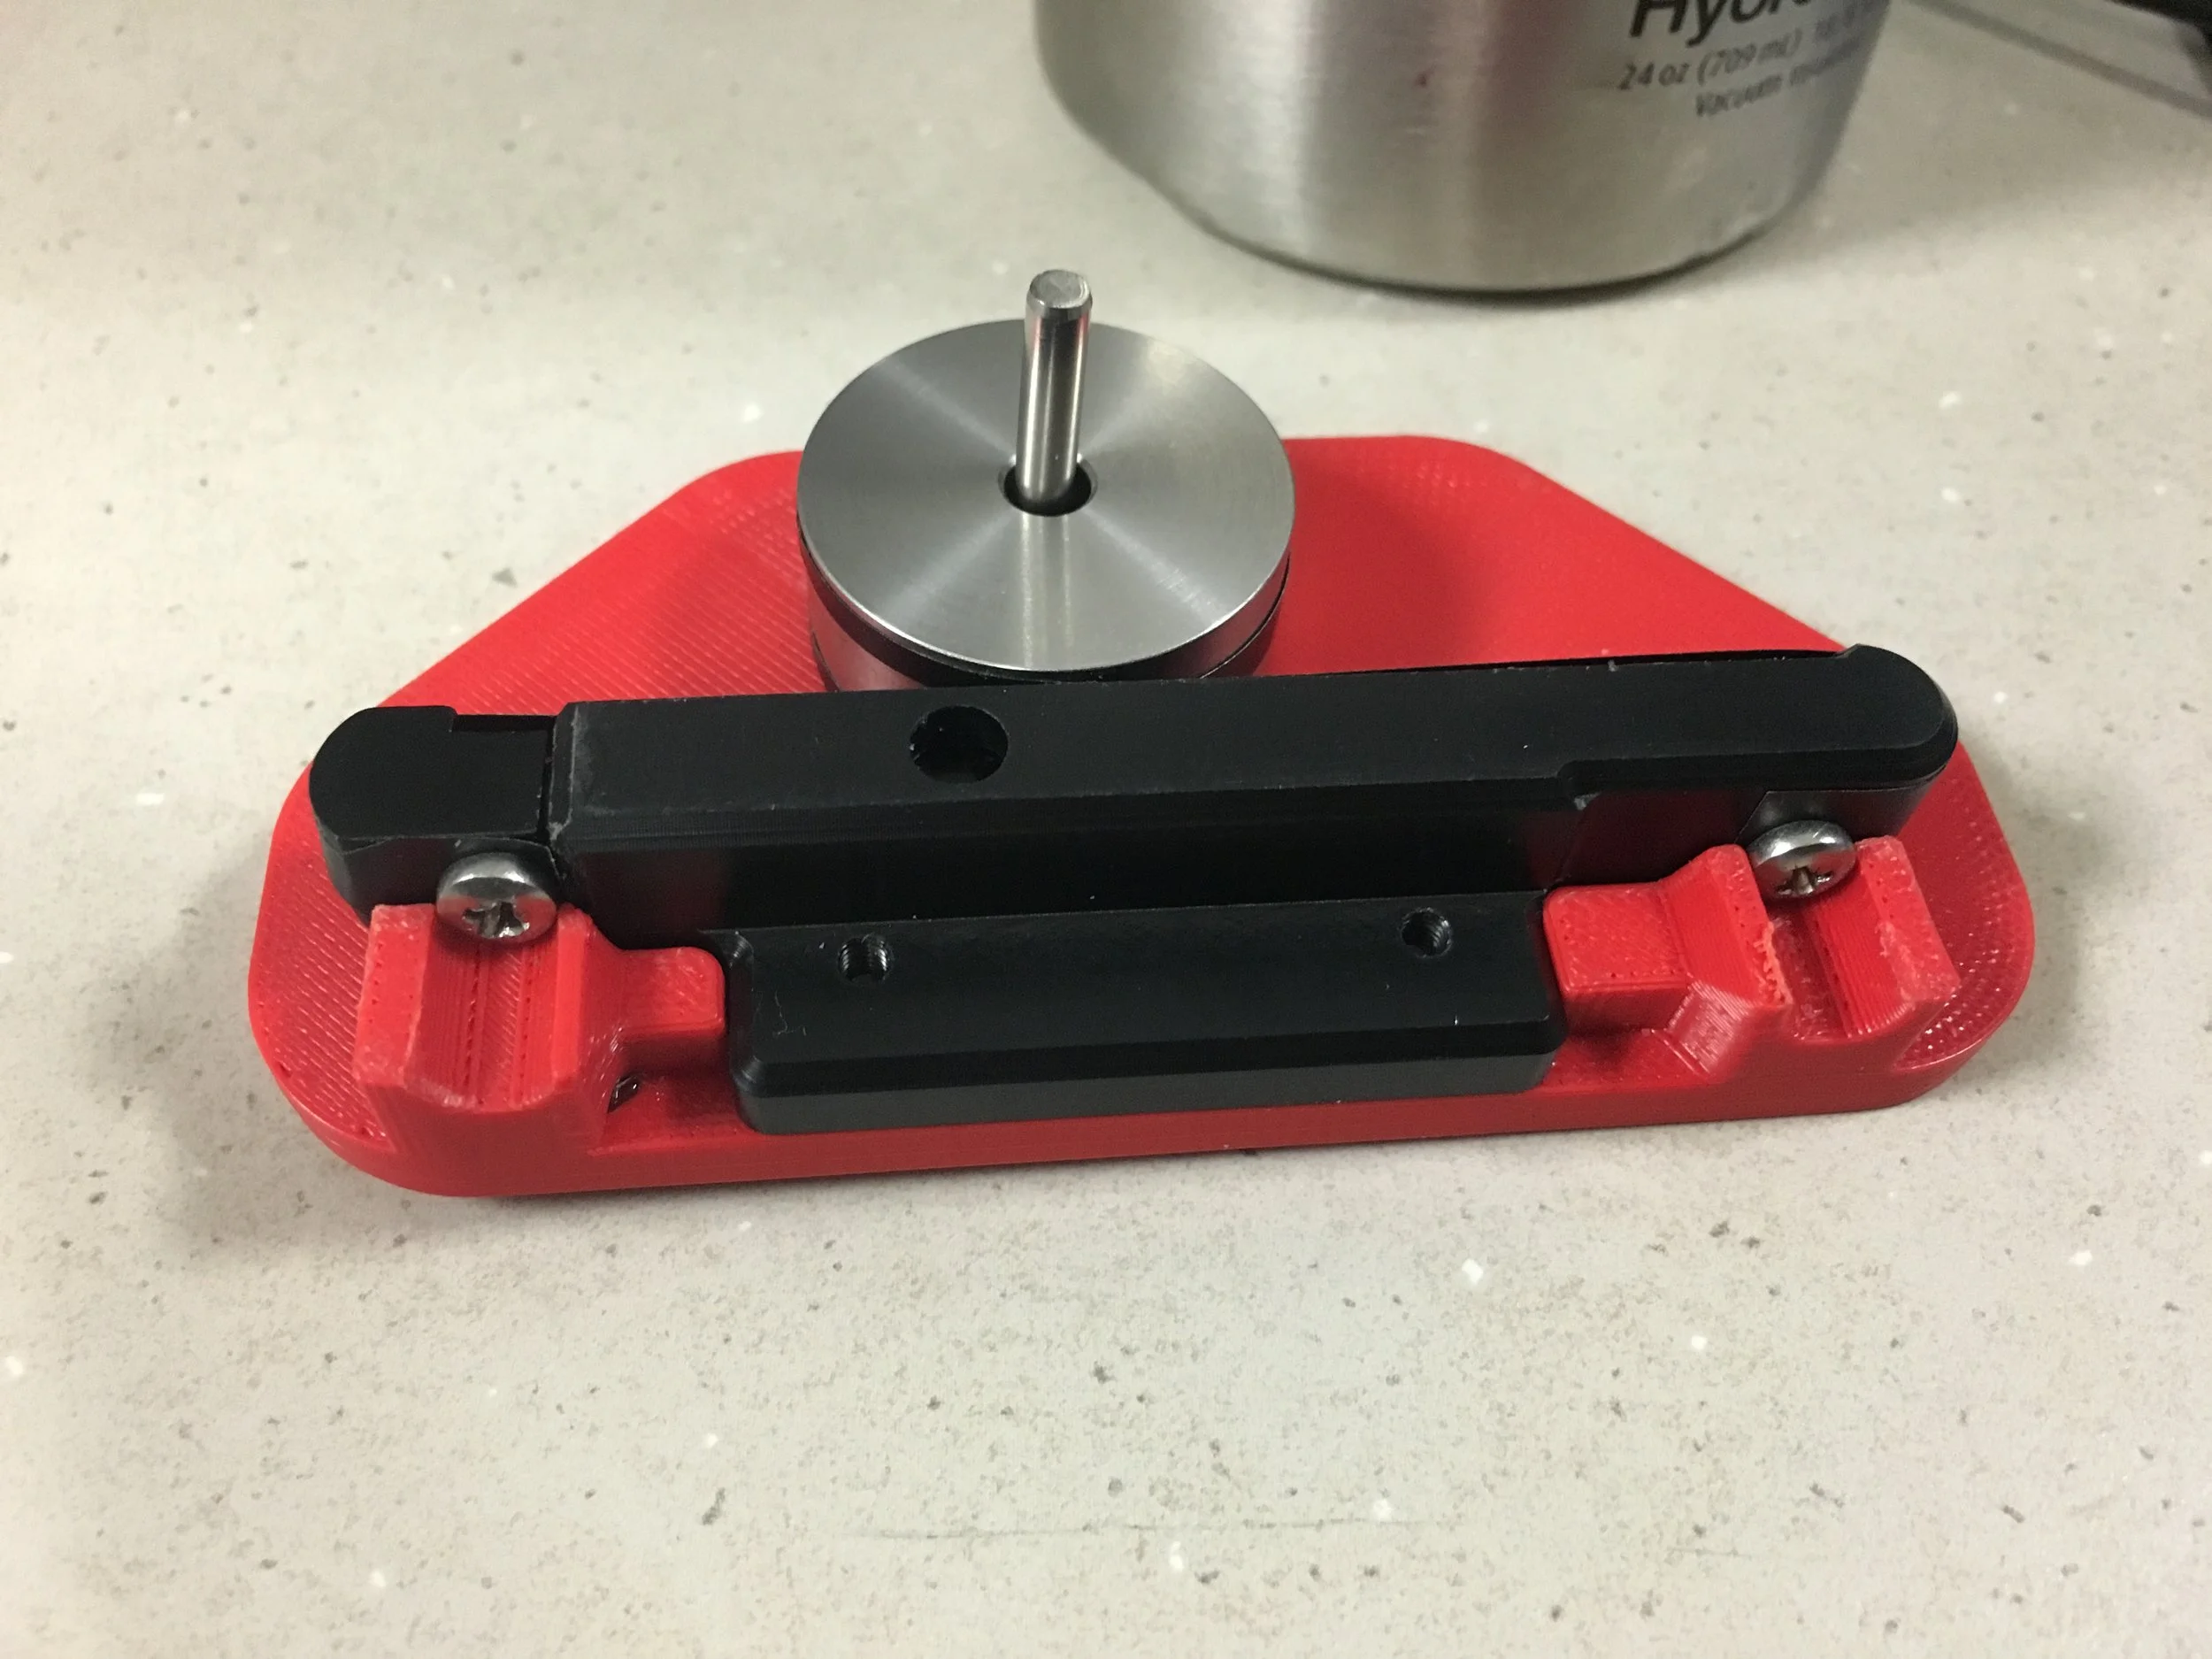
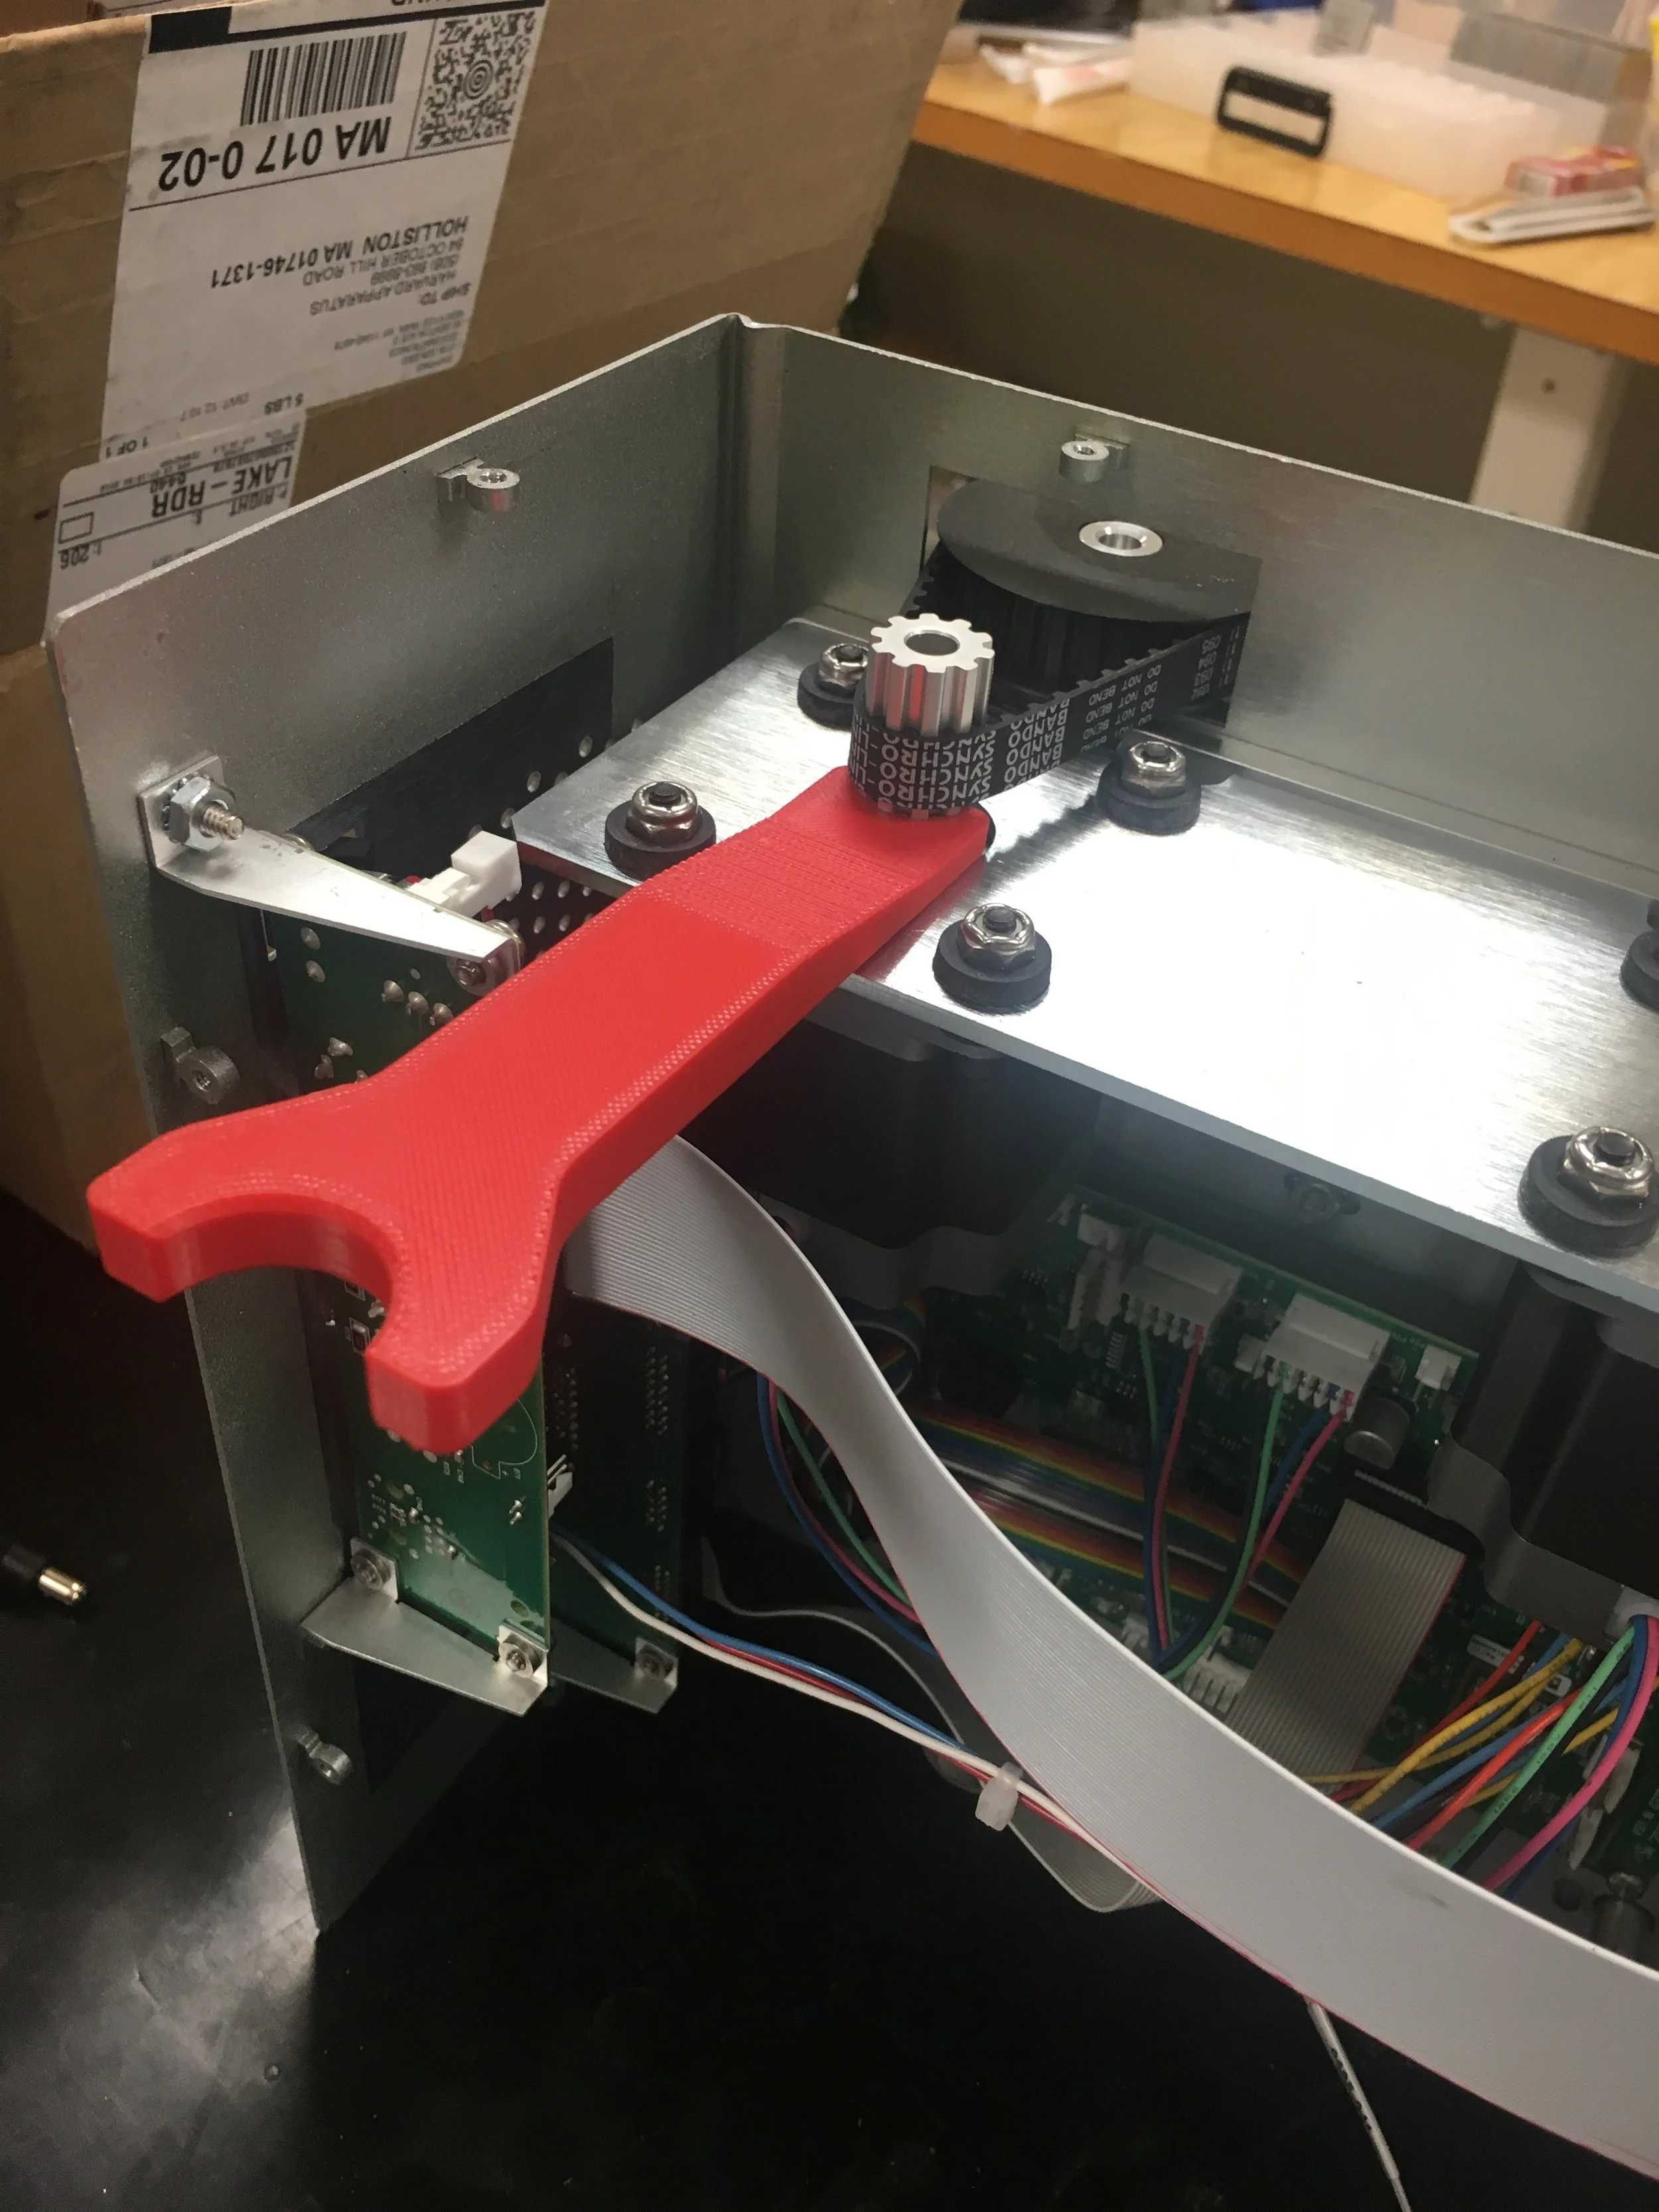
The object in the photograph is a rotational to linear motion convertor. a DC step motor would be inserted into the silver disk, and when that rotated, the bar would pushed back and forth.
This project was a two-fold and involved redesigning the band of steel that wraps around the silver disk. The band was too thin of steel and the edges had a tendency to catch on each other, and the bands would break.
The new redesigned spring with correct spacing and thicker spring steel worked much better in testing, but were nearly impossible to install. I designed and printed the red jig with the metal peg in it in order to facilitate installation. The black bar is spring-loaded in order to keep tension, so the jig holds this tension while the installer has a much easier time inserting the spring steel.
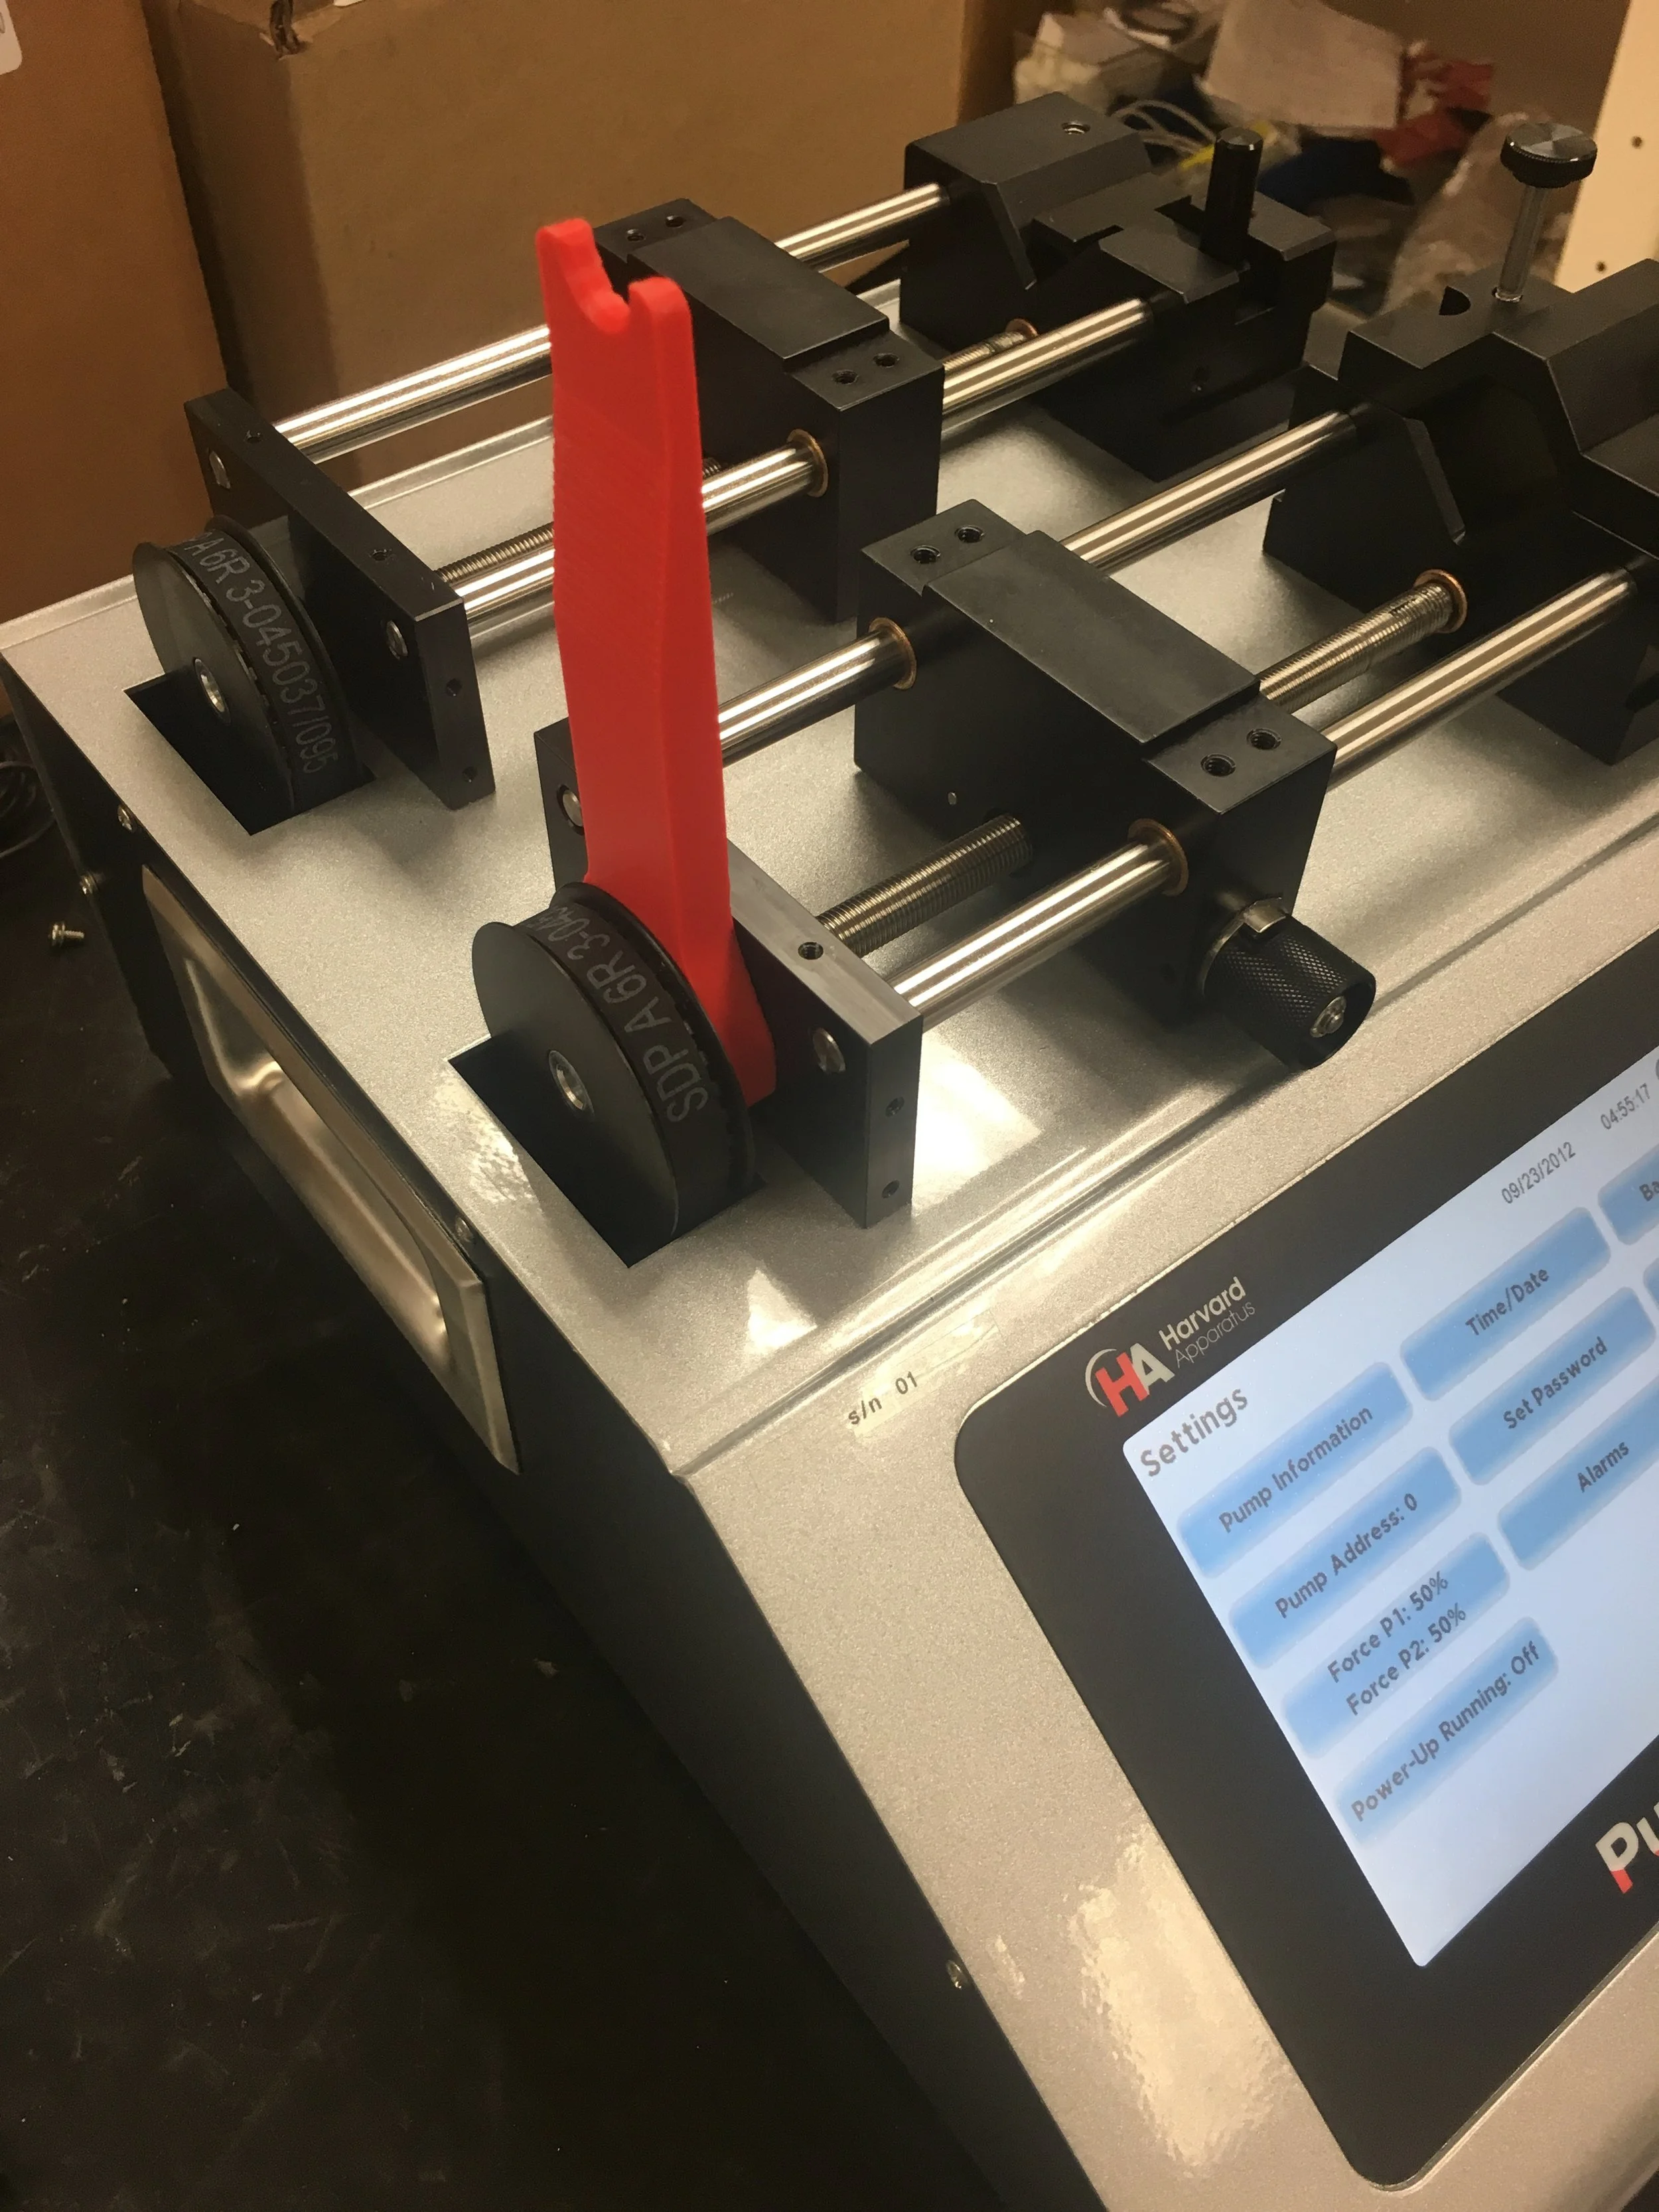
On this syringe pump, technicians were having difficulty spacing the drive gears properly. Belts were over-tensioned or out of alignment. This 3D printed tool made it so that the gears could be installed with ease, instead of using calipers or trying to eyeball it. It was a side project done to help streamline manufacturing.
This linear encoder was difficult to calibrate, so I designed a new bracket that allowed for on-the-fly adjustment for easy installation for an optical linear encoder.
June - August 2014
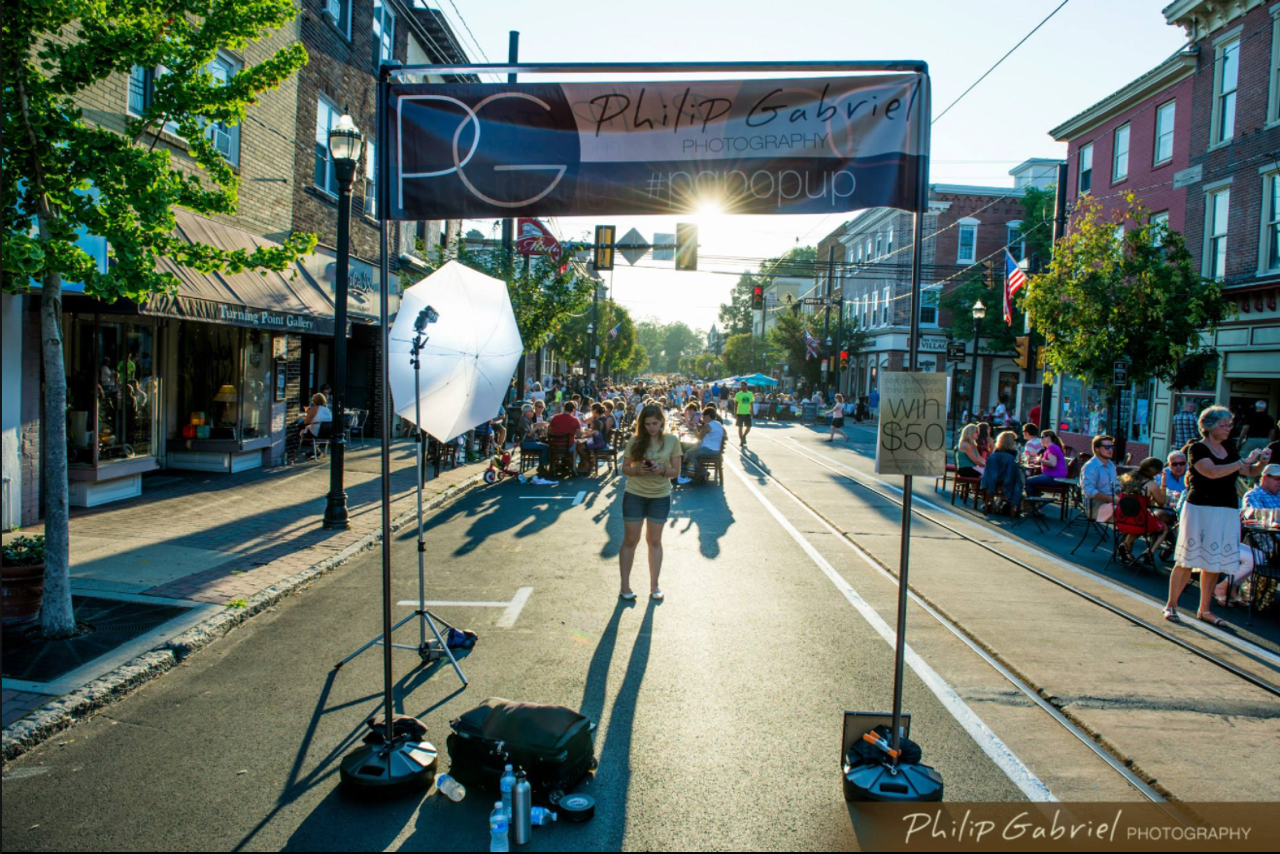
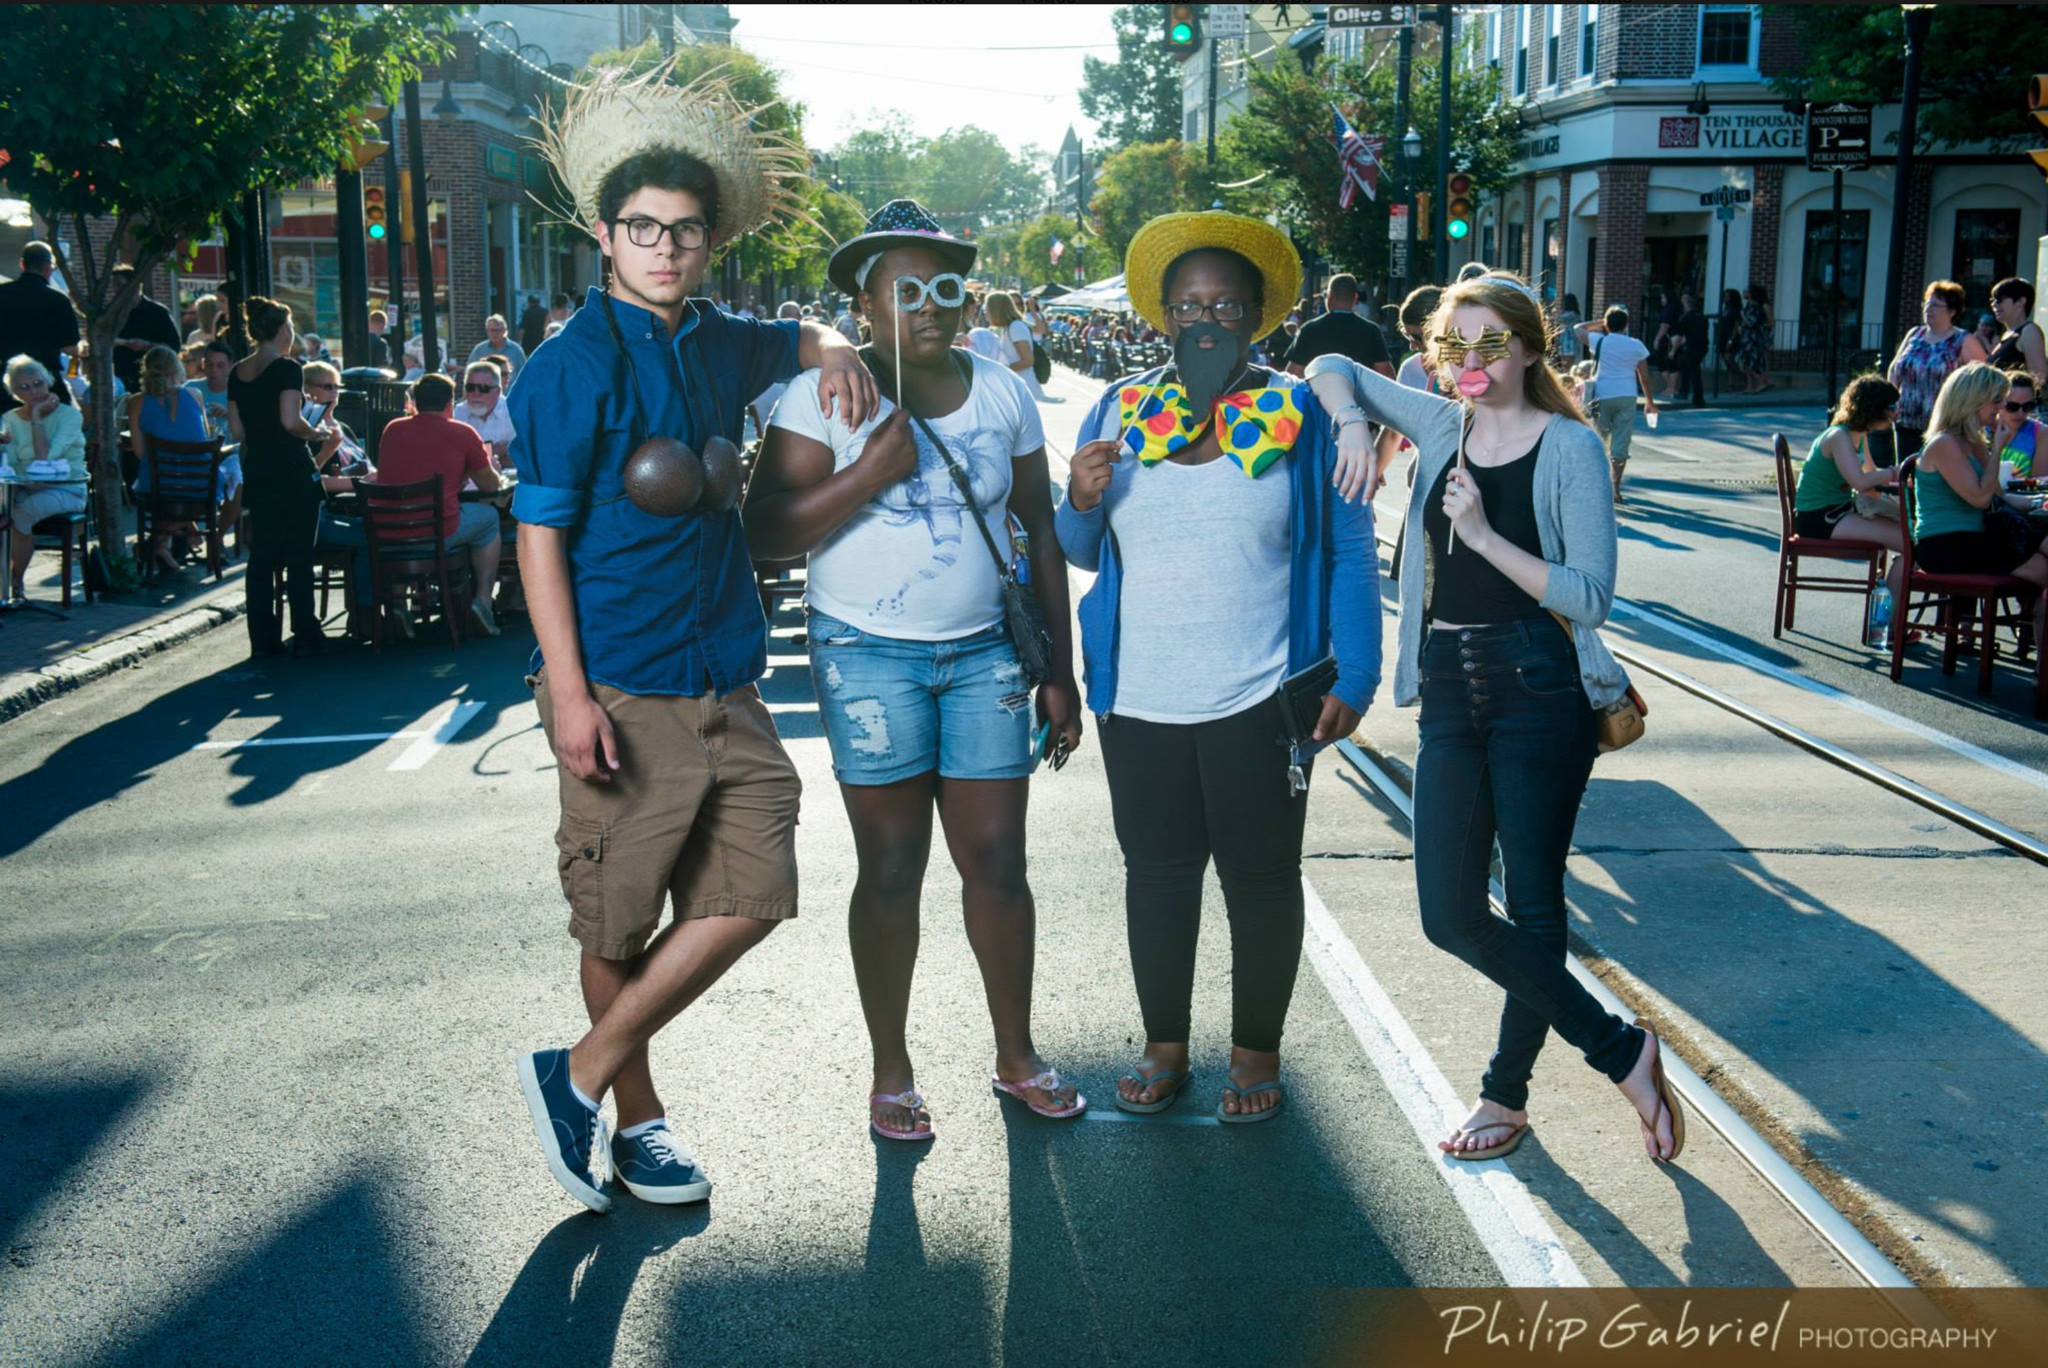
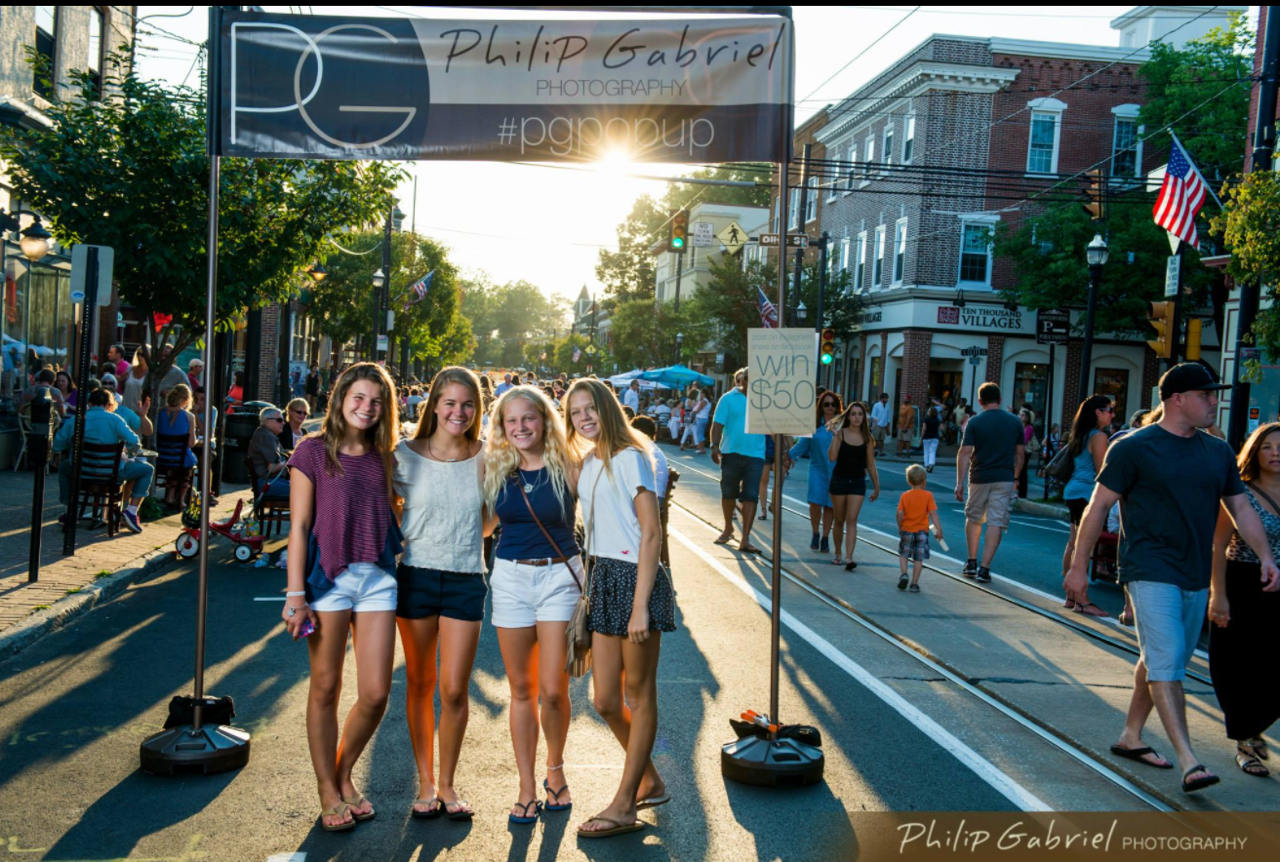
At Philip Gabriel Photography, I was an assistant who worked on miscellaneous projects. My biggest accomplishment during my time there was this PGPopup photobooth, which is a portable photobooth that offers real-time previews of the pictures via an iPad. I designed and built the banner and banner stand, along with designing a wireless system for a professional digital camera that relayed images taken to a mobile iPad.
This tent was used purely for brand marketing, and was mostly used during an event that my town puts on every Wednesday in the summer, Dining Under the Stars. The town shuts down our main street, and the restaurants take tables and place them on the street for everyone to enjoy the weather. We decided to offer free photography for anyone who wanted it, with a chance to win a $50 gift card to our studio depending on how many likes they got on Facebook.